

Available in🇮🇳 India
Set up recurring payments using Touch’n Go wallet. Customers authorise their wallet once and subsequent payments are processed automatically without additional authentication.
Integration Flow
The recurring payments integration involves three main steps:- Register Wallet Mandate: Customer authorises their wallet for future charges.
- Fetch Token Details: Retrieve and verify the mandate registration.
- Charge Customers: Create subsequent payments as needed.
1. Register Wallet Mandate
Mandate registration creates an authorisation transaction where customers provide consent to charge their Touch’n Go wallet for future payments. This generates a secure token that represents the customer’s payment authorisation.- Using Razorpay Standard Checkout
- Using a Registration Link
Step 1: Create a CustomerCreate a customer record in Razorpay to associate the mandate with. This returns a
customer_id to be used in subsequent steps.Step 2: Create an OrderCreate an order for the authorisation amount. You can set this to RM 1 for minimal authorisation or the actual first payment amount. Pass the token parameters including max_amount and expire_at to set mandate limits.Step 3: Create Authorisation PaymentInitialise Razorpay Checkout with the order_id, customer_id and recurring-specific parameters. Specify wallet as the payment method. The customer completes the authorisation on Touch’n Go interface. Once the authorisation is successful, you receive a token_id in the payment response. This token represents the customer’s wallet mandate.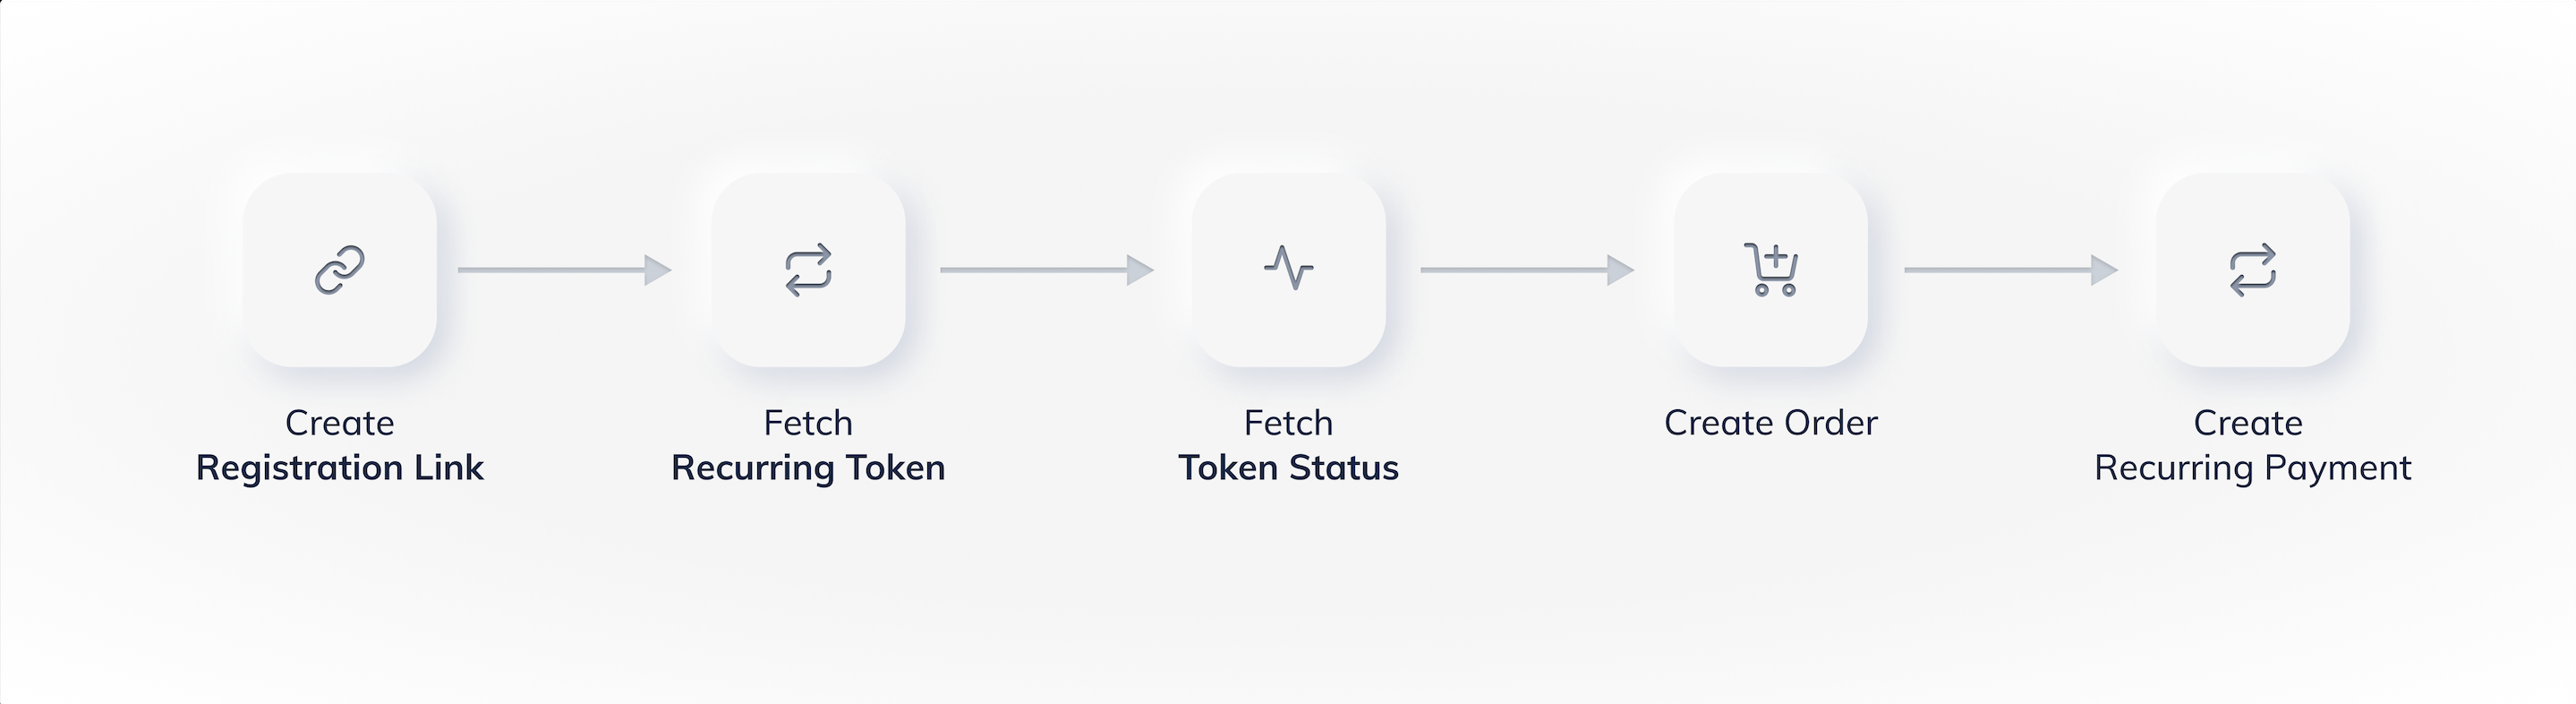
2. Fetch Token Details
After the authorisation transaction is complete, a token is generated. The token securely stores the customer’s wallet authorisation and represents their mandate. You can retrieve token information using:Token Lifecycle
Token Lifecycle
Tokens move through different states from creation to expiry: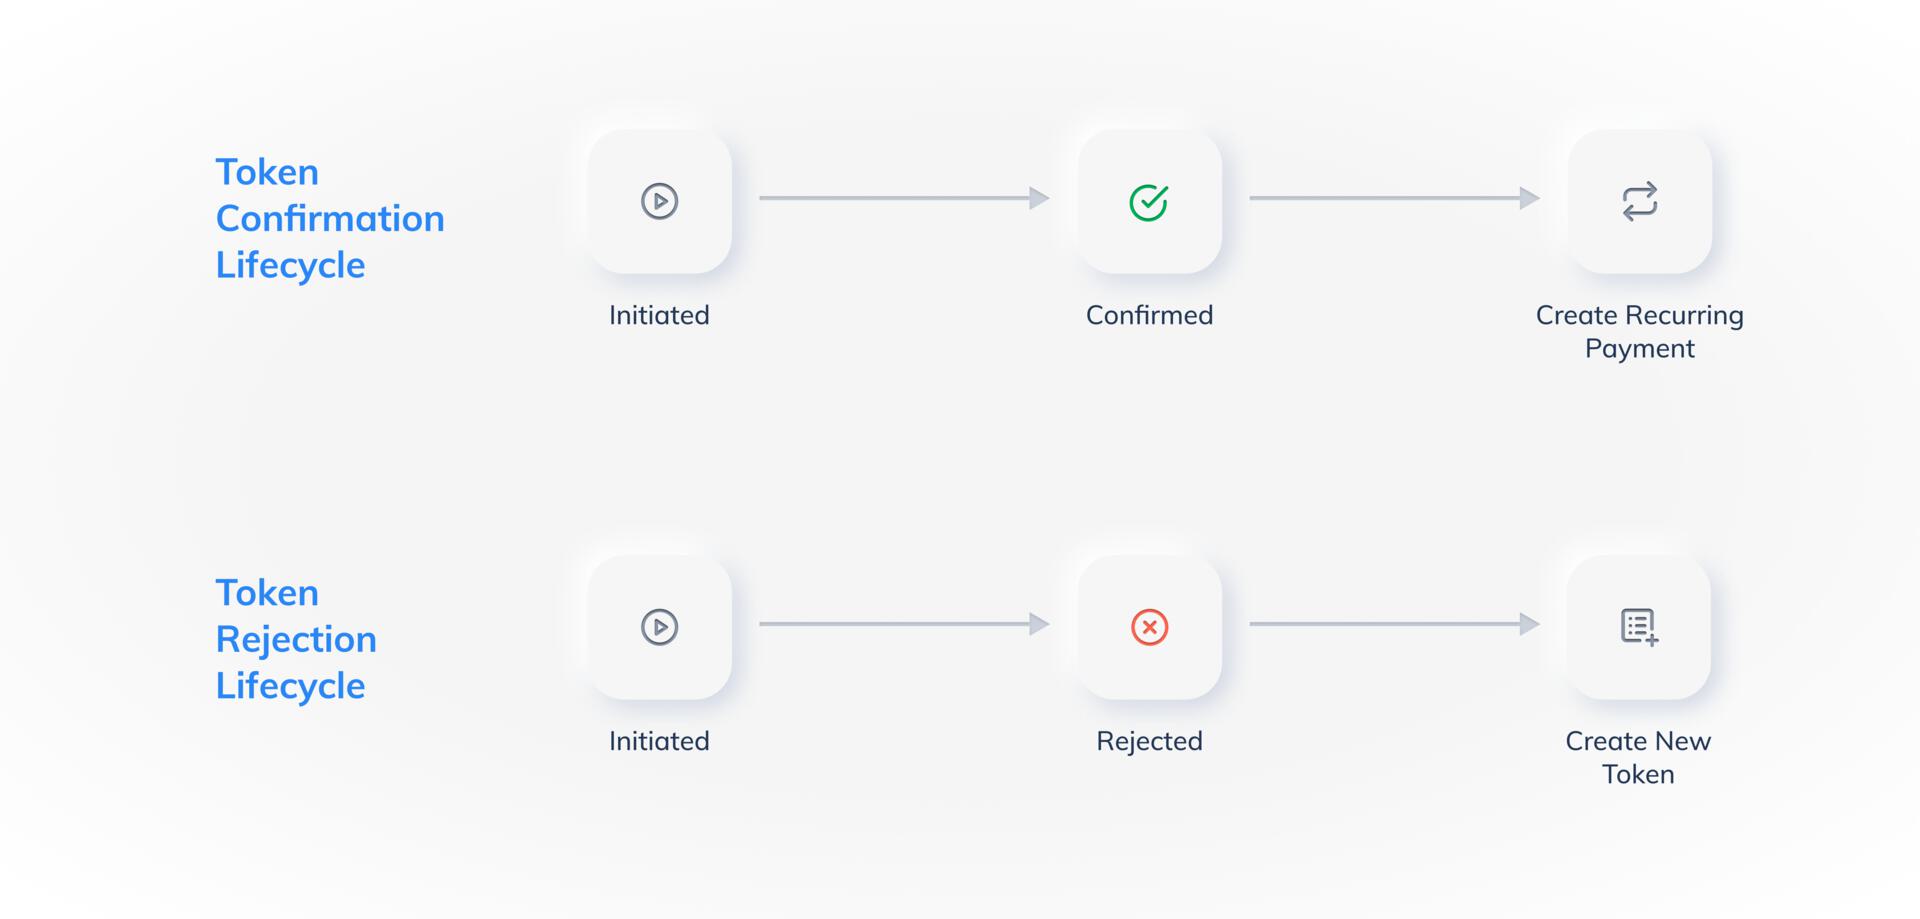
3. Charge Customers
Once the token is in confirmed state, you can create recurring payments without customer intervention. Each subsequent payment requires you to create a new charge request.How to Charge Customers
- Using Dashboard
- Using APIs
Step 1: Find the TokenUse the Dashboard search to locate the customer’s token. Verify the token status is confirmed.Step 2: Create a ChargeClick Charge Token and enter the payment amount. Razorpay automatically creates an order and processes the payment.
Automatic Order CreationWhen charging via Dashboard, Razorpay automatically creates the order for you - no need to create it separately.