

Available in🇮🇳 India
Sync Account Statements
Sync Account Statements
You can integrate your RazorpayX Account Statement with Tally to sync payment information from RazorpayX and reconcile. After integration, all the transaction data on the RazorpayX bank statement flows into your accounting software, saving you time and effort.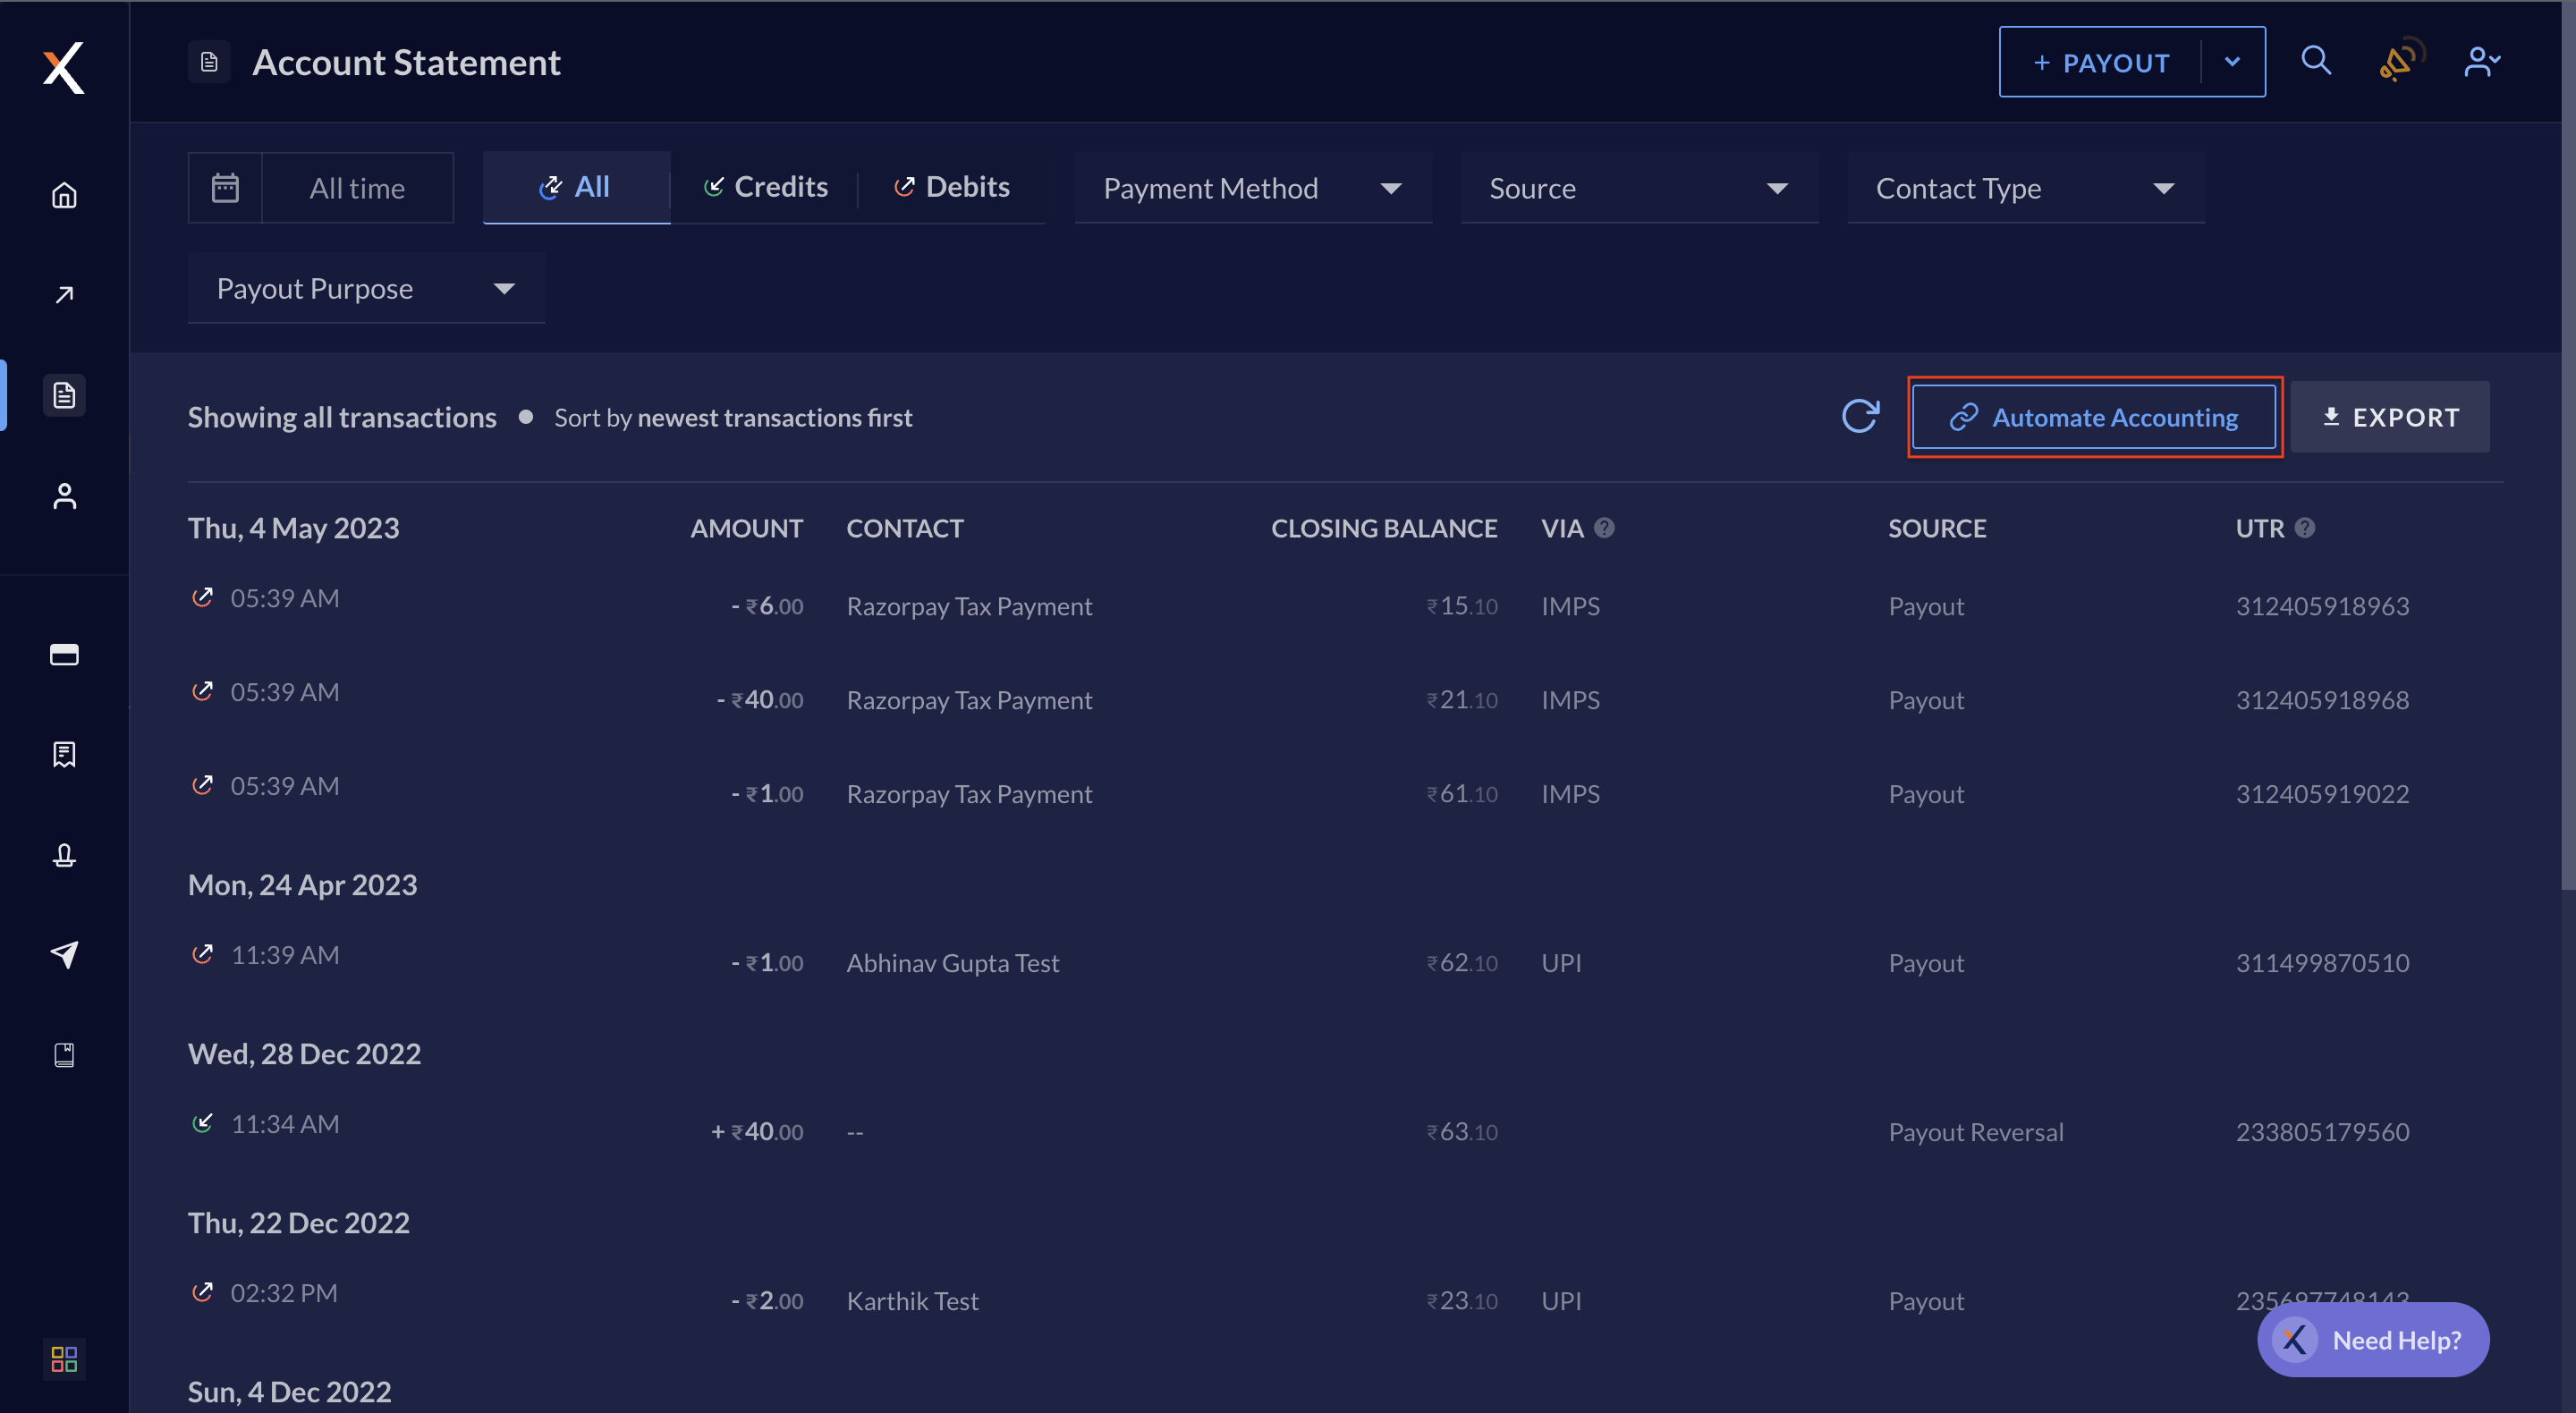
- Account Statement can be synced with both RazorpayX Lite and Current Account.
- It updates automatically at the given time, every day.
- It passes all the required context you need to categorise your transaction.
Navigate to Account Statement → Automate Accounting on the Dashboard and Select the software of your choice.
Prerequisites
See RazorpayX-Tally Integration.Sync RazorpayX Account Statement with Tally
- Open Tally on your system.
- Click F1 → TDLs & Add-ons → Manage Local TDS.

- Go to file name, click Specify Path and paste the file path.
- Select TCP file and type YES under Load TDL to enable it. Press enter.
- Go back to the Gateway of Tally home screen. On your right, you will see 2 more options, RazorpayX Settings and RazorpayX Sync.
- Click RazorpayX Settings and Enable RazorpayX Integration by entering YES. Under authentication settings, enter your MID (log in to Dashboard and click on profile to find yours) and enter your registered email ID.
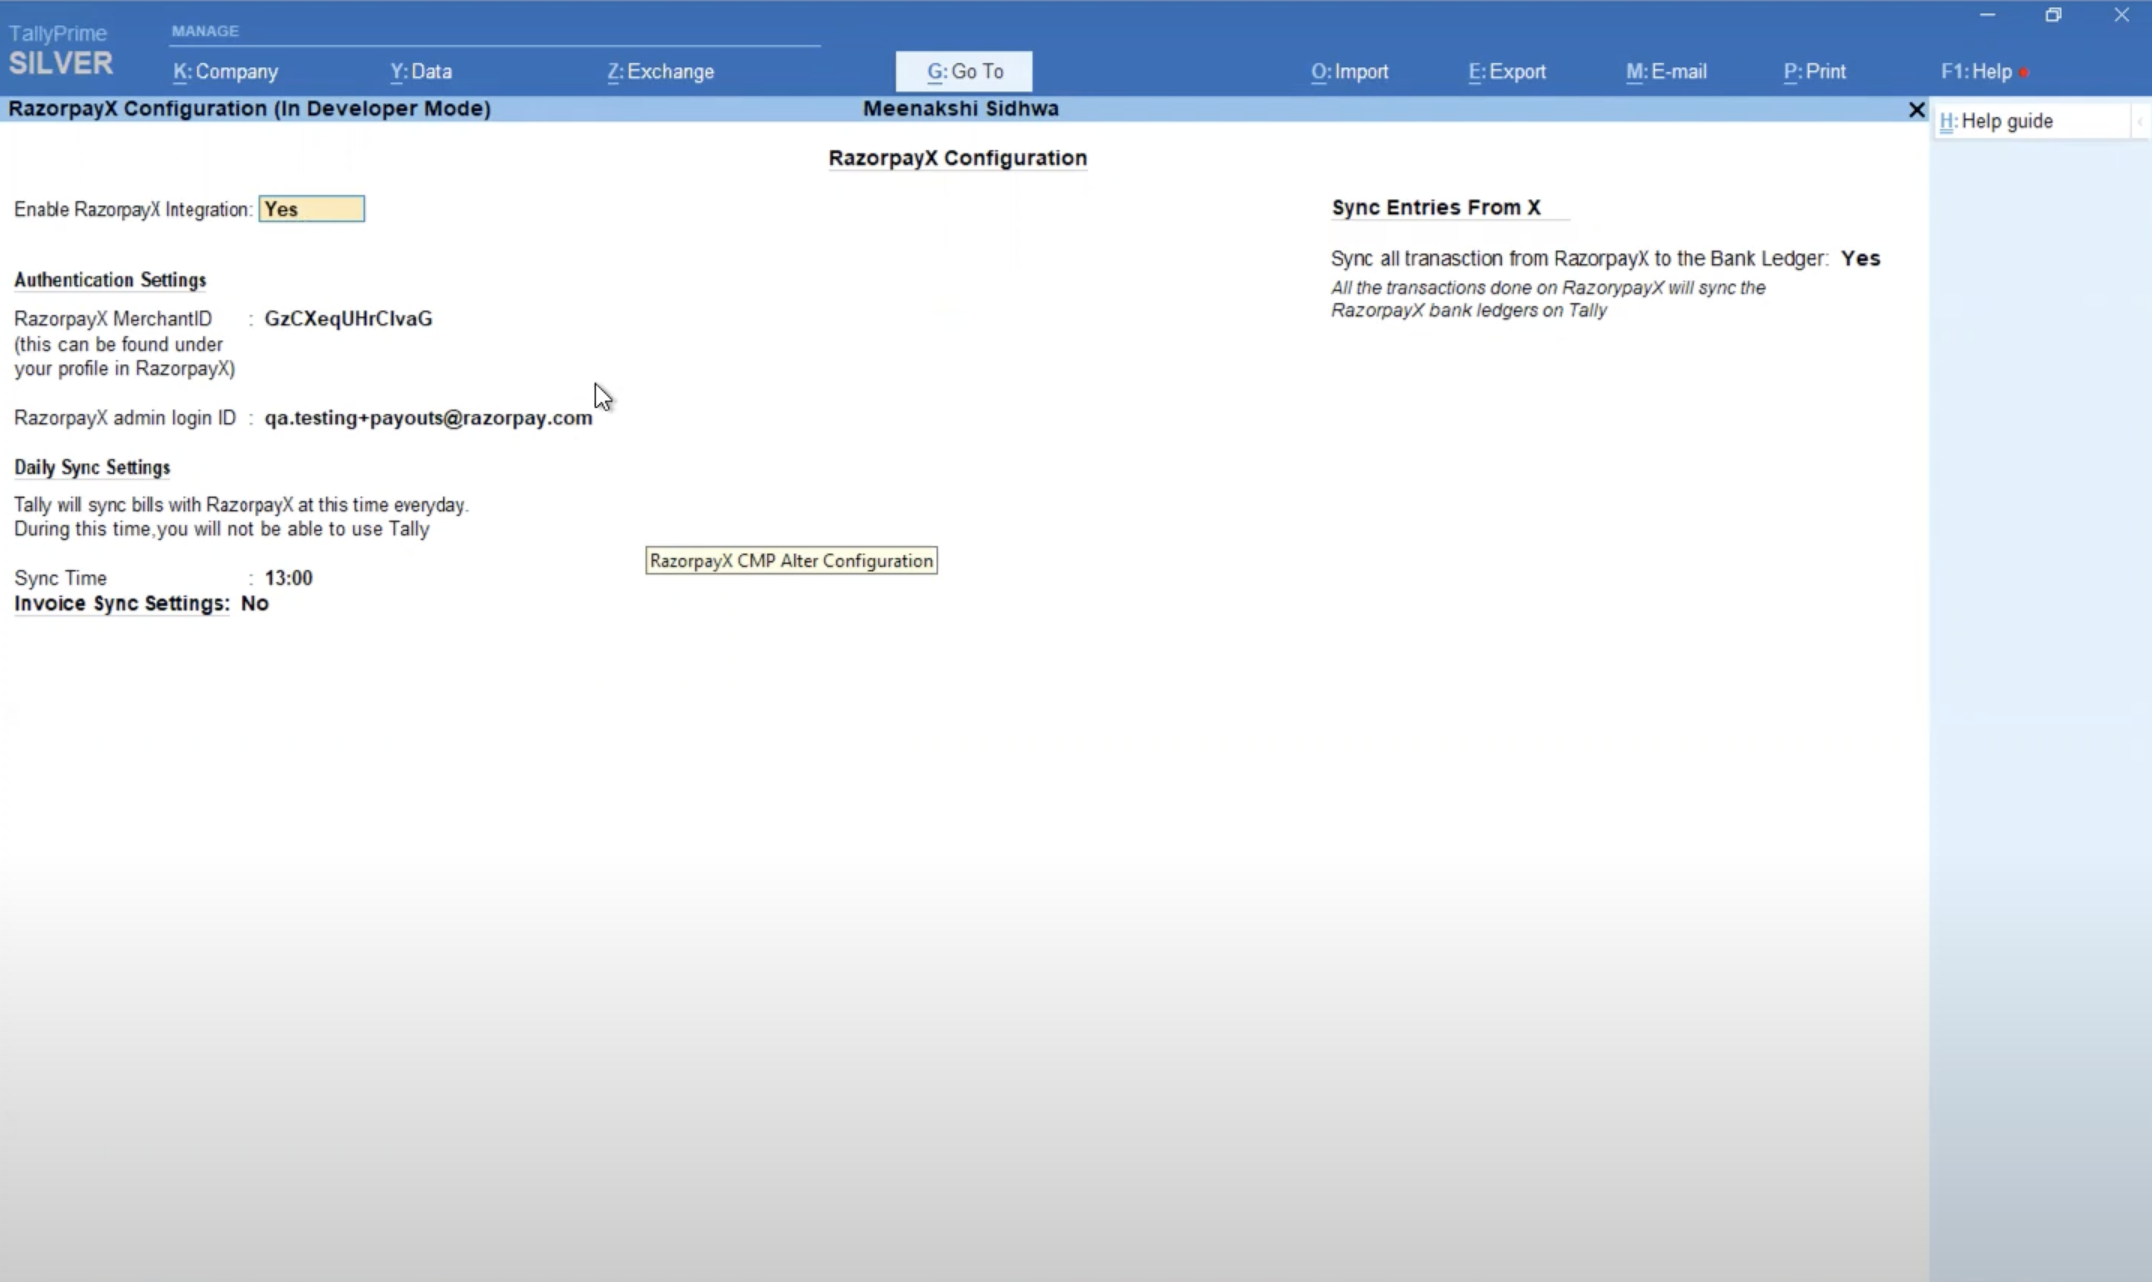
- Enable Sync all transaction from RazorpayX to the Bank Ledger by selecting YES. You can also enable Invoice Sync Settings by selecting YES, if you have an existing vendor payment integration.
- Click Accept settings.
- An OTP is sent to your email. Enter the OTP for verification.
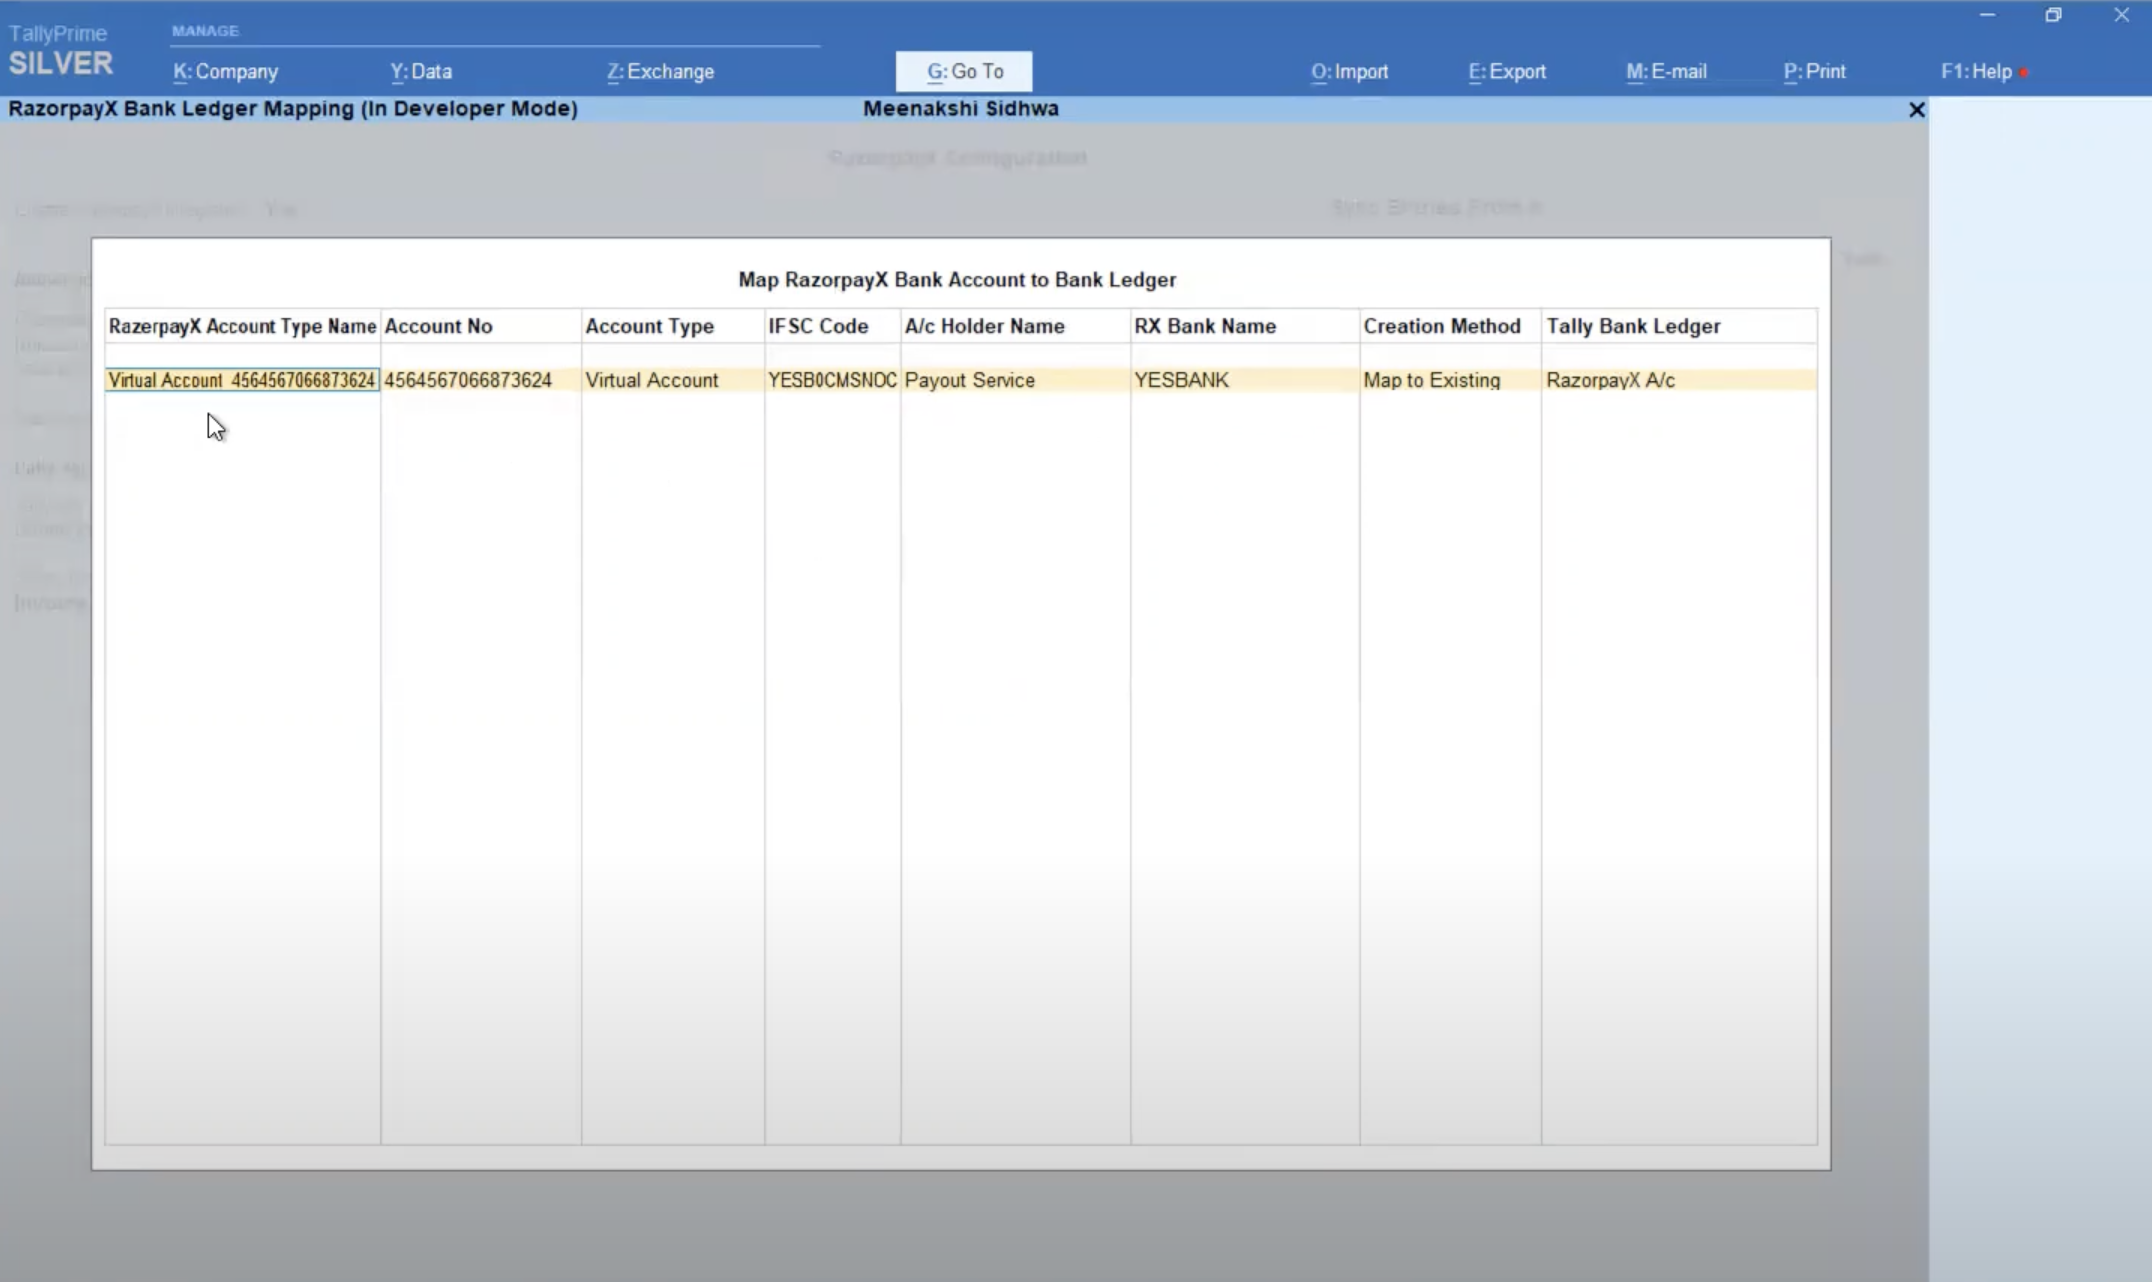
- Upon successful integration, a pop-up saying Map RazorpayX Bank Account to Bank Ledger will appear on the screen which displays details of all the RazorpayX Accounts you have.
-
Under the Creation Method, you can either choose Create New or Map to Existing Ledgers and then under the Tally Bank Ledger, you can either select the existing Tally Bank Ledger or Create New. All your transaction details will flow into whichever ledger you select.
- Press Enter.
Test feature
After completing the above integration steps, try creating a Payout on RazorpayX.- While entering the Payout Details, under Payout Purpose, you will be able to see additional payout purposes specific to a business’ expenses. This lets you add a reason behind a particular transaction.
- Proceed and create a payout by clicking on Pay.
- Now, go to Tally after the next scheduled sync (at 6:00 am or 8:00 pm) and navigate to Gateway of Tally. Under Utilities, click on RazorpayX and then click on RazorpayX Bank Statement. Select the Bank Account Ledger for which you want to view the statement, i.e. the account used to create the recent payout.
- You will be able to see all the bank transaction entries. Click on the entry for which you made the payment recently.
- Under Narration at the bottom, you will be able to find all the details associated with the transaction, which you would have to manually share with your finance team.
- You can convert this voucher into a payment entry, a receipt or a journal entry. After this, you approve it and that voucher will be posted to your Tally.