

Available in🇮🇳 India
ACH (Automated Clearing House) is an electronic network that processes bank-to-bank payments in batches. ACH Direct Debit enables you to withdraw funds directly from a customer’s US bank account using their account and routing numbers, with transactions settling within 3-5 business days.
Integration Steps
Follow the steps below to integrate Razorpay S2S JSON API and accept payments using ACH. 1.1 Create an Order 1.2 Create a Payment 1.3 Handle Payment Success and Error Events 1.4 Integrate Payments Rainy Day Kit 1.5 Fetch Payment Details and Verify Payment Status1.1 Create an Order
To process a payment, create a Razorpay Order to correspond with the order in your system. Send the order request parameters to the following endpoint: Order is an important step in the payment process.- An order should be created for every payment.
- You can create an order using the Orders API. It is a server-side API call. Know how to authenticate Orders API.
- The
order_idreceived in the response should be passed to the checkout. This ties the order with the payment and secures the request from being tampered.
- Using the sample code on the Razorpay Postman Public Workspace.
- By manually integrating the API sample codes on your server.
Razorpay Postman Public Workspace
You can use the Postman workspace below to create an order:
Handy TipsUnder the Authorization section in Postman, select Basic Auth and add the Key Id and secret as the Username and Password, respectively.
API Sample Code
Use this endpoint to create an order using the Orders API.POST /orders
Request Parameters
Request Parameters
amount mandatory
: integer Payment amount in the smallest currency subunit. For example, if the amount to be charged is ₹299, then pass 29900 in this field. In the case of three decimal currencies, such as KWD, BHD and OMR, to accept a payment of 295.991, pass the value as 295990. And in the case of zero decimal currencies such as JPY, to accept a payment of 295, pass the value as 295.currency mandatory
: string The currency in which the transaction should be made. See the list of supported currencies. Length must be 3 characters.Handy TipsRazorpay has added support for zero decimal currencies, such as JPY and three decimal currencies, such as KWD, BHD and OMR, allowing businesses to accept international payments in these currencies. Know more about Currency Conversion (May 2024).
receipt optional
: string Your receipt id for this order should be passed here. Maximum length is 40 characters.notes optional
: json object Key-value pair that can be used to store additional information about the entity. Maximum 15 key-value pairs, 256 characters (maximum) each. For example, "note_key": "Beam me up Scotty”.partial_payment optional
: boolean Indicates whether the customer can make a partial payment. Possible values:true: The customer can make partial payments.false(default): The customer cannot make partial payments.
first_payment_min_amount optional
: integer Minimum amount that must be paid by the customer as the first partial payment. For example, if an amount of ₹7000 is to be received from the customer in two installments of #1 - ₹5000, #2 - ₹2000 then you can set this value as 500000. This parameter should be passed only if partial_payment is true.Know more about Orders API.Response Parameters
Response Parameters
Descriptions for the response parameters are present in the Orders Entity parameters table.
Error Response Parameters
Error Response Parameters
The error response parameters are available in the API Reference Guide.
1.2 Create a Payment
Once an order is created, your next step is to create a payment. The following API will create a payment withach as the payment method:
POST /payments/create/json
Request
Request Parameters
Request Parameters
amount mandatory
: integer Payment amount in the smallest currency sub-unit. For example, if the amount to be charged is ₹299, then pass 29900 in this field.currency mandatory
: string Currency code for the currency in which you want to accept the payment. For example, USD.order_id mandatory
: string Unique identifier of the Order.Know more about Orders API.
email mandatory
: string Email address of the customer. Maximum length supported is 40 characters.contact mandatory
: string Phone number of the customer. Maximum length supported is 15 characters, inclusive of country code.method mandatory
: string Name of the payment method. Here it is ach.bank_account mandatory
: object Bank account details.account_number mandatory
: string Customer’s bank account number.name mandatory
: string Account holder’s name as per bank records.bank_code mandatory
: string The ACH routing number of the bank account.bank_code_category mandatory
: string The category of bank code. Must be routing_number for ACH payments.account_type mandatory
: string Type of bank account. Possible values:personal_savings: Individual savings account.personal_checking: Individual current account.business_savings: Business savings account.business_checking: Business current account.
billing_address optional
: json object This will have details about the billing address of the customer/user.line1 optional
: string Address Line 1 of the address.line2 optional
: string Address Line 2 of the address.city optional
: string City of the address. For example, San Jose.state optional
: string Name of the state. For example, California.postal_code optional
: string Postal code of the state. For example, 33514.The payment request for each of the supported payment methods will slightly vary. Know more about the relevant payment request fields.Response Parameters
Response Parameters
If the payment request is valid, the response contains the following fields:
razorpay_order_id
: string Order ID returned by Razorpay Orders API.razorpay_payment_id
: string Returned by Razorpay API only for successful payments.razorpay_signature
: string A hexadecimal string used for verifying the payment.Error Response Parameters
Error Response Parameters
ACH Payment States
ACH payments progress through the following states:- Created: Payment request has been initiated.
- Authorised: Payment has been accepted by Razorpay and submitted to the ACH network.
- Captured: Funds have been confirmed and will be settled to your account.
- Failed: Payment was rejected due to invalid account details, insufficient funds or other errors.
Payment Processing TimelineUnlike card payments, ACH transactions are not processed in real-time. After successful payment creation: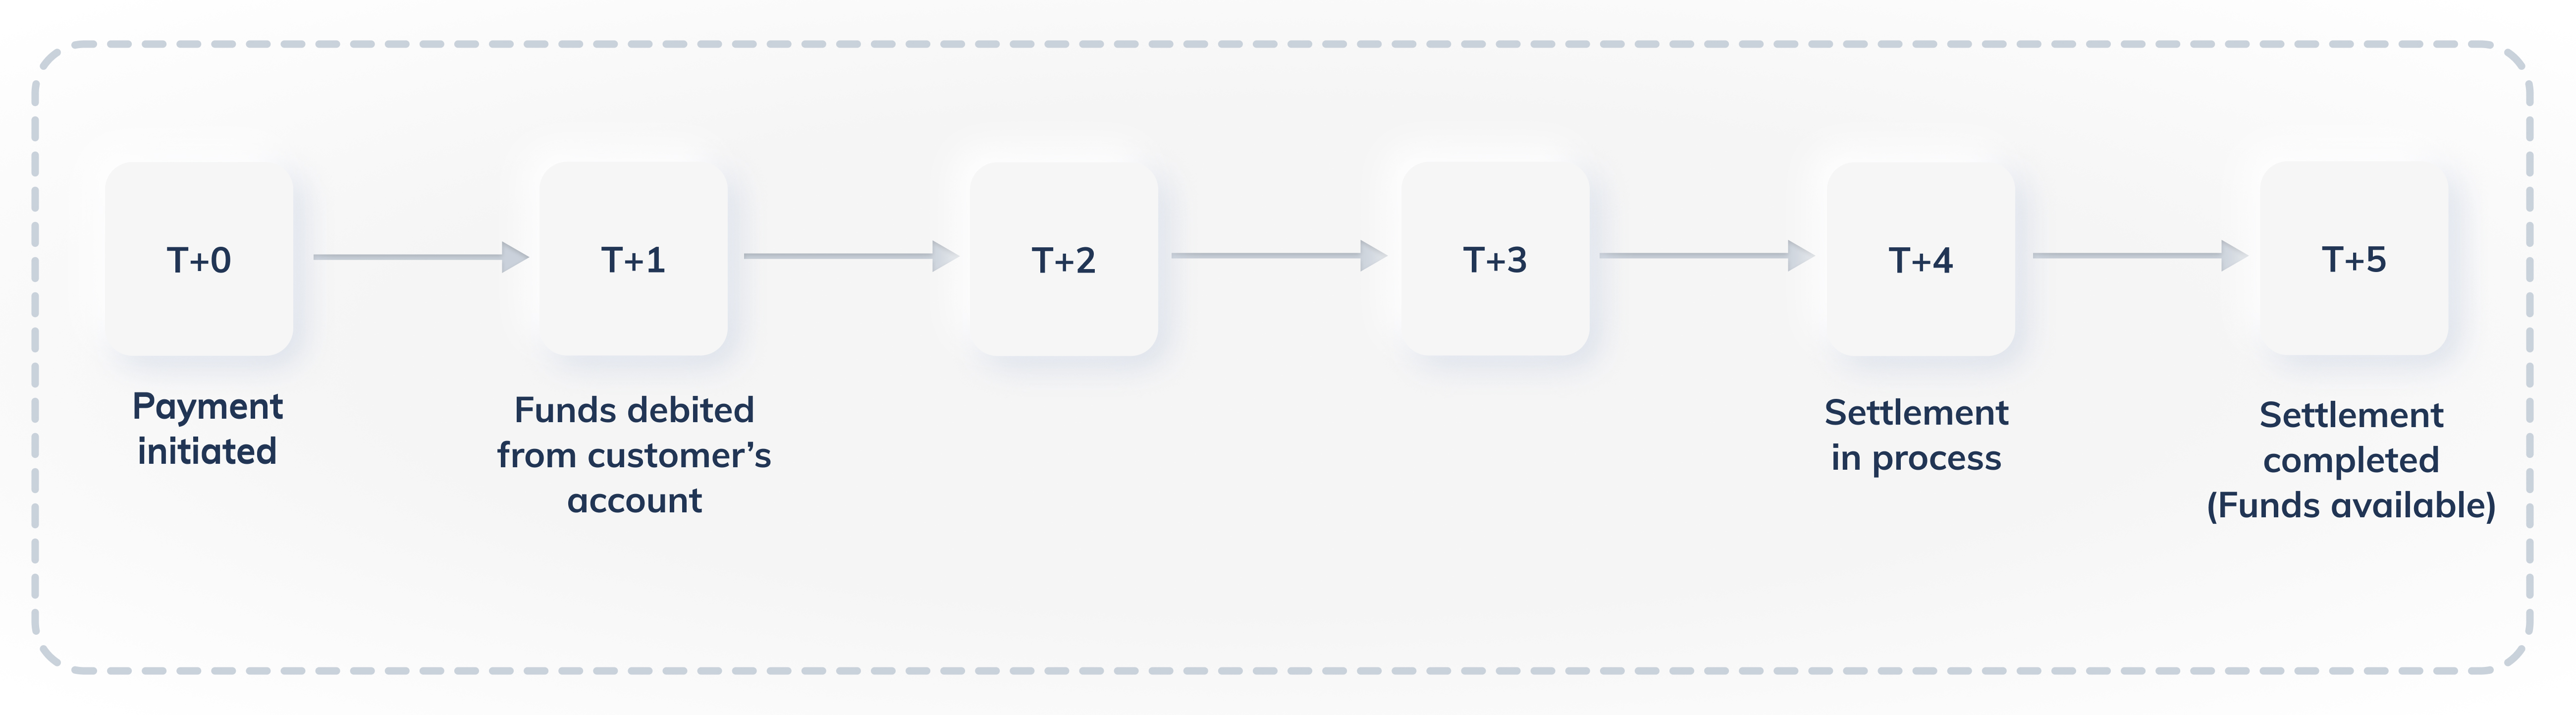
- The payment status moves to
authorisedwithin seconds. - However, actual bank authorisation takes 1-4 business days.
- Settlement occurs on T+5 (5 business days after transaction).
- Most returns occur within the first 5 days if there are account issues.
1.4 Handle Payment Success and Error Events
Once the payment is completed by the customer, aPOST request is made to the callback_url provided in the payment request. The data contained in this request will depend on whether the payment was a success or a failure.
Success Callback
If the payment made by the customer is successful, the following fields are sent:razorpay_payment_idrazorpay_order_idrazorpay_signature
Callback Example
Failure Callback
If the payment has failed, the callback will contain details of the error. Refer to Errors for details.1.5 Integrate Payments Rainy Day Kit
Use Payments Rainy Day kit to overcome payments exceptions such as:1.6 Fetch Payment Details and Verify Payment Status
After receiving therazorpay_payment_id through the callback_url, use this endpoint to fetch the payment details:
Handy TipsOn the Razorpay Dashboard, ensure that the payment status is
captured. Refer to the payment capture settings page to know how to capture payments automatically.You can track the payment status in three ways:
You can track the payment status in three ways:
- Verify Status from Dashboard
- Subscribe to Webhook Events
- Poll APIs
To verify the payment status from the Razorpay Dashboard: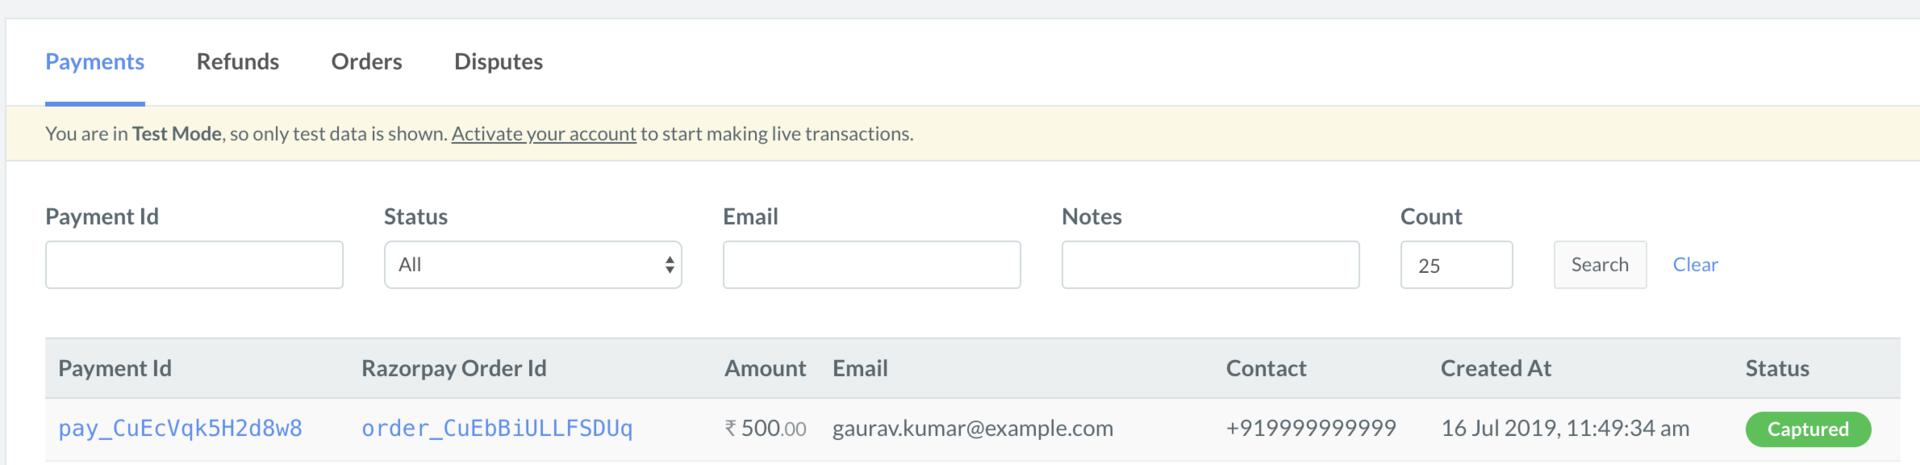
- Log in to the Razorpay Dashboard and navigate to Transactions → Payments.
- Check if a Payment Id has been generated and note the status. In case of a successful payment, the status is marked as Captured.