

Available in🇮🇳 India
The headless JS integration with amount after click is for checkouts where the cart total is only known or finalised at the moment the customer clicks pay. You initialise the Razorpay JS object without amount or currency, then set them right before the payment starts. Know more about Apple Pay.
When to Use This Flow
When to Use This Flow
Use this integration only when your checkout cannot know the cart total at initialisation time. Common scenarios include:
- Dynamic pricing: The final price is resolved at click time based on real-time inventory, demand or promotions.
- Deferred shipping/tax calculation: Shipping costs and taxes are calculated after the customer selects their address.
- Multi-step checkout: The cart total changes based on selections made late in the checkout flow.
Prerequisites
Before starting the integration, ensure you have the following:- A Razorpay account with Apple Pay enabled.
- An existing Razorpay Custom Checkout integration.
- International Payments enabled on your Razorpay account.
- Your API Key Id available. Know how to generate API Keys from the Dashboard.
- An HTTPS-enabled domain (TLS 1.2 or higher). Apple Pay requires a secure context and will not function over HTTP.
- Server-side capability to create orders via the Razorpay Orders API.
- Domains verified in the Dashboard for Apple Pay.
Integration Steps
Follow the steps given below.Step 1: Domain Verification
Step 1: Domain Verification
Verify your checkout domain(s) for Apple Pay before you go live. To find the list of these domains, please log in to the dashboard.Dashboard Configuration and Verification
Handy TipOnly domains whitelisted with the accounts service will be visible here. Similar domains are visible as well. Please contact our Support team if you cannot find your Apple Pay showing domain here. You need to whitelist your URL.
-
Log in to the Dashboard and navigate to Account & Settings → International payments (under Payment methods). Click Apple Pay.
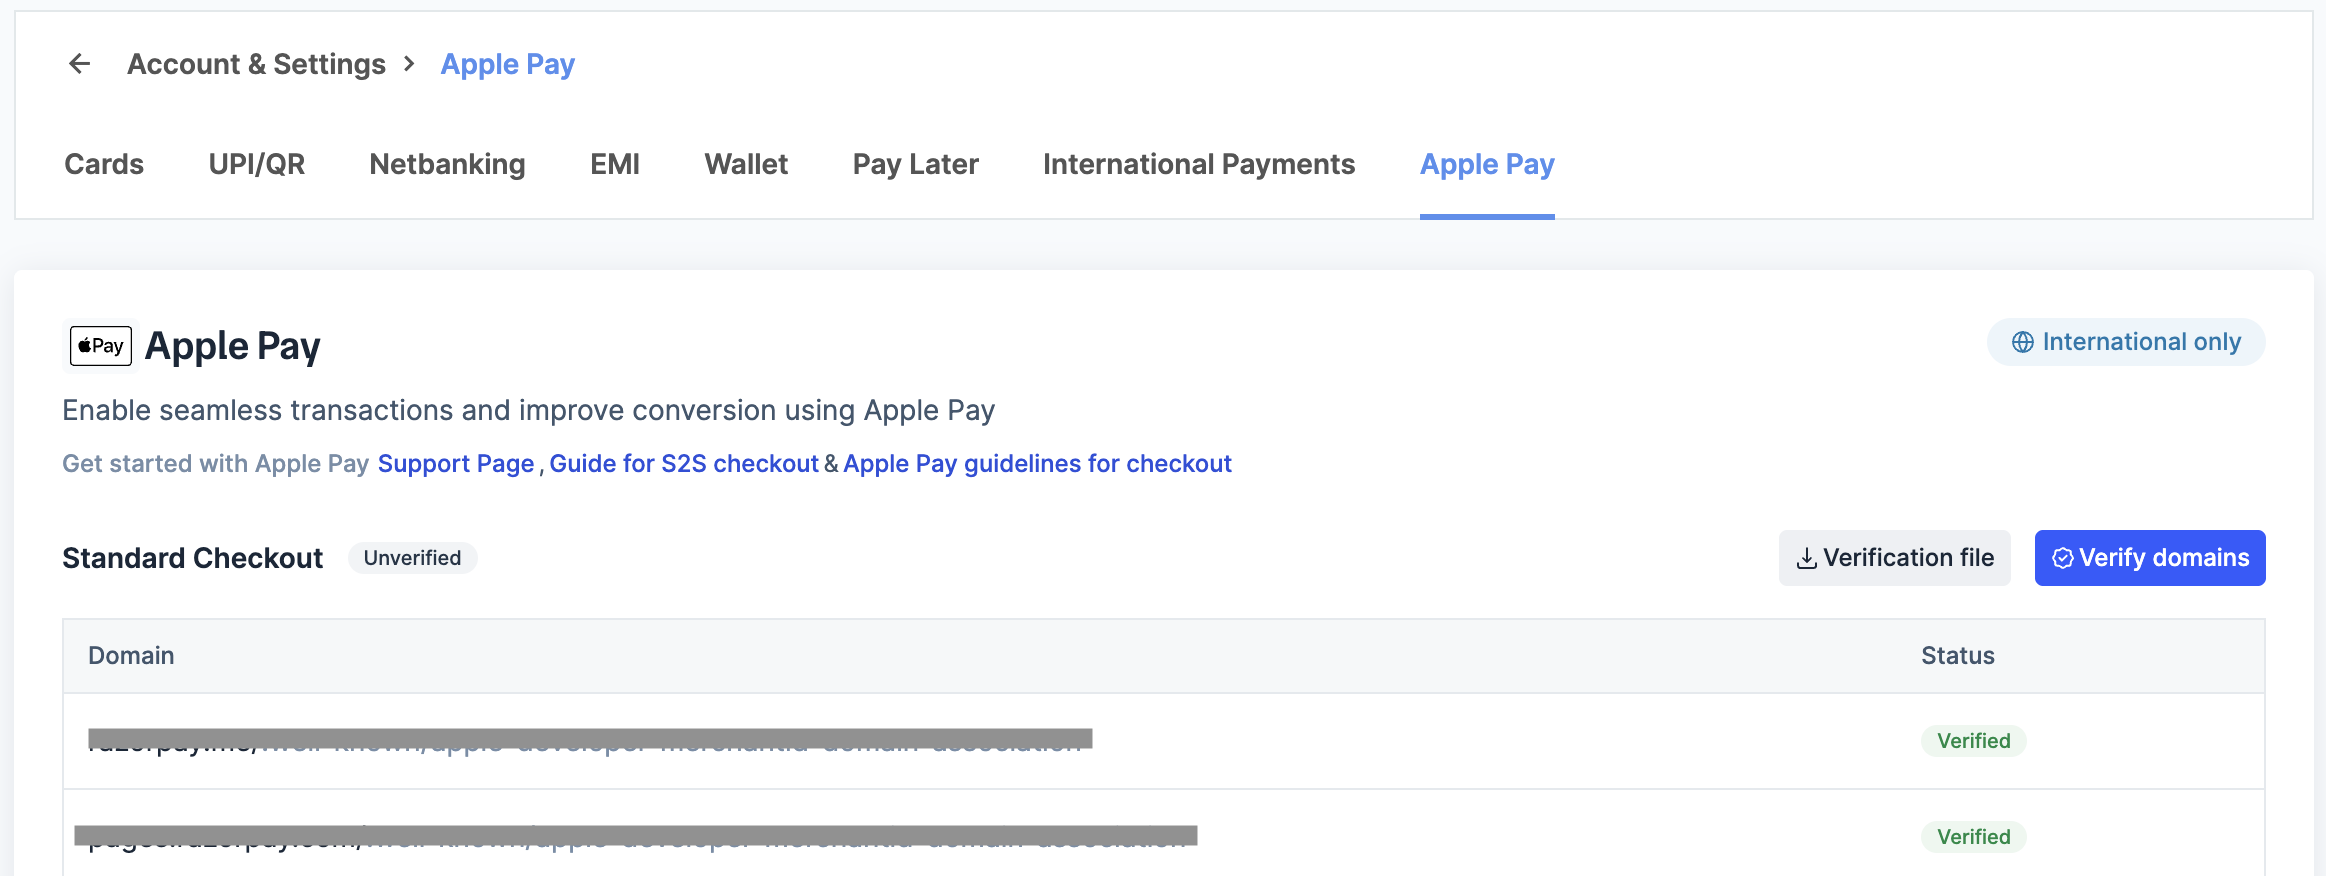
-
You will see a list of domains associated with your business account:
- Verified domains: Ready for Apple Pay.
- Unverified domains: Need to be verified.
- Click Verify domains for any unverified domains.
Step 2: Load the Script
Step 2: Load the Script
Include the Razorpay Custom Checkout script in your page’s
<head> tag.HTML
Handy TipLoad this script on every page where you intend to use the Apple Pay integration. Existing Custom Checkout merchants already load this script.
Running Alongside Standard Checkout
Running Alongside Standard Checkout
Both If you cannot guarantee this load order (for example, scripts injected dynamically or loaded in parallel), queue the captures instead and resolve them once both scripts have loaded:Use
razorpay.js (headless Apple Pay) and checkout.js (Standard Checkout) register their constructor on the same window.Razorpay global. If your page uses both, whichever script loads last overwrites the other’s constructor on window.Razorpay. Capture the headless constructor as soon as razorpay.js loads, and let checkout.js load after it so window.Razorpay is restored to Standard Checkout’s constructor for the rest of your page.HTML
JavaScript
window.__rzpApplePay (instead of window.Razorpay) to initialise the headless Apple Pay object in Step 3, and leave window.Razorpay untouched for your existing Standard Checkout code.JavaScript
Step 3: Initialise Without Amount and Currency
Step 3: Initialise Without Amount and Currency
Initialise Razorpay without passing amount or currency. Use the
on_payment_initiate_create_order callback to create the order on your server right before the payment sheet opens.JavaScript
Step 4: Listen for the Result
Step 4: Listen for the Result
Register event listeners for payment success and failure.
JavaScript
Step 5: Check Availability and Set Amount/Currency on Click
Step 5: Check Availability and Set Amount/Currency on Click
Check whether the customer’s device supports Apple Pay using
canMakePayment(), then set the amount and currency right before triggering the payment using one of the following options.- Option 1: mount() with onClick (Recommended)
Use
mount() to have Razorpay render an Apple Pay button into a container element you provide. This is the recommended default. Pass an onClick callback to set the amount and currency right before the payment sheet opens.JavaScript
mount() creates the button, appends it to the container and wires up the click to payment lifecycle for you, calling your onClick first. The result still comes via the payment.success / payment.failure events from Step 3.Step 6: Verify the Payment Signature on Your Server
Step 6: Verify the Payment Signature on Your Server
After a successful payment (the
payment.success event fires), verify the payment signature on your server before fulfilling the order.Send the following fields to your backend:razorpay_payment_idrazorpay_order_idrazorpay_signature
Error Handling Reference
Every failure — frompayment.failure events or a caught exception — carries the same shape:
JavaScript
Quick Checklist
- Load
https://checkout.razorpay.com/v1/razorpay.js - Initialise
new Razorpay({ ... })without amount/currency - Implement order creation inside
on_payment_initiate_create_order - Call
razorpay.set('amount', ...)/razorpay.set('currency', ...)right before payment starts (click handler ormount()’sonClick) - Wire up
payment.success/payment.failurehandling - Test
canMakePayment()handling for devices/browsers where Apple Pay is not available - Verify the payment signature on your server before fulfilling the order