

Available in🇮🇳 India
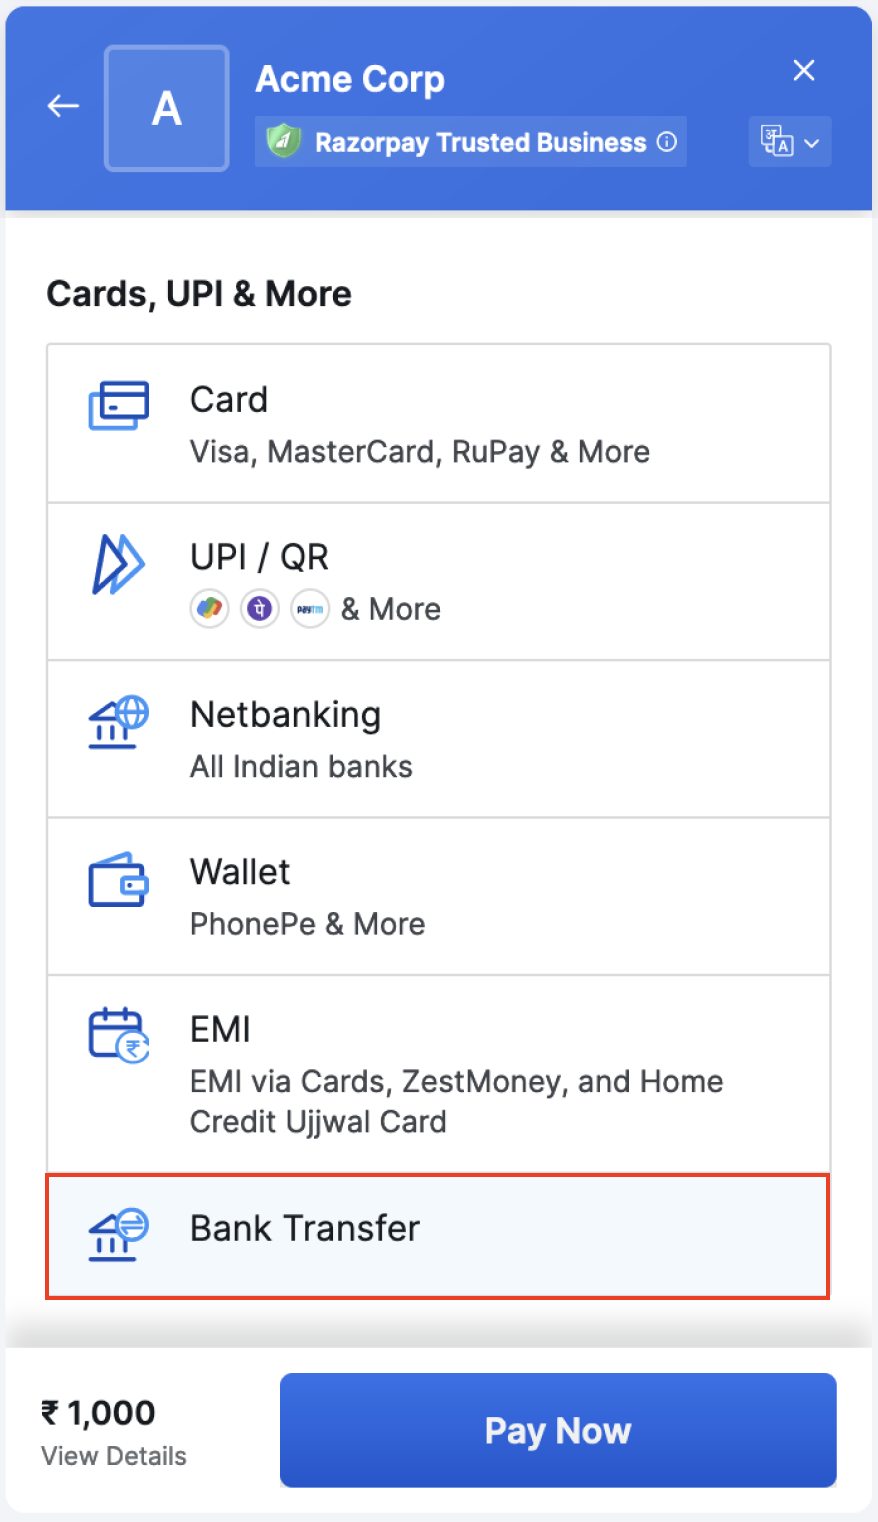
Accept payments from customers using online bank transfers at Razorpay Checkout.
On-Demand Feature - Raise a Request
On-Demand Feature - Raise a Request
Feature RequestThis is an on-demand feature. Please raise a request with our Support team to get this feature activated on your Razorpay account.
How it Works
- Customer selects bank transfer as the payment method on Checkout.
- A Customer Identifier is created with bank account number and IFSC details and displayed to customer.
- Customer copies these details and make a netbanking payment from their online banking portal.
- Method 1: Create New Customer Identifier Per Order
- Method 2: Create New Customer Identifier Per Customer
Method 1: Create New Customer Identifier Per Order
This creates a new Customer Identifier per order, every time a customer selects bank transfer as the payment method on Checkout.Integration
The bank transfer payment method will appear for the Payment Gateway and products such as Payment Links and Payment Pages.Payment Links and Payment PagesNo additional integration is required if you are using Payment Links and Payment Pages. Raise a request with our Support Team to activate the feature on your account.
Step 1: Track Checkout Modal Using `ondismiss` Function
Step 1: Track Checkout Modal Using `ondismiss` Function
If you have integrated with Razorpay Standard Checkout, you must implement the
ondismiss function to track the lifecycle of the Checkout modal. This displays the close icon, which the customer can use to exit the Checkout.Handy TipsIf you are using Android SDK, you can rely on the “payment cancelled by user” error response to track the lifecycle of the Checkout modal.
ondismiss function
Step 2: Attach Event Listeners to `Razorpay` Instance
Step 2: Attach Event Listeners to `Razorpay` Instance
For bank transfer payments, Checkout will not give a success or a failure callback. You must attach event listeners to the
Razorpay instance to track if and when the customer has selected the bank transfer payment method.Event Listener
Step 3: Subscribe to Webhook Event
Step 3: Subscribe to Webhook Event
You must subscribe to the
virtual_account.credited webhook event on the Dashboard to receive notifications whenever customers make payments using bank transfers. Know how to set up webhooks.Sample Payloadvirtual_account.credited
Method 2: Create New Customer Identifier Per Customer
This ensures that each customer will be allocated a unique Customer Identifier, whenever they use the bank transfer method on Checkout. This method requires specific integration steps, which are mentioned in the following section.Integration
The bank transfer payment method will appear for the Payment Gateway and products such as Payment Links and Payment Pages.Payment Links and Payment PagesNo additional integration is required if you are using Payment Links and Payment Pages. Raise a request with our Support Team to activate the feature on your account.
Step 1: Create a Customer
Step 1: Create a Customer
You must create a customer using the Customers API. You can also do this using the Dashboard.The following endpoint creates or add a customer with basic details such as name and contact details. You can use this API for various Razorpay Solution offerings.
POST /customers- Request Parameters
- Response Parameters
name optional
: string Customer’s name. Alphanumeric value with period (.), apostrophe (’), forward slash (/), at (@) and parentheses are allowed. The name must be between 3-50 characters in length. For example, Gaurav Kumar.contact optional
: string The customer’s phone number. A maximum length of 15 characters including country code. For example, +919876543210.email optional
: string The customer’s email address. A maximum length of 64 characters. For example, gaurav.kumar@example.com.fail_existing optional
: string Possible values:1(default): If a customer with the same details already exists, throws an error.0: If a customer with the same details already exists, fetches details of the existing customer.
gstin optional
: string Customer’s GST number, if available. For example, 29XAbbA4369J1PA.notes optional
: object This is a key-value pair that can be used to store additional information about the entity. It can hold a maximum of 15 key-value pairs, 256 characters (maximum) each. For example, "note_key": "Beam me up Scotty”.Step 2: Create an Order
Step 2: Create an Order
Order is an important step in the payment process.
- An order should be created for every payment.
- You can create an order using the Orders API. It is a server-side API call. Know how to authenticate Orders API.
- The
order_idreceived in the response should be passed to the checkout. This ties the order with the payment and secures the request from being tampered.
- Using the sample code on the Razorpay Postman Public Workspace.
- By manually integrating the API sample codes on your server.
Razorpay Postman Public Workspace
You can use the Postman workspace below to create an order:Handy TipsUnder the Authorization section in Postman, select Basic Auth and add the Key Id and secret as the Username and Password, respectively.
API Sample Code
Use this endpoint to create an order using the Orders API.POST /ordersRequest Parameters
Request Parameters
amount mandatory
: integer Payment amount in the smallest currency subunit. For example, if the amount to be charged is ₹299, then pass 29900 in this field. In the case of three decimal currencies, such as KWD, BHD and OMR, to accept a payment of 295.991, pass the value as 295990. And in the case of zero decimal currencies such as JPY, to accept a payment of 295, pass the value as 295.currency mandatory
: string The currency in which the transaction should be made. See the list of supported currencies. Length must be 3 characters.Handy TipsRazorpay has added support for zero decimal currencies, such as JPY and three decimal currencies, such as KWD, BHD and OMR, allowing businesses to accept international payments in these currencies. Know more about Currency Conversion (May 2024).
receipt optional
: string Your receipt id for this order should be passed here. Maximum length is 40 characters.notes optional
: json object Key-value pair that can be used to store additional information about the entity. Maximum 15 key-value pairs, 256 characters (maximum) each. For example, "note_key": "Beam me up Scotty”.partial_payment optional
: boolean Indicates whether the customer can make a partial payment. Possible values:true: The customer can make partial payments.false(default): The customer cannot make partial payments.
first_payment_min_amount optional
: integer Minimum amount that must be paid by the customer as the first partial payment. For example, if an amount of ₹7000 is to be received from the customer in two installments of #1 - ₹5000, #2 - ₹2000 then you can set this value as 500000. This parameter should be passed only if partial_payment is true.Know more about Orders API.Response Parameters
Response Parameters
Descriptions for the response parameters are present in the Orders Entity parameters table.
Error Response Parameters
Error Response Parameters
The error response parameters are available in the API Reference Guide.
Step 3: Pass `customer_id` and `order_id` to Checkout
Step 3: Pass `customer_id` and `order_id` to Checkout
You must pass the
customer_id and order_id generated in the previous steps to Checkout, as shown below:Standard Checkout
Step 4: Track Checkout Modal Using `ondismiss` Function
Step 4: Track Checkout Modal Using `ondismiss` Function
(Only if you are using Standard Checkout)If you have integrated with Razorpay Standard Checkout, you must implement the
ondismiss function to track the lifecyle of the Checkout modal. This displays the close icon, which the customer can use to exit the Checkout.ondismiss function
Step 5: Attach Event Listeners to `Razorpay` Instance *[Optional]*
Step 5: Attach Event Listeners to `Razorpay` Instance *[Optional]*
For bank transfer payments, Checkout will not give a success or a failure callback. You must attach event listeners to the
Razorpay instance to track if and when the customer has selected the bank transfer payment method.Event Listener
Step 6: Subscribe to Webhook Event
Step 6: Subscribe to Webhook Event
You must subscribe to the
virtual_account.credited webhook event on the Dashboard to receive notifications whenever customers make payments using bank transfers. Know how to setup webhooks.Sample Payloadvirtual_account.credited