

Available in🇮🇳 India
You can create separate group types for users based on your organisations’ need. For example, these group types can be:
- Teams that work for you, like Product, IT, Sales.
- Stores pan-India like Chennai, Kolkata, Hyderabad.
- Departments like Marketing, HR, Finance.
- Regions like South Bangalore, East Bangalore.
- Locations like MG Road, Koramangala, Whitefield and so on.
Advantages
Advantages
- Data privacy: Currently, you can make a setting for your team member to either view their own data or the entire organisation’s data.
- Customised Approval Workflows: We can create different levels of management and set up workflows according to your needs, for better administration. With this feature you can maintain your hierarchy while standardising and supervising the process across your employees, on one dashboard.
- Time Saving: Each team need not spend time setting up their own process and tools. Everyone can follow the standardised set.
- End-to-end data in one place: You get full financial control with the availability of data and download reports for easy tracking and verification. You can also download data based on group type. For example, data for a particular team or department.
- Teams
- Departments
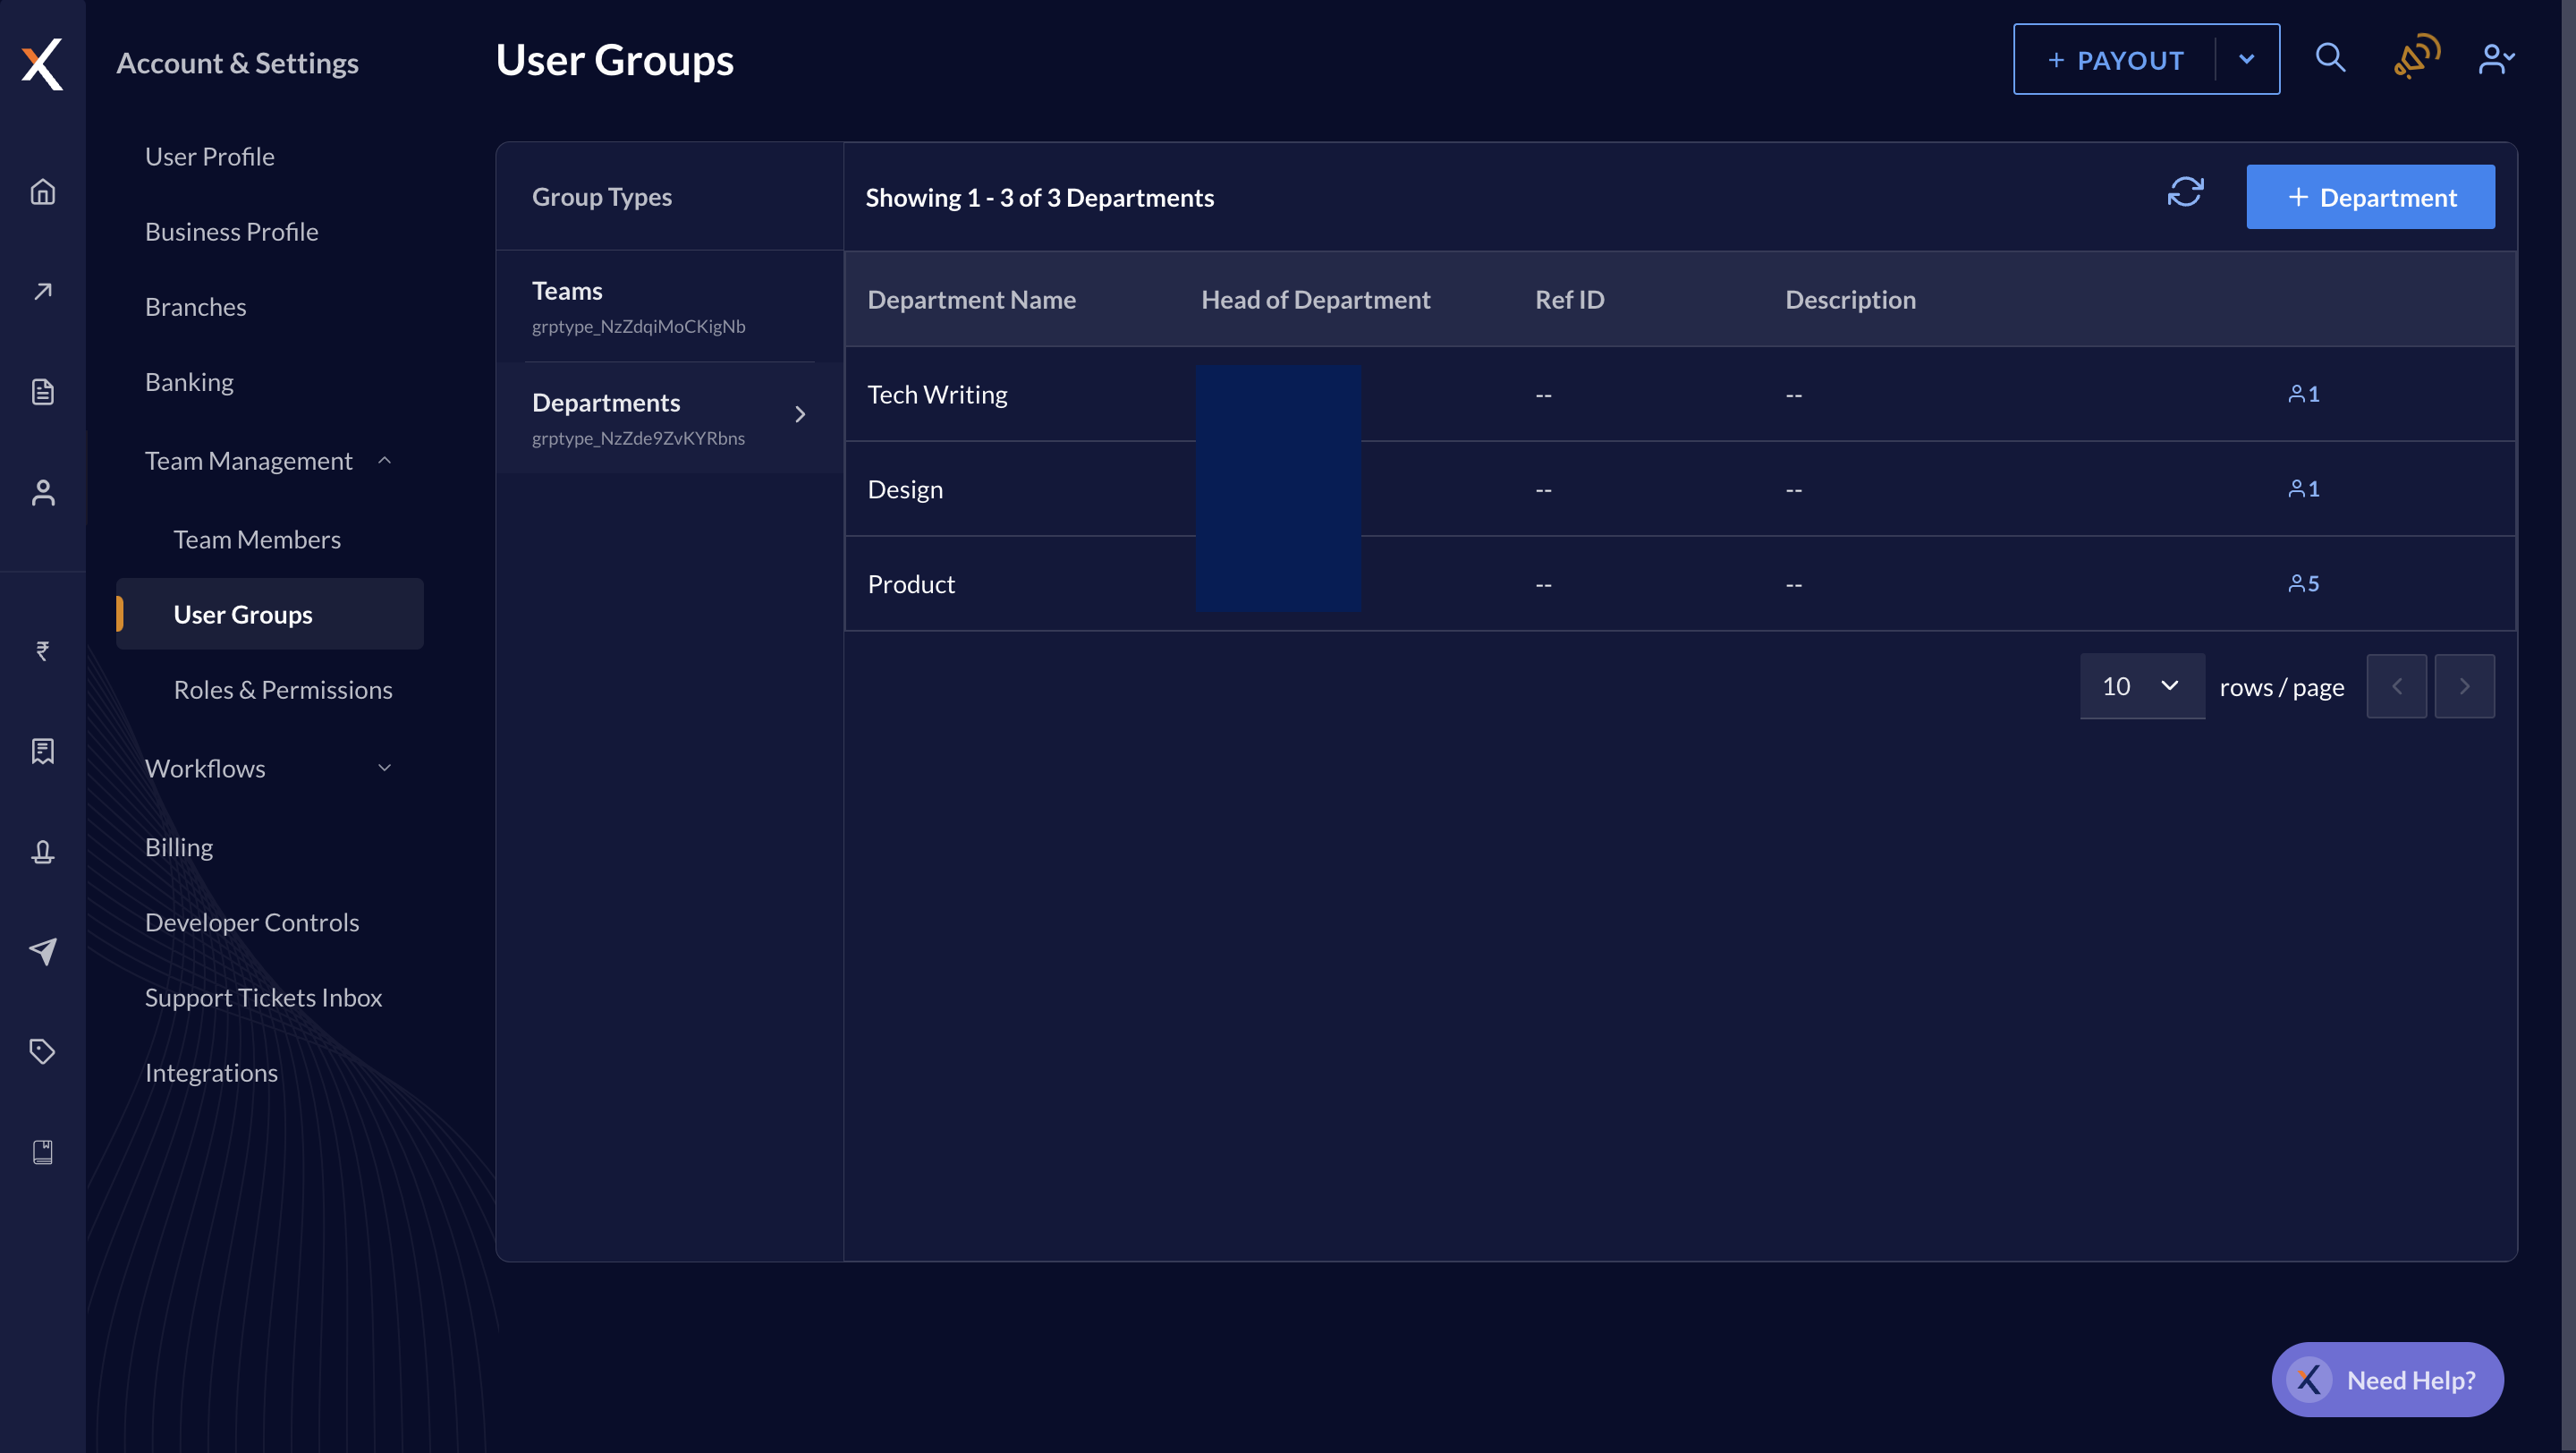
Add a Group
You can add groups one by one or request RazorpayX to create the groups. To add a group, in this case, a department, you must:- Log in to your RazorpayX Dashboard.
- Navigate to My Account and Settings → Team Management → User Groups.
- Select the group type, that is, Departments and click + Department.
- Enter the name and description of the department and select Head of Department from list of Team Members.
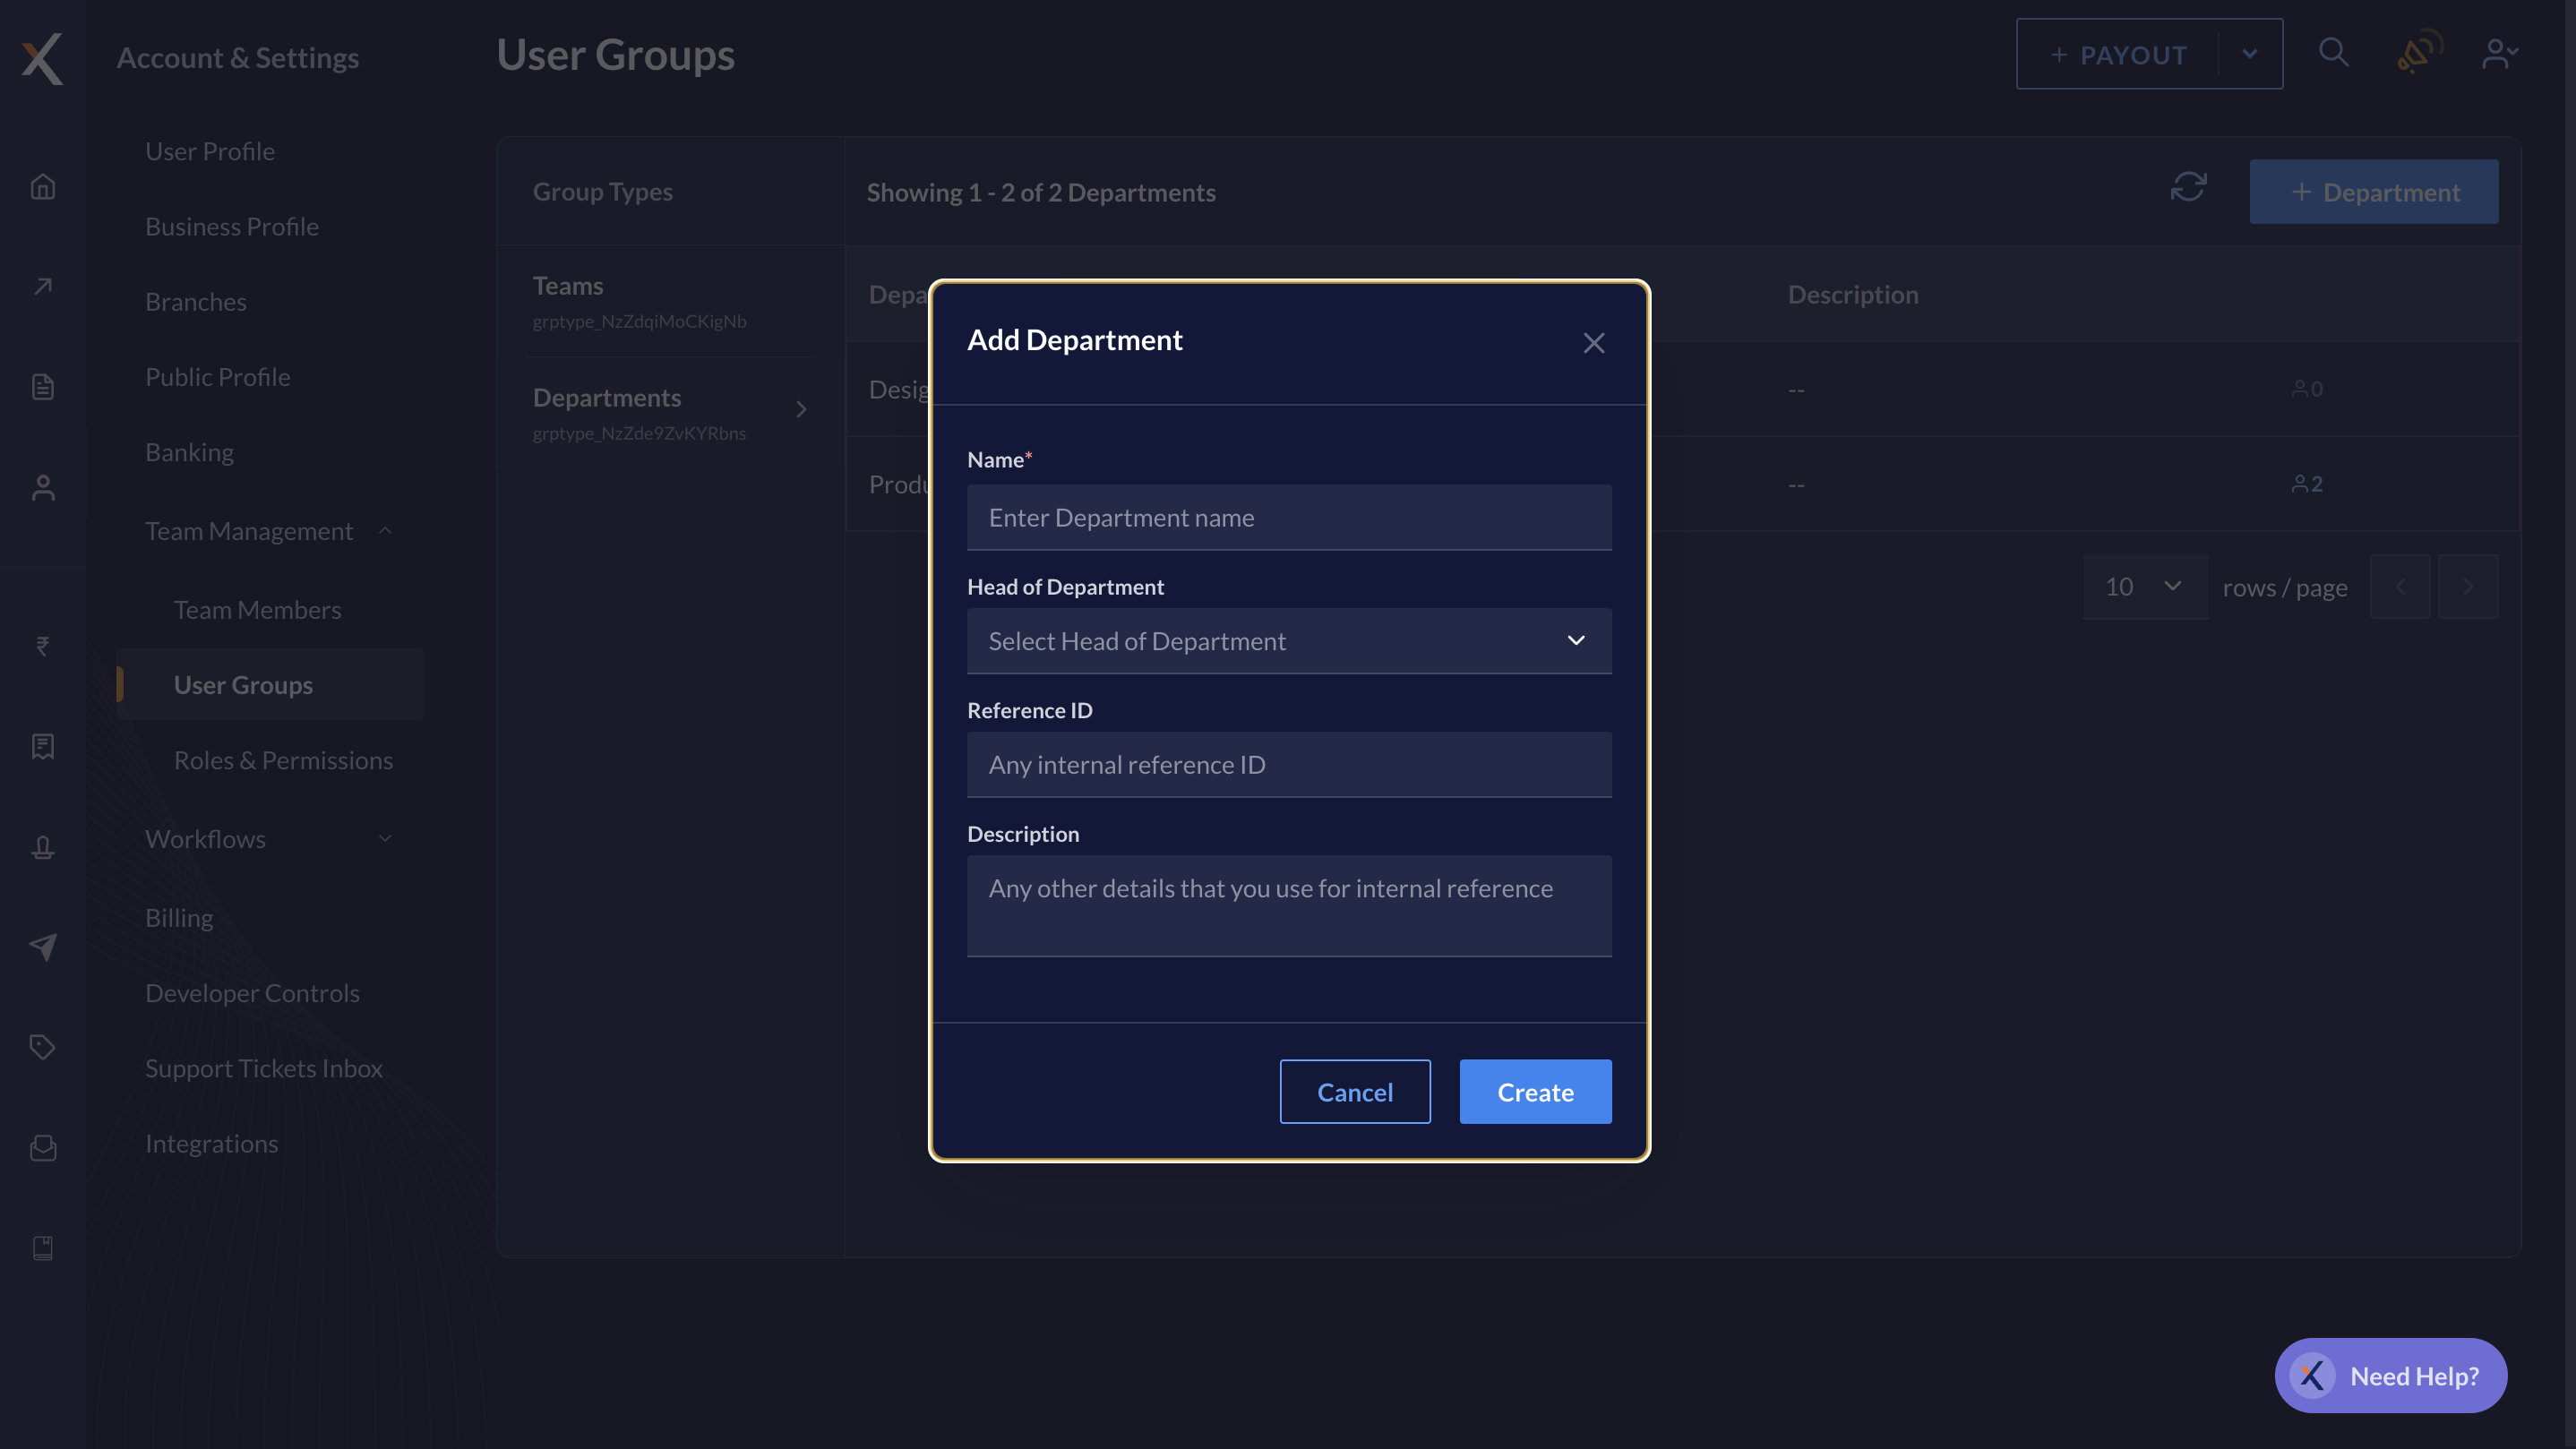
- Click Create. A new group ‘Department’ is added successfully.
Add a User to a Group
If you require multiple roles, you can create multiple user roles based on your requirements and invite the users. You can also raise a request with us to create user groups in bulk, once you have created all the required roles. To add a user to a group, in this case, a department, you must:- Log in to your RazorpayX Dashboard.
- Navigate to My Account and Settings → Team Management → Team Members and click + Team Member.
- Enter the team member details and select a department and Reporting Manager from the drop-down.
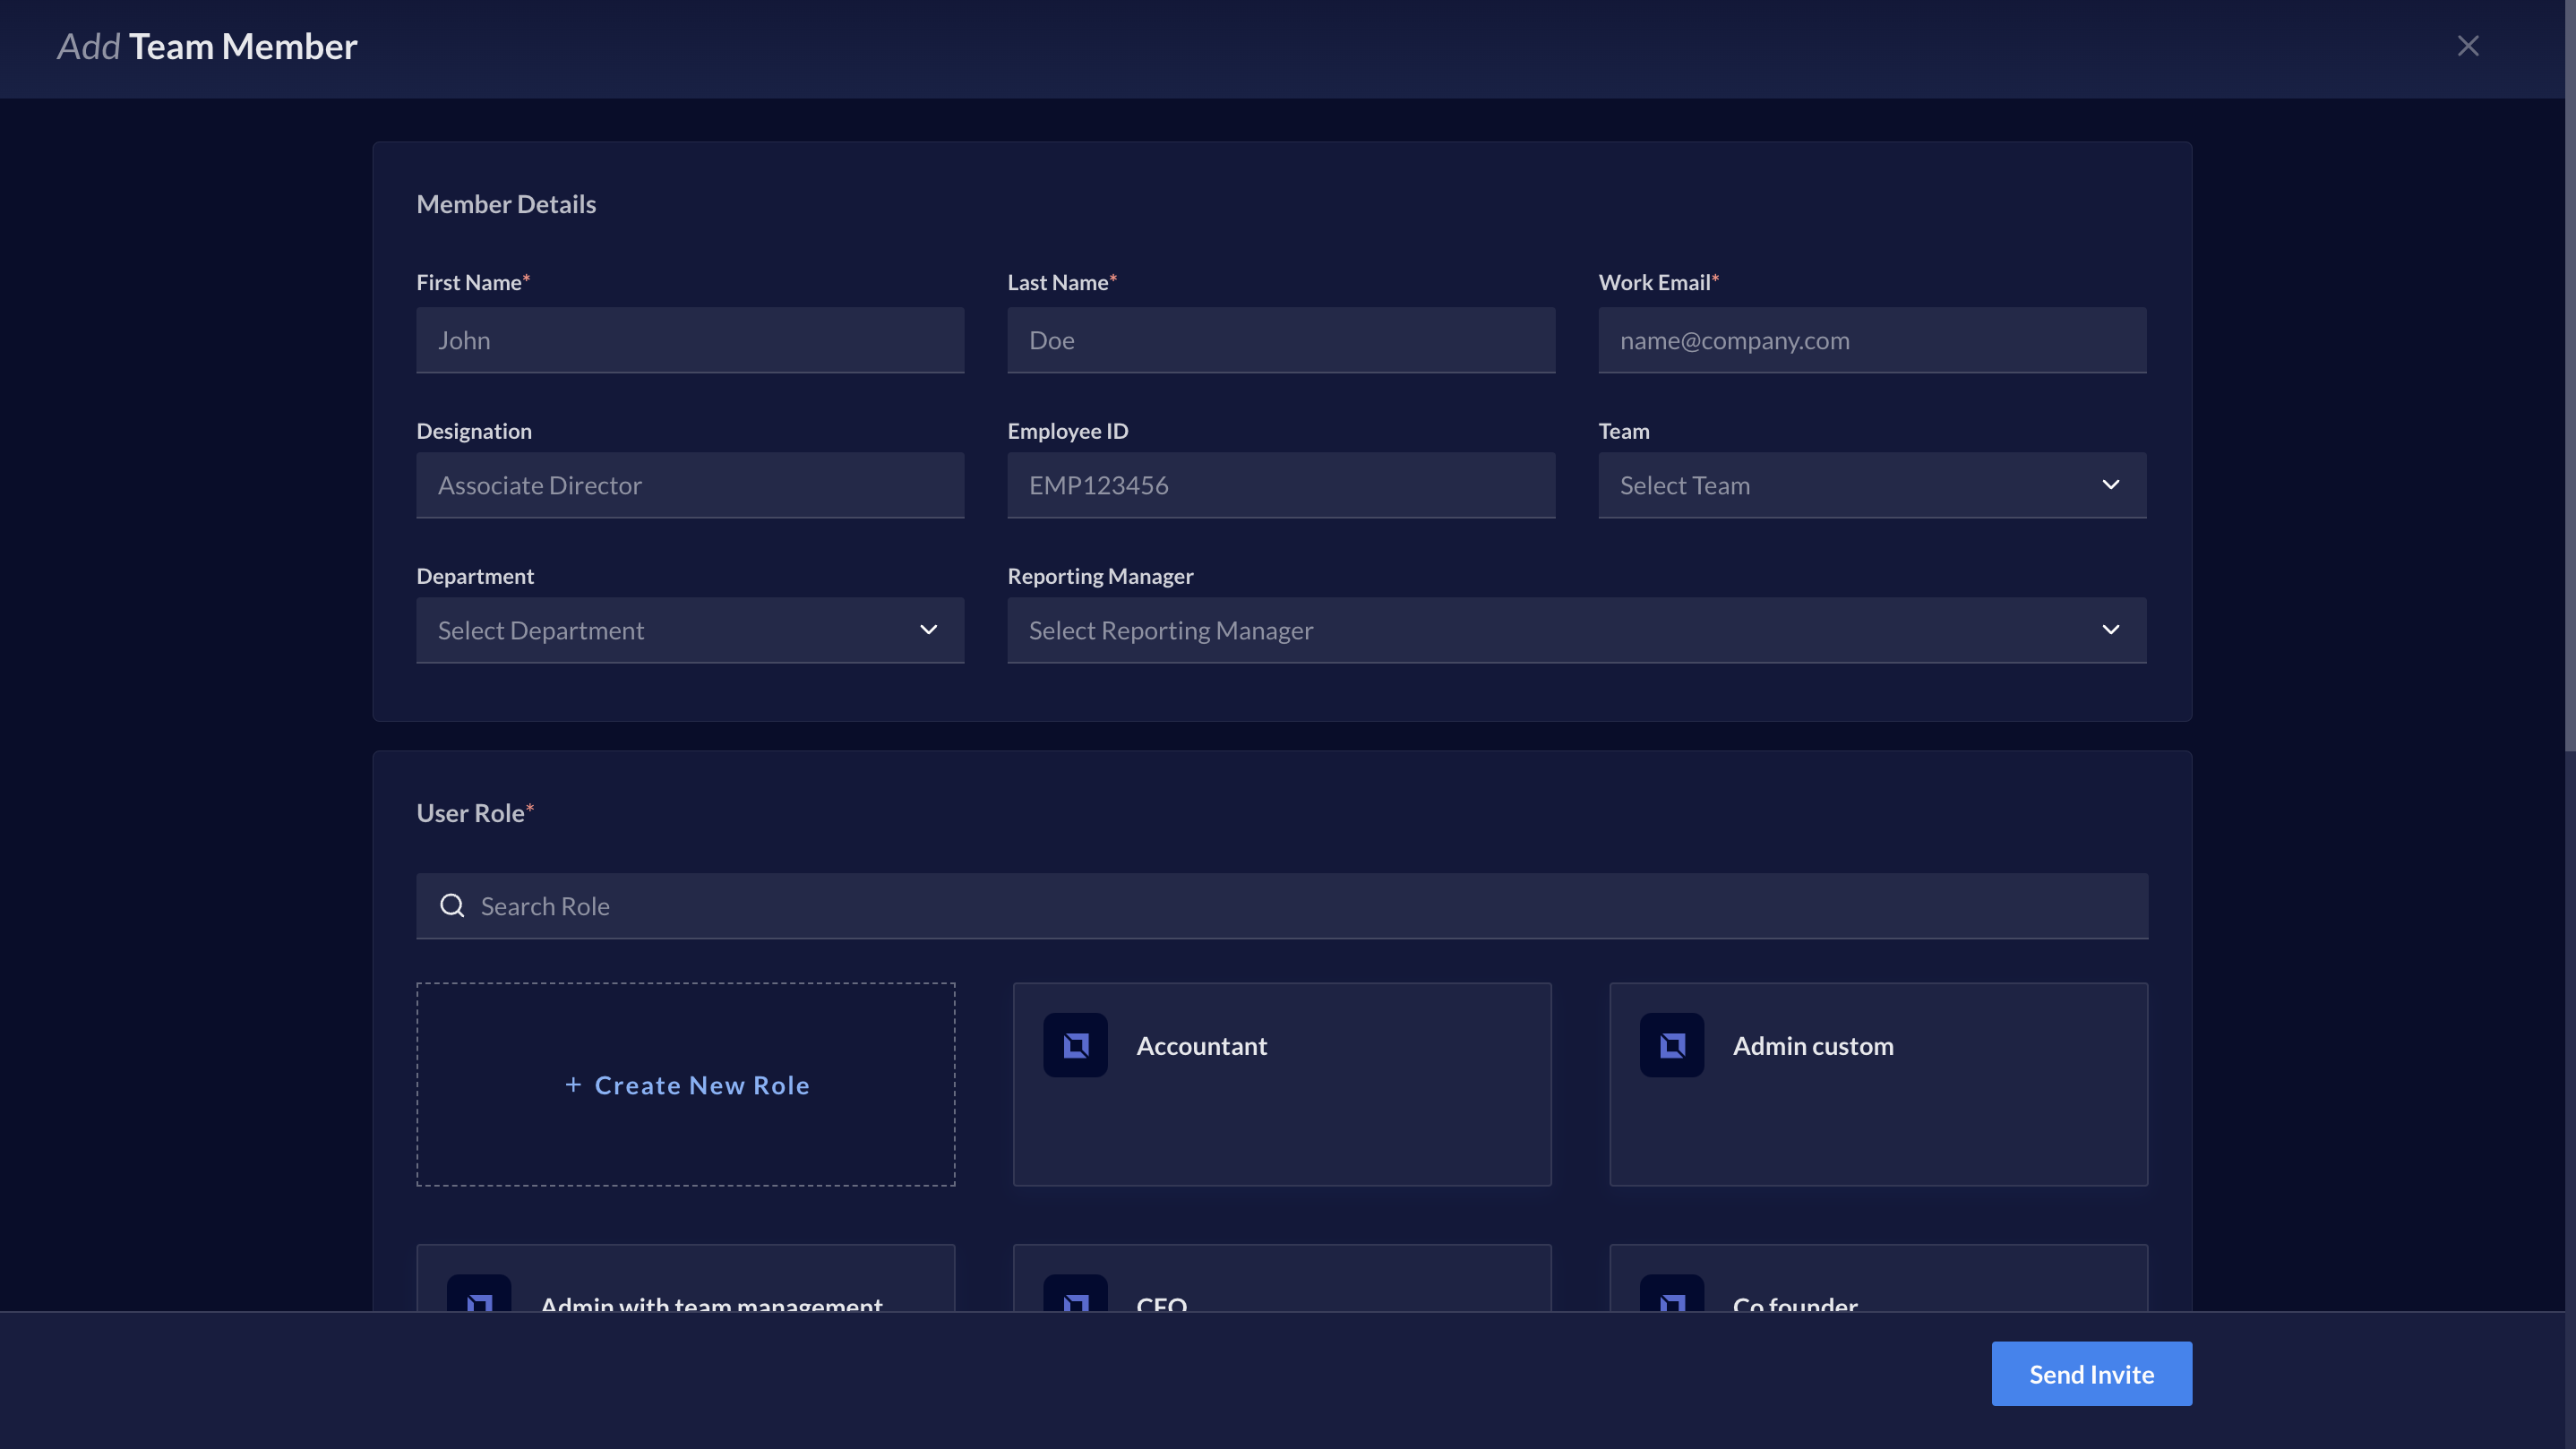
- Select the role to be assigned to the user or + Create New Role. Review the permissions and click Send Invite.
- Enter the OTP sent to your registered mobile number and click Verify & Invite.
Resend Invite
To resend an invite, you must:- Log in to your RazorpayX Dashboard.
- Navigate to My Account and Settings → Team Management → Team Members.
- Hover over the user to who you want to resend the invite. Click on the Vertical Ellipsis ⋮ → Resend Invite.
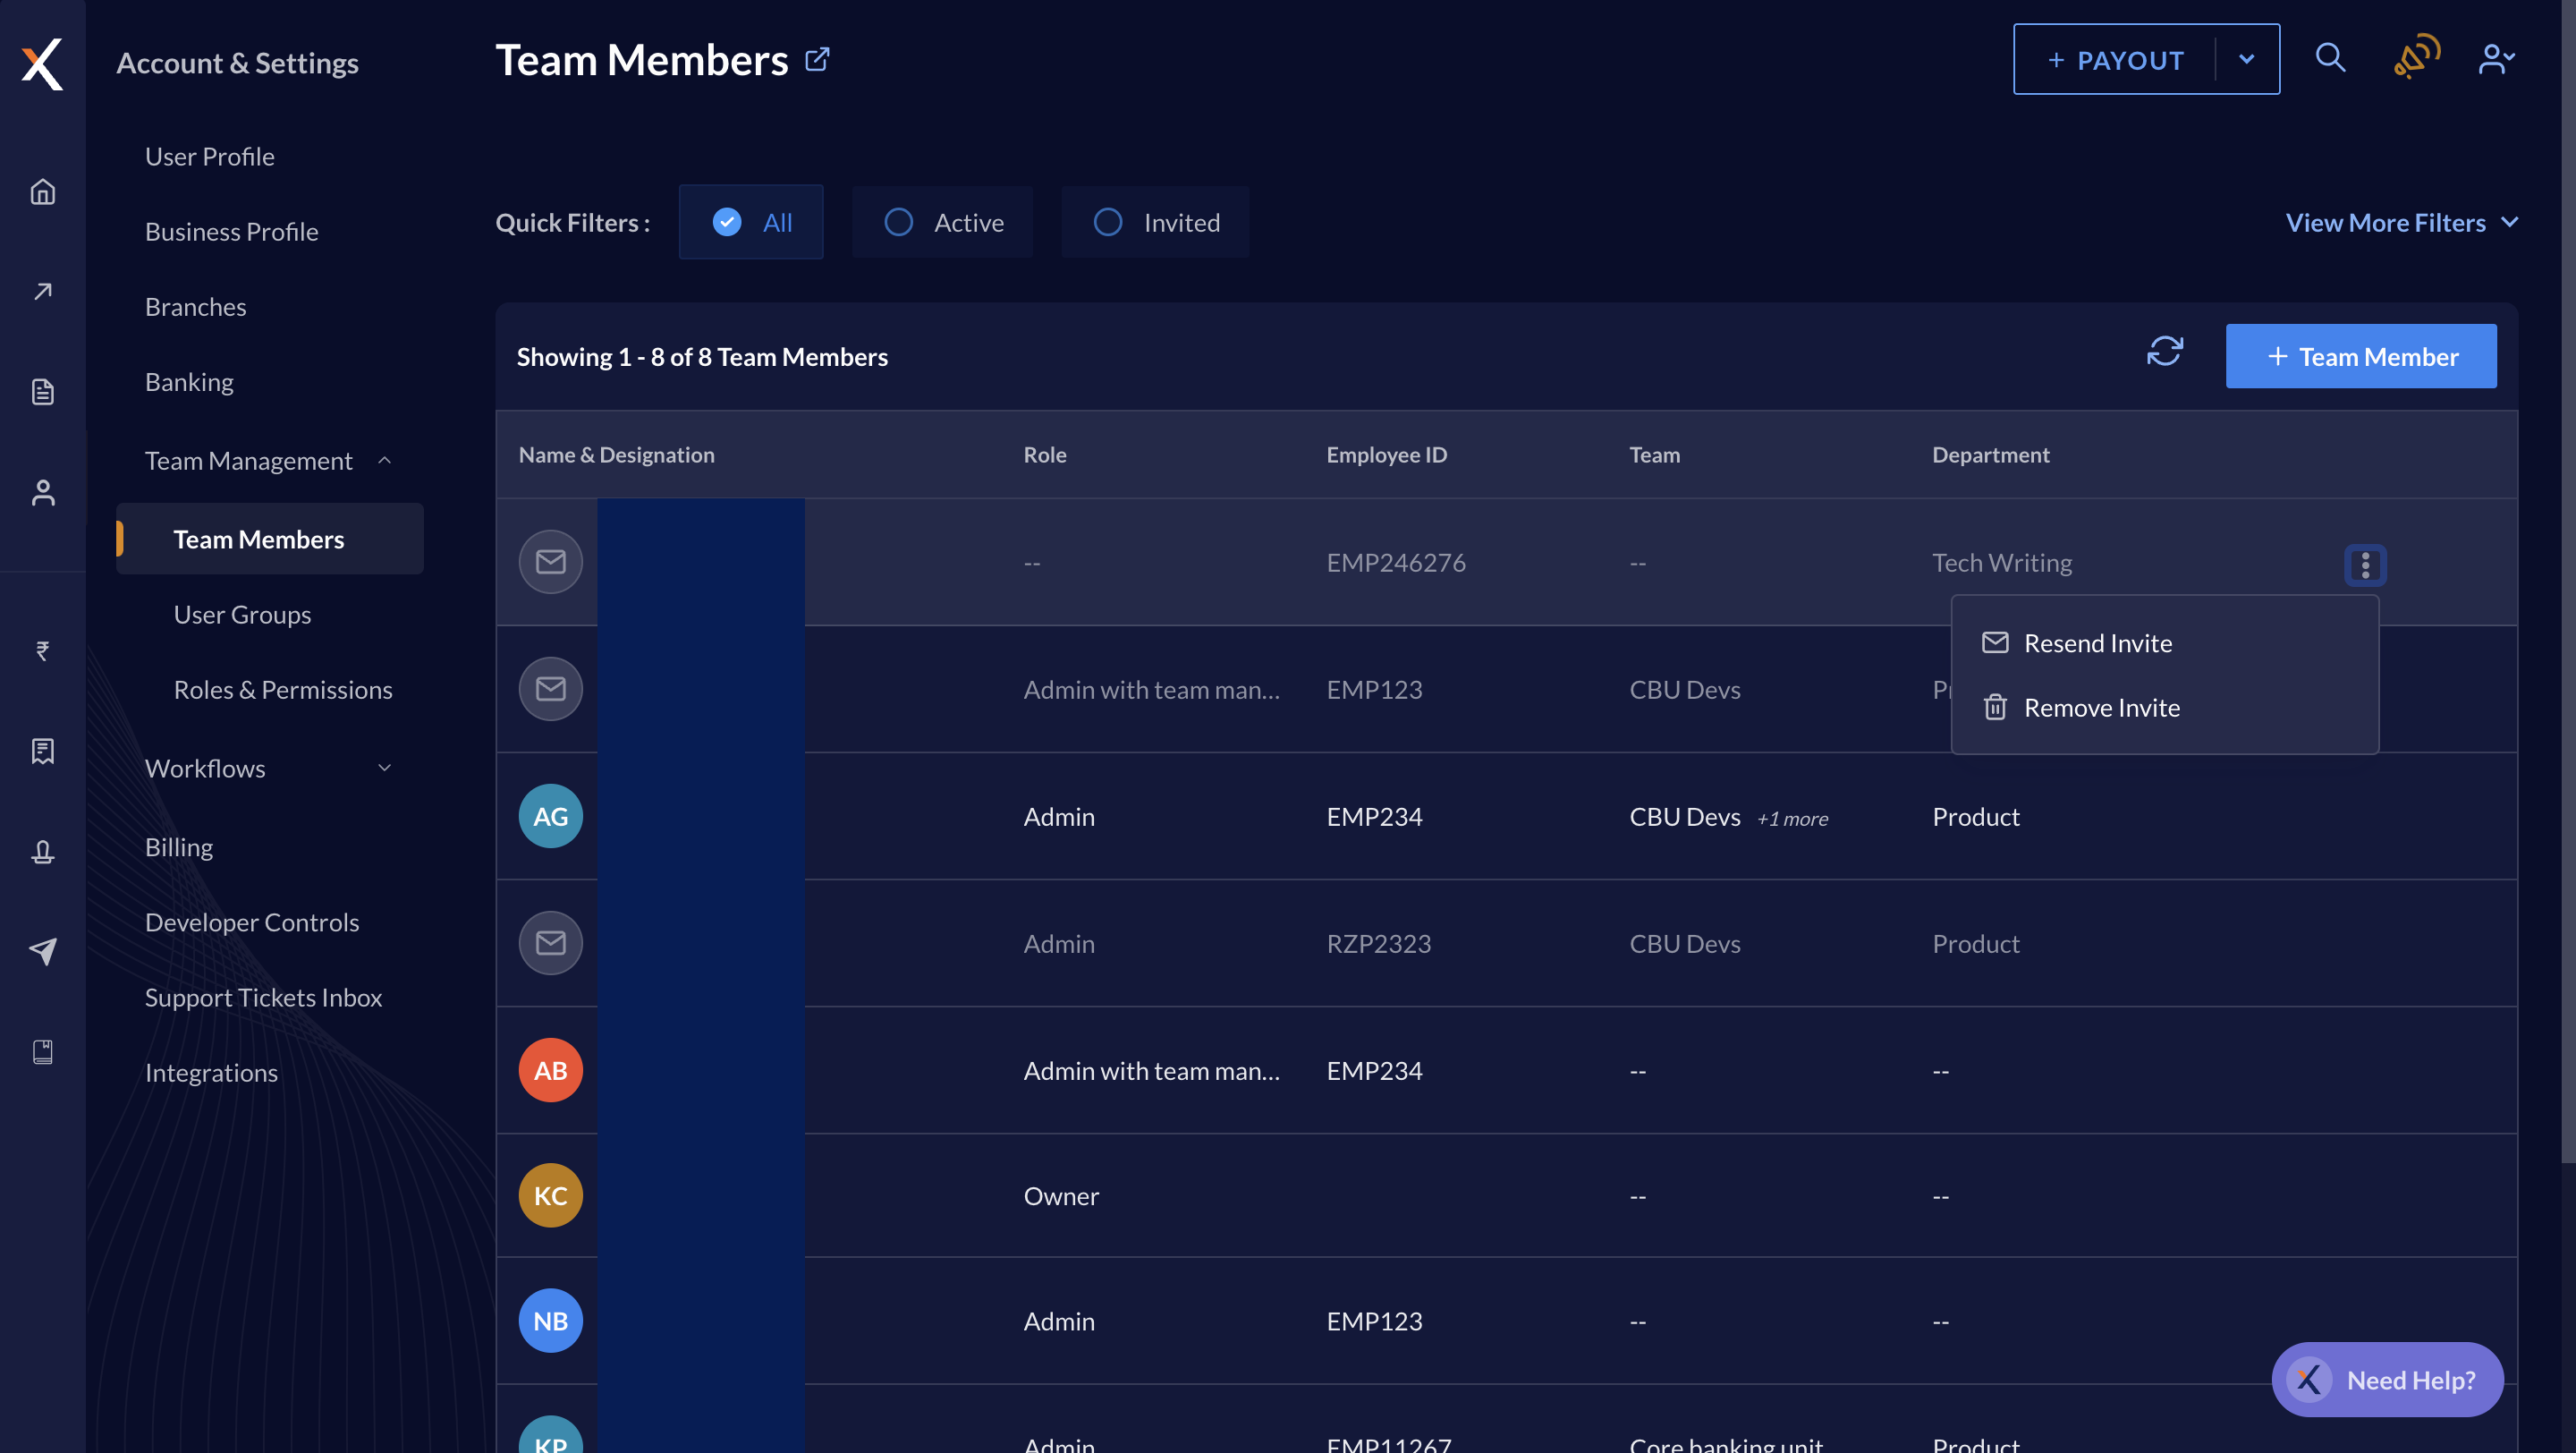 You have successfully sent an email invite to your team member. They can Accept Invite via their email.
Remove Invite
To delete an invite, you must:- Log in to your RazorpayX Dashboard.
- Navigate to My Account and Settings → Team Management → Team Members.
- Hover over the user you want to remove. Click on the Vertical Ellipsis ⋮ → Remove Invite.
Edit/Update User Details, Role or Department
To edit a user’s details, role or group, you must:- Log in to your RazorpayX Dashboard.
- Navigate to My Account and Settings → Team Management → Team Members.
- Hover over the user whose information you wish to edit. Click on the Vertical Ellipsis ⋮ → Edit.
- You can edit any of the details except the Work Email ID of the user. Once the changes are made, review and click Save Changes.
Handy TipsYou can navigate to My Account and Settings → Team Management → Roles & Permissions to edit the permissions for different roles.
Remove a User
To remove a user, you must:- Log in to your RazorpayX Dashboard.
- Navigate to My Account and Settings → Team Management → Team Members.
- Hover over the user to be deleted. Click on the Vertical Ellipsis ⋮ → Remove Member.
- Click Remove. Review and click Got it.
Workflows
Two types of workflows are available:- Workflow based on group types.
- Workflow based on amount based on roles.