

Available in🇮🇳 India
Besides the preset templates, you can create custom user roles in RazorpayX. You can add users and assign roles to them and limit their access to the Dashboard as per your business requirements.
For example, you might want to hide the account balance and account statement from the new employees in your team. Or you wish to delegate certain tasks, like team management and Dashboard Settings configuration to certain members of your team only.
You can use the preset templates to create new custom roles. You can further edit the custom roles as required.
Create Custom User Roles
Watch the video to know how to create new custom user roles.
To create custom user roles in RazorpayX, you must:
- Log in to your RazorpayX Dashboard.
- Navigate to My Account and Settings → Team Management → Roles & Permissions.
-
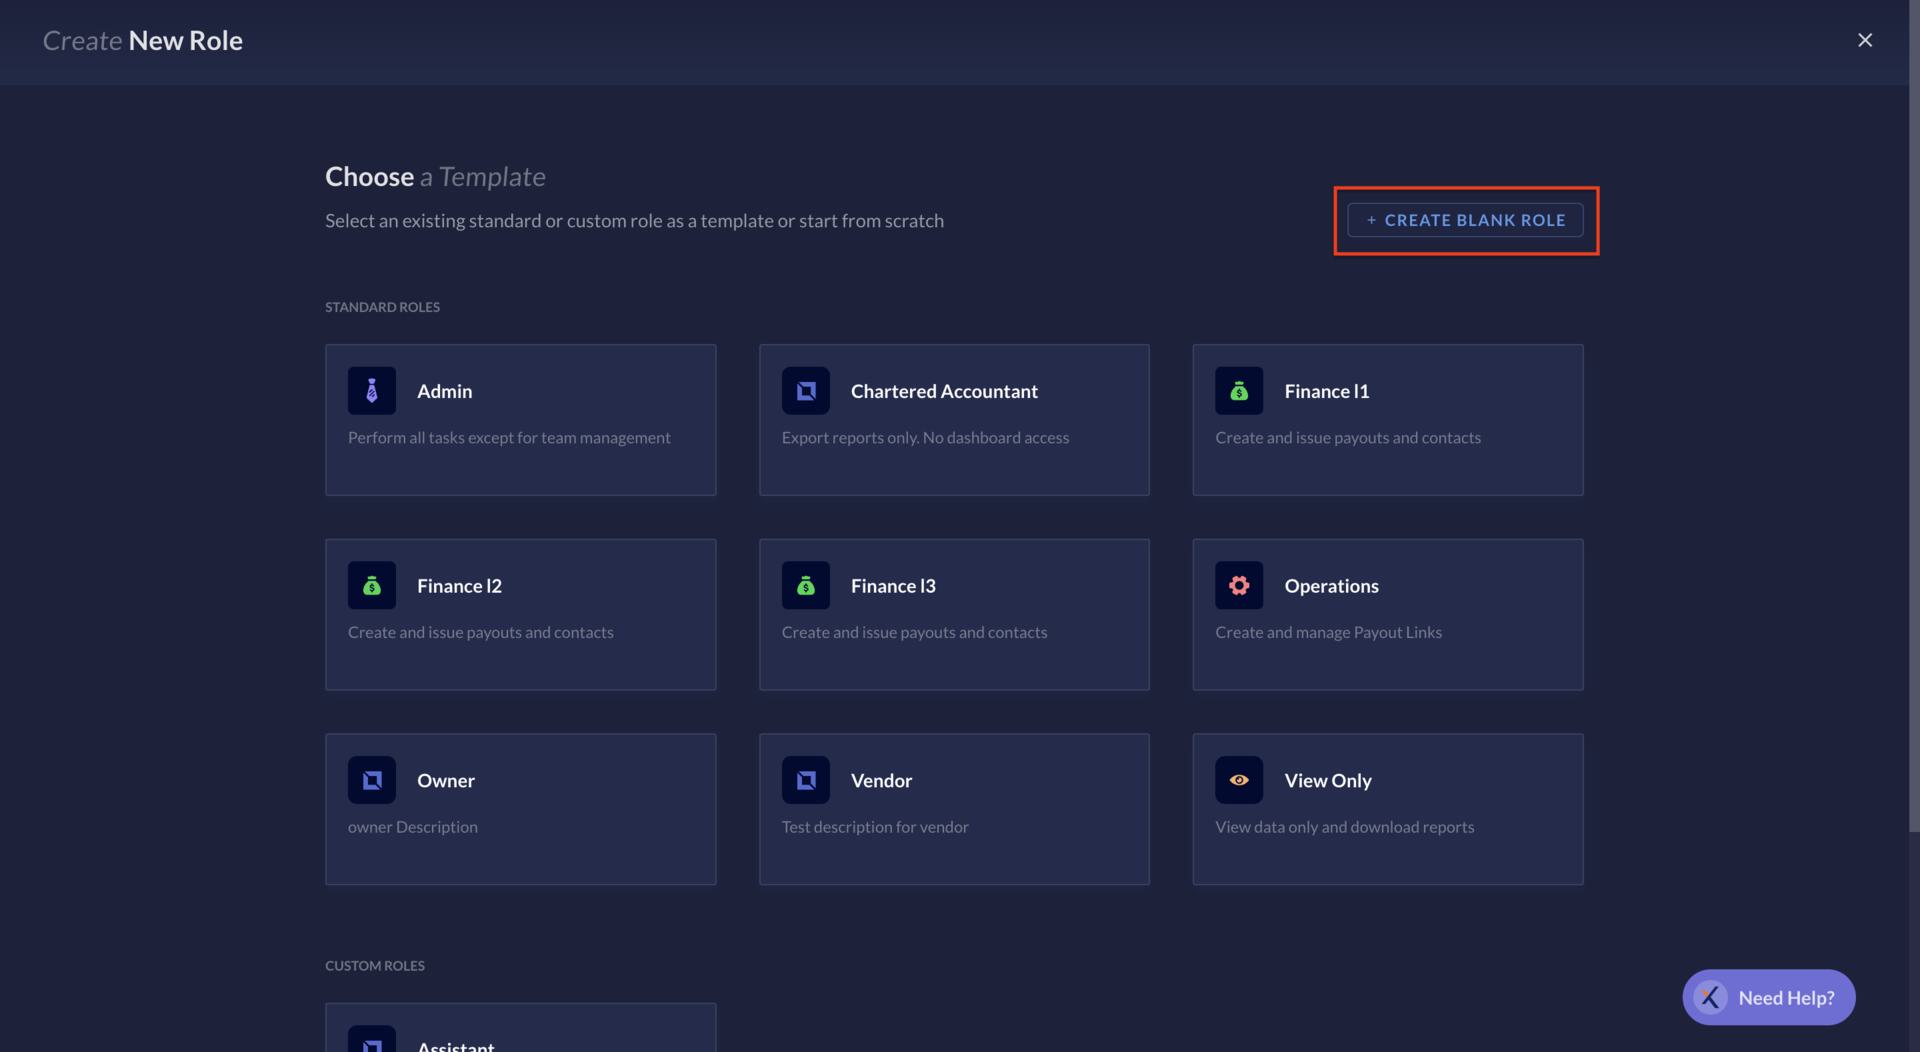
Click + Create New Role. You can click on the templates to view the preset permissions. You can either:
- Duplicate a standard role/existing custom role from the templates available.
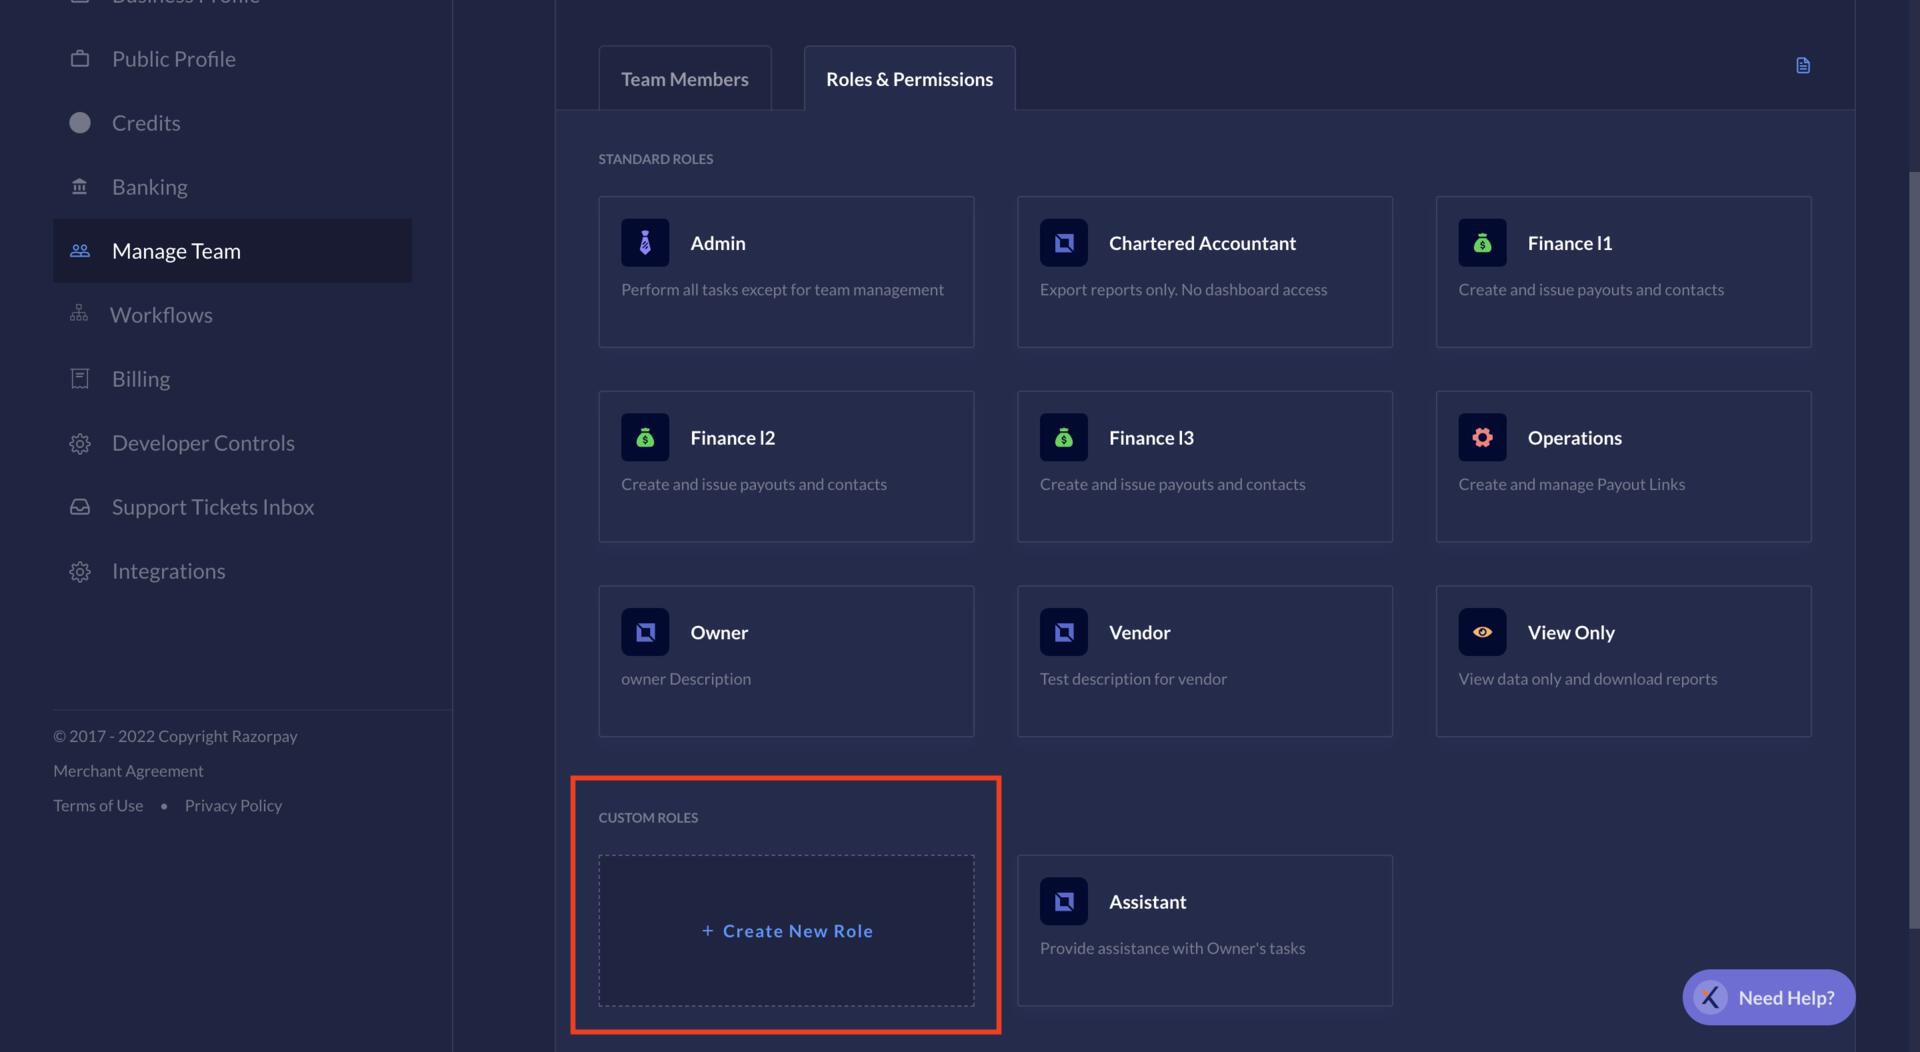
- Click + Create Blank Role, as shown.
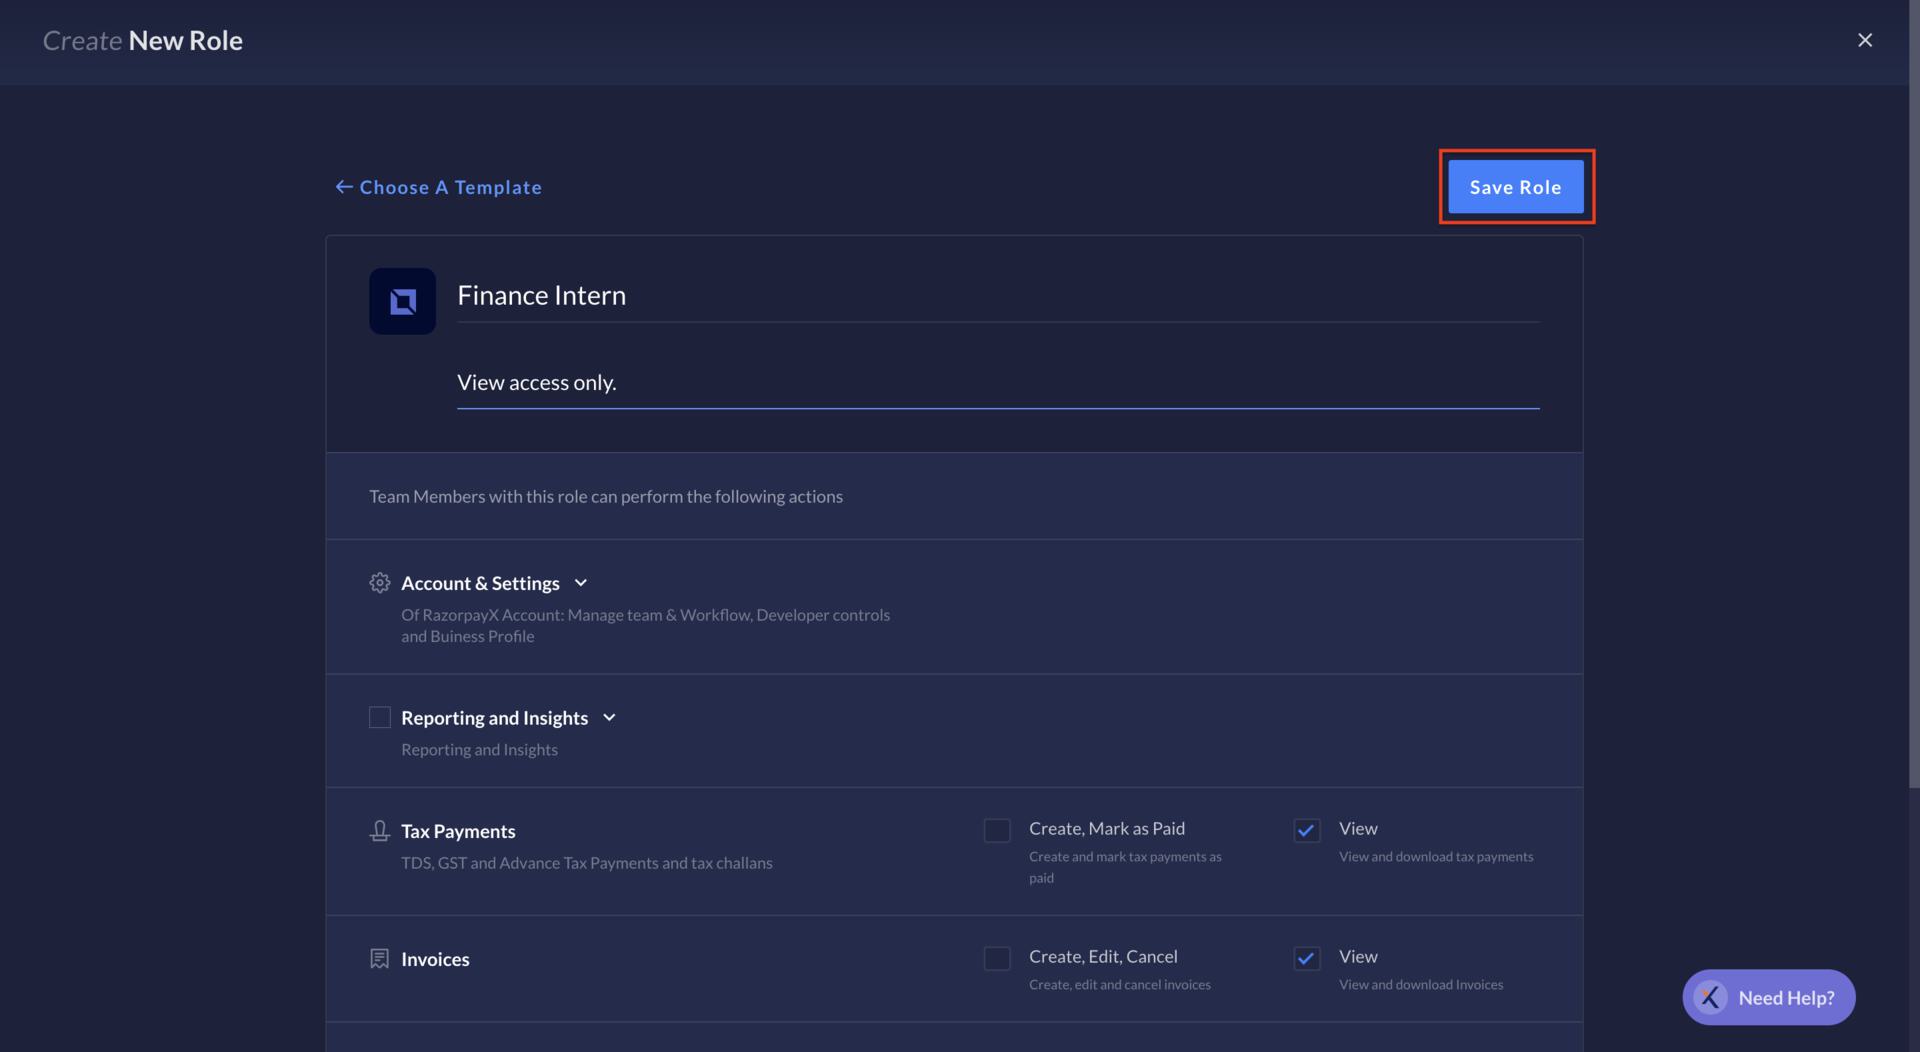
- For the new custom role, provide a name and description, then select the required permissions using the checkboxes.
- Click Save Role. Once the role is successfully created, you can invite a new team member to the role or update the role of an existing team member to the newly created role.
Edit Custom User Roles
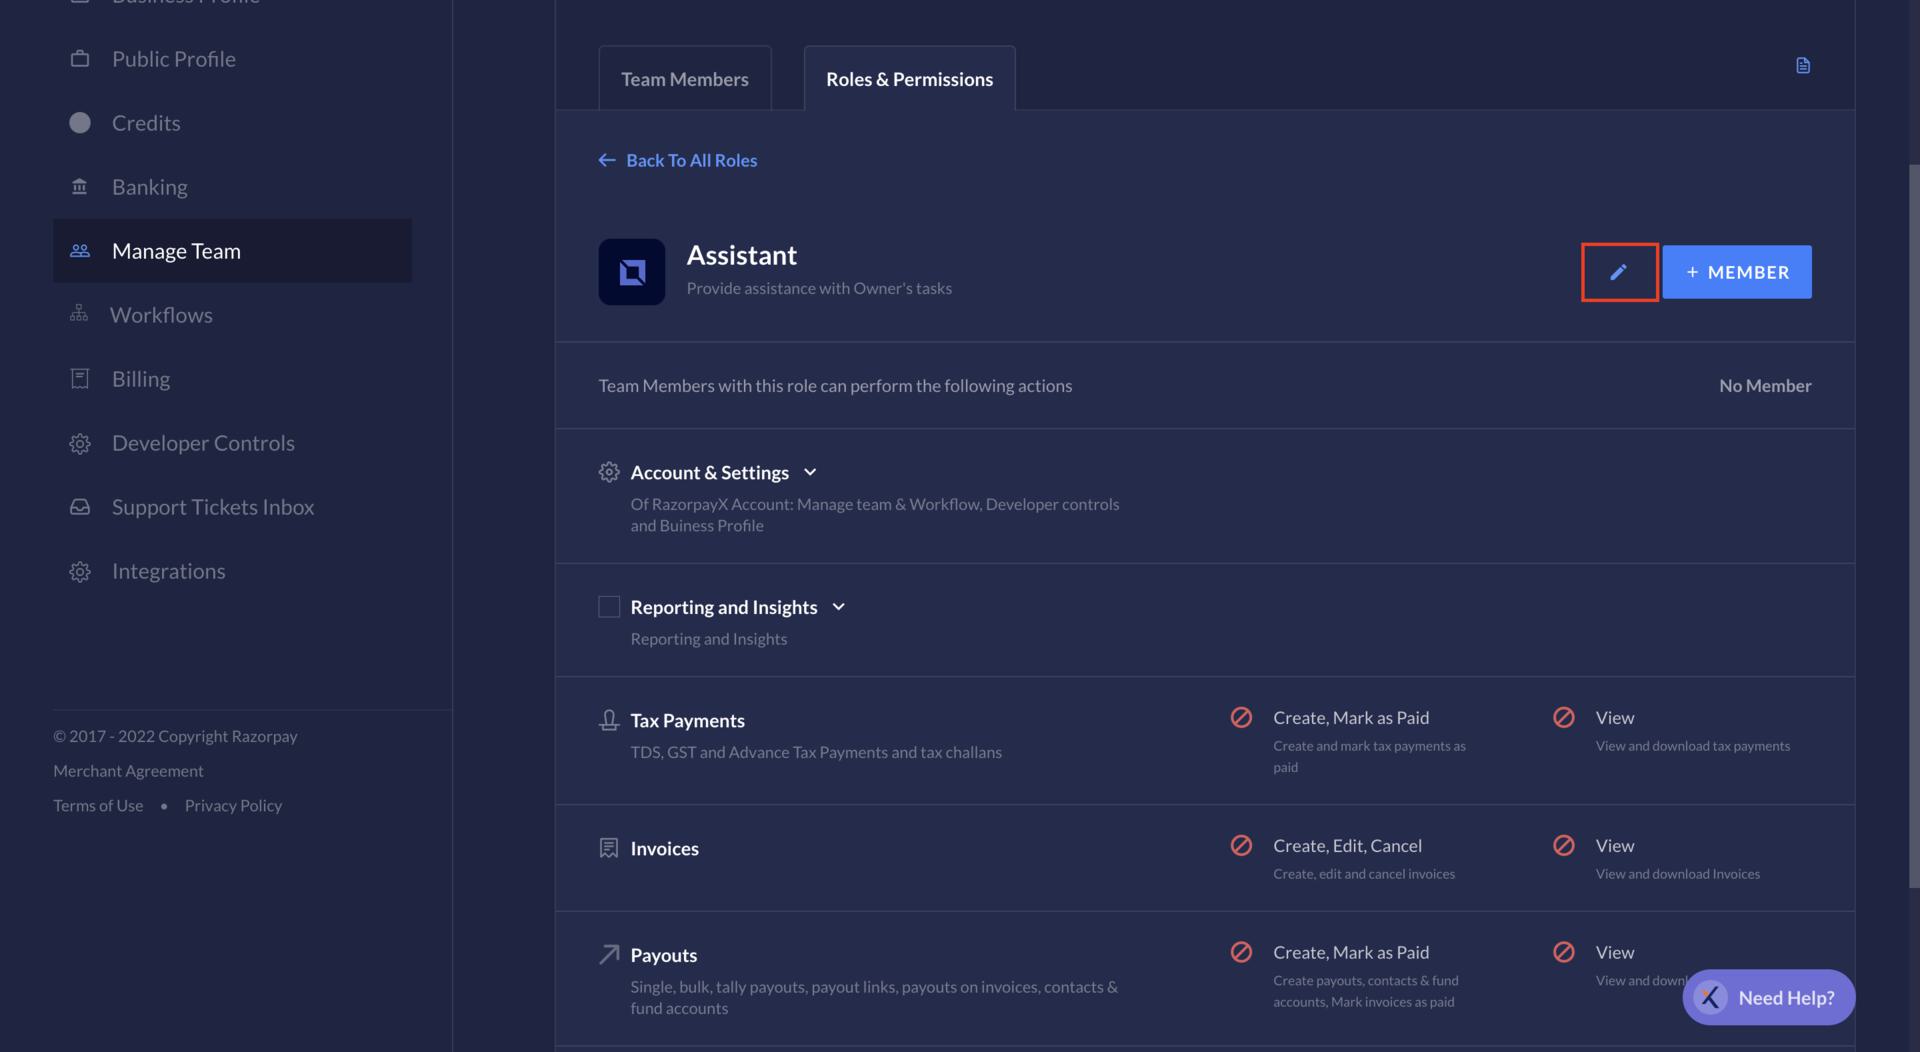
Users can click on any existing role and modify the permissions to update the role, if their role allows them to do so. Usually, the Owner can do this. However, the user cannot edit their own role.- Log in to your RazorpayX Dashboard.
- Navigate to My Account and Settings → Manage Team → Roles & Permissions.
-
Hover over the user you want to edit, click the pencil icon and make the changes.
-
Click Save Role.
- On the pop-up, click Save Changes.