Available in🇮🇳 India
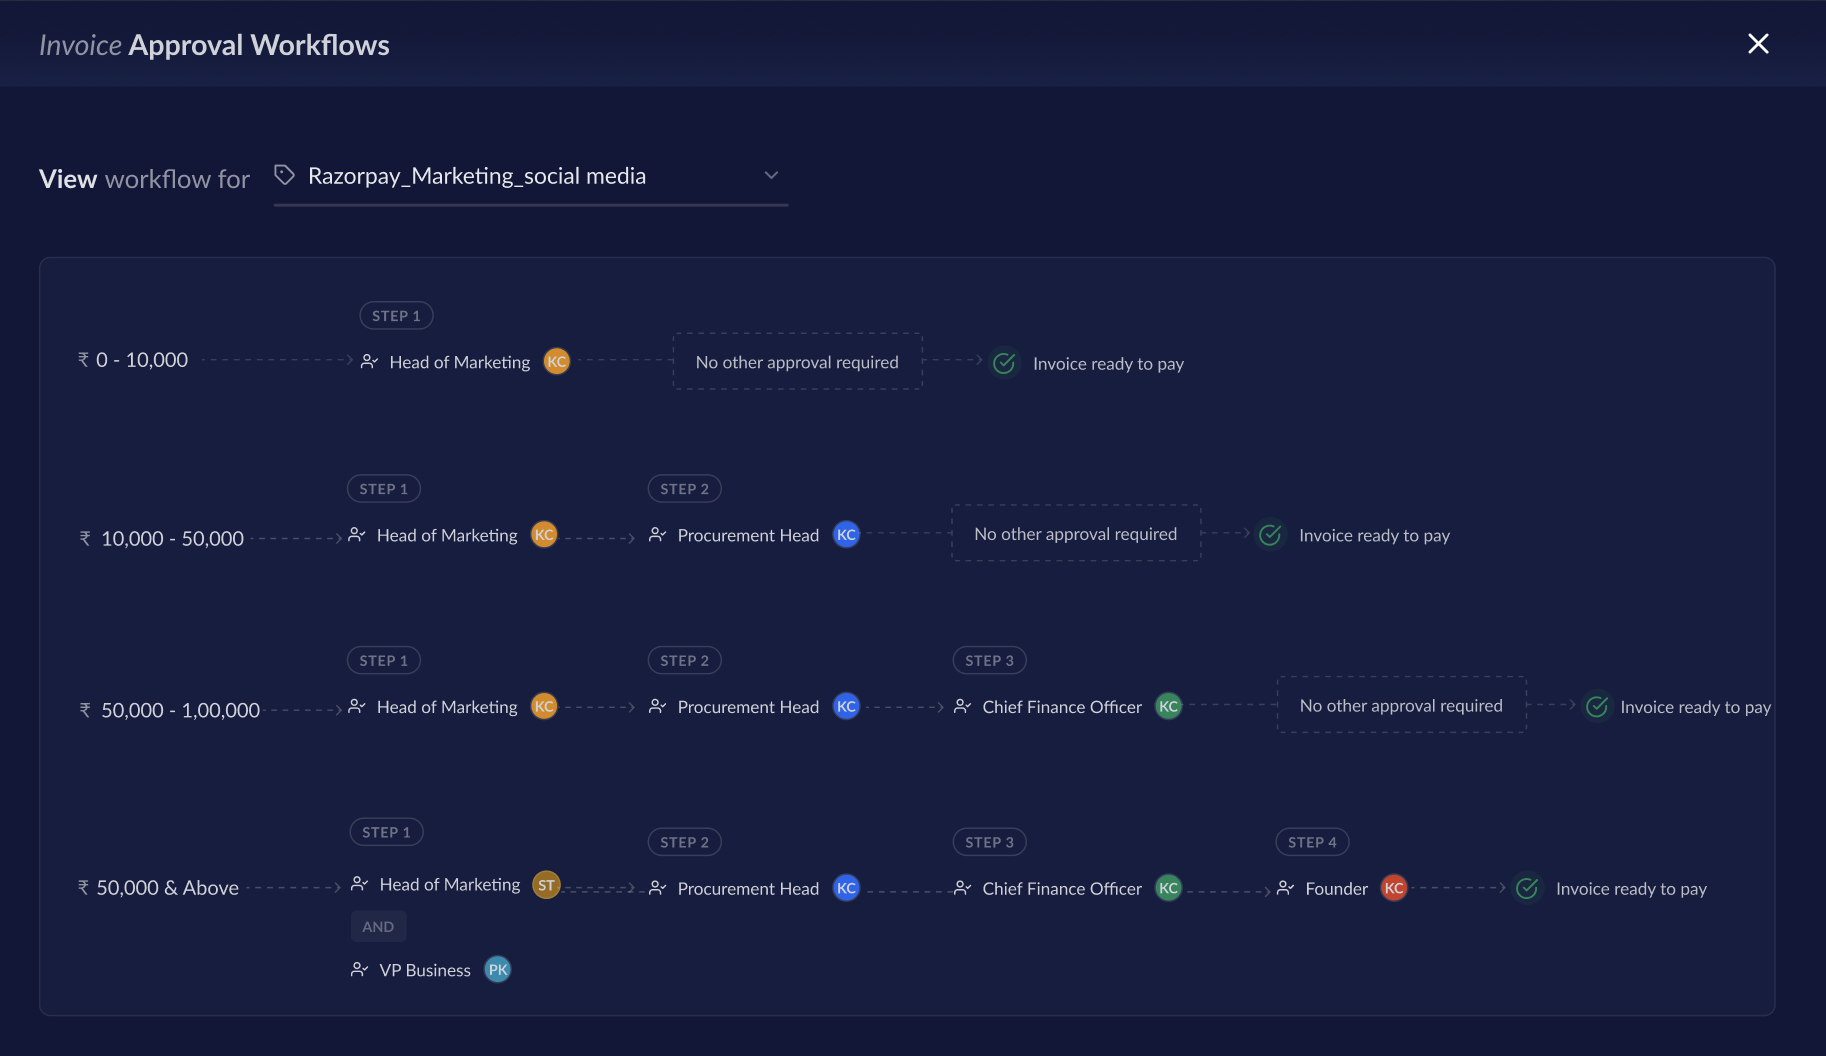
This approval workflow is based on the cost center that you have linked to your invoice. You can add a cost center to your invoice at the time of creation and the workflow linked to that cost center for an invoice will become applicable to your invoice.
You can contact support to setup this approval workflow and assign it to relevant team members.
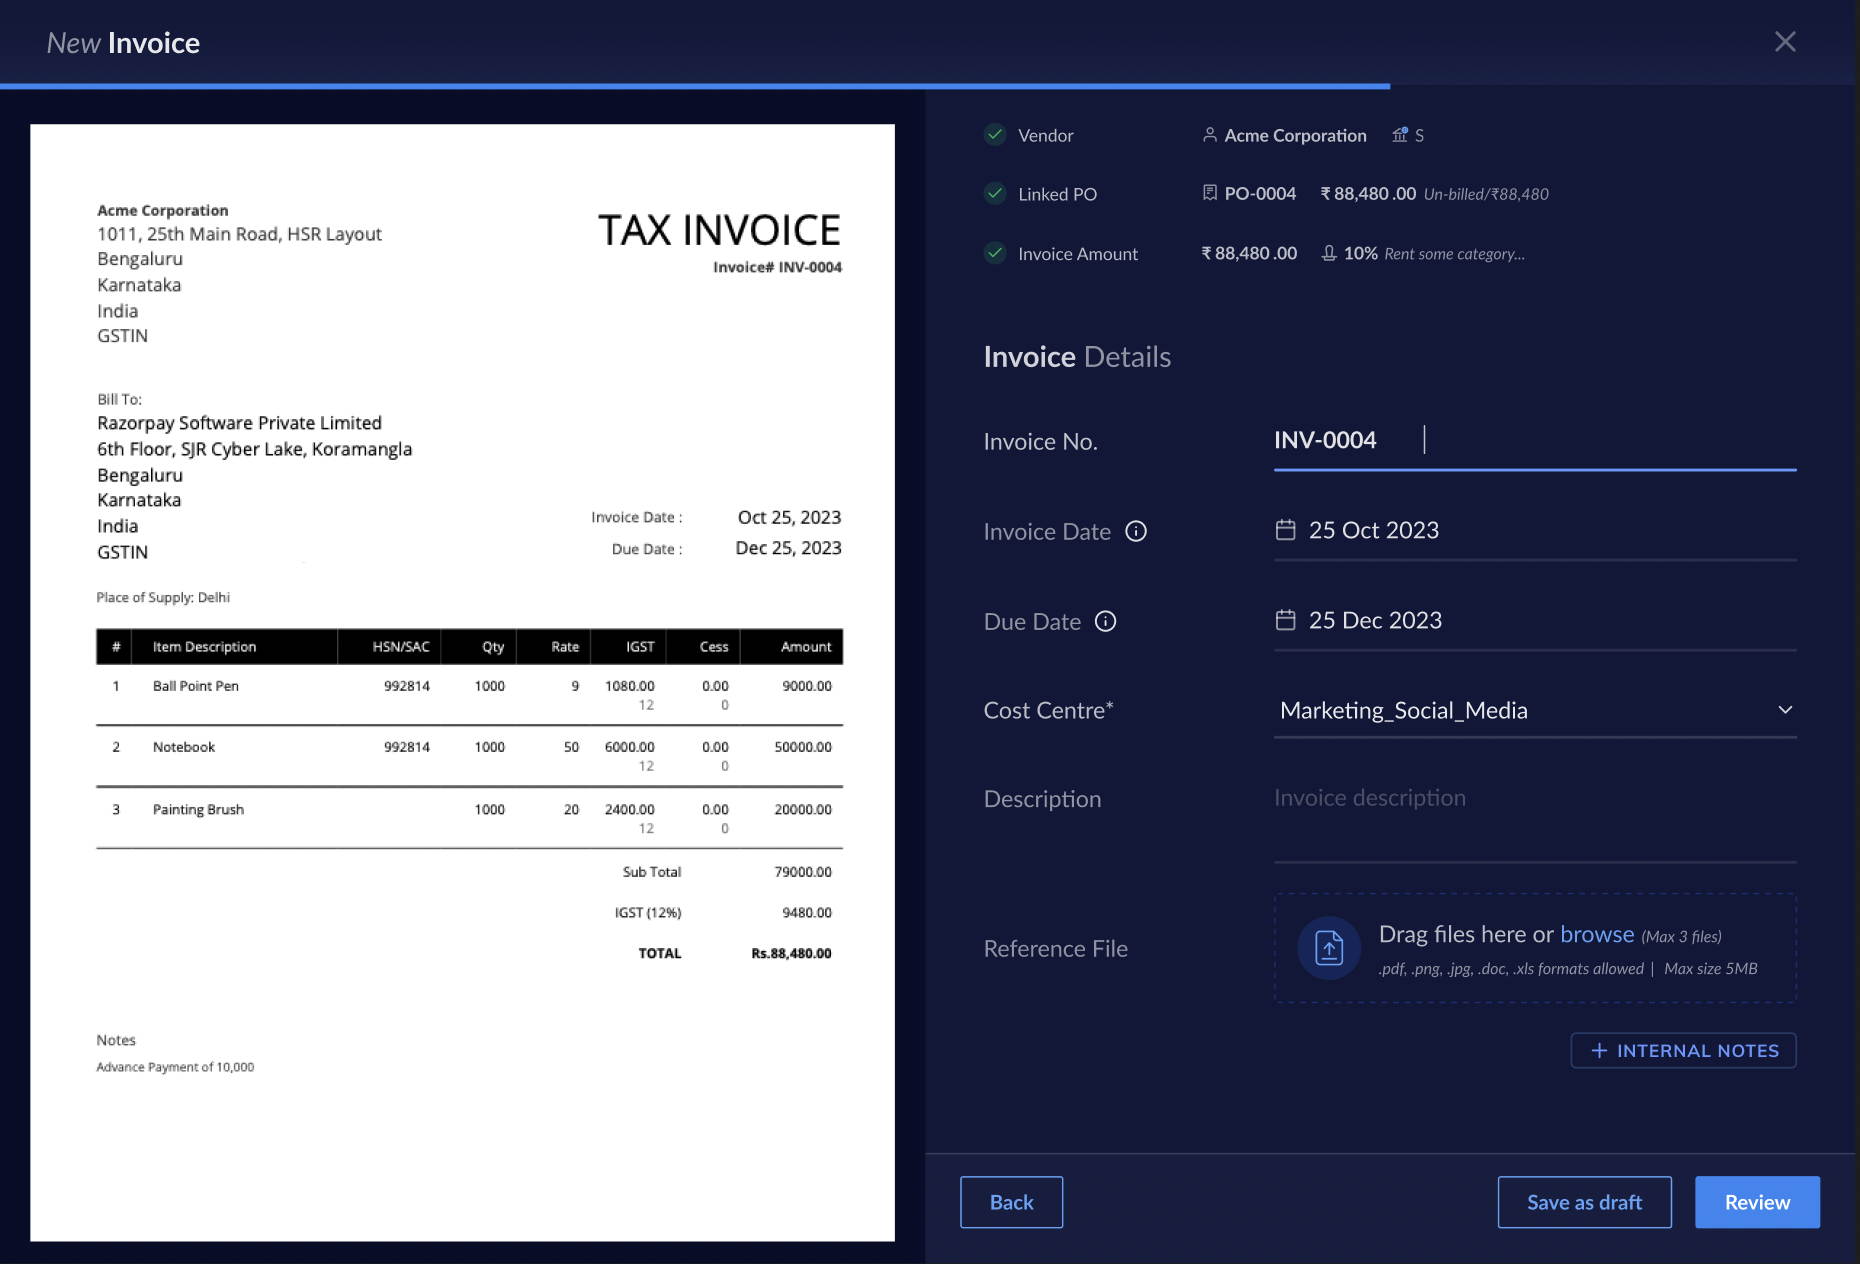
While creating or adding an invoice, you can Link PO and add a Cost Center in the Invoice Details section.
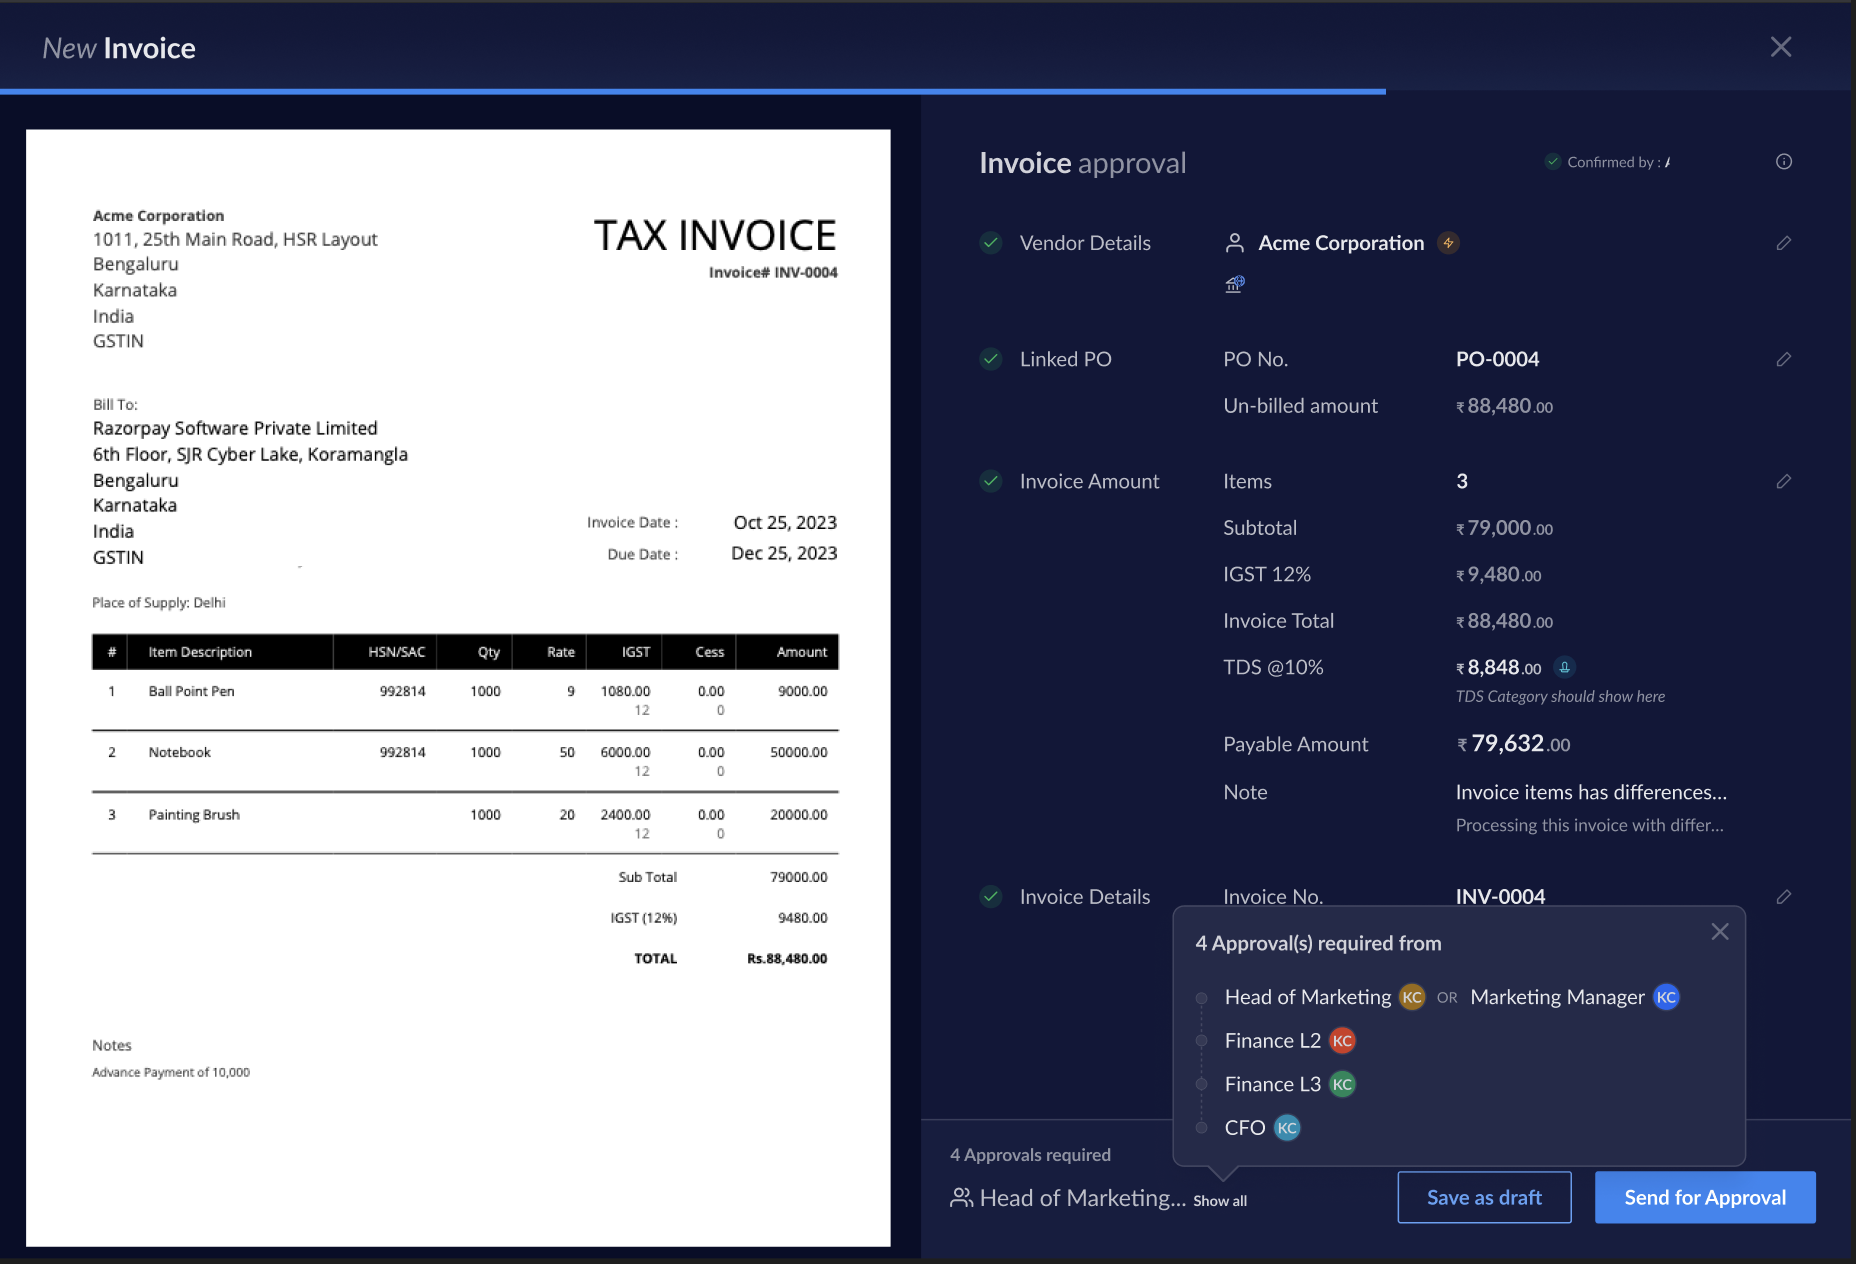
 After adding the cost center when you review the final invoice details, you can hover over Show all at the right-bottom of your screen to view the set approval cycle. Click Send for Approval.
Approving an Invoice
Approving an Invoice
To approve or reject an Invoice:
- Log in to the RazorpayX Dashboard.
Handy TipsYou can either find the Invoices waiting for your approval on the Dashboard or follow the steps below.
- Navigate to Vendor Payments → Invoices.
- Hover over the required Invoice
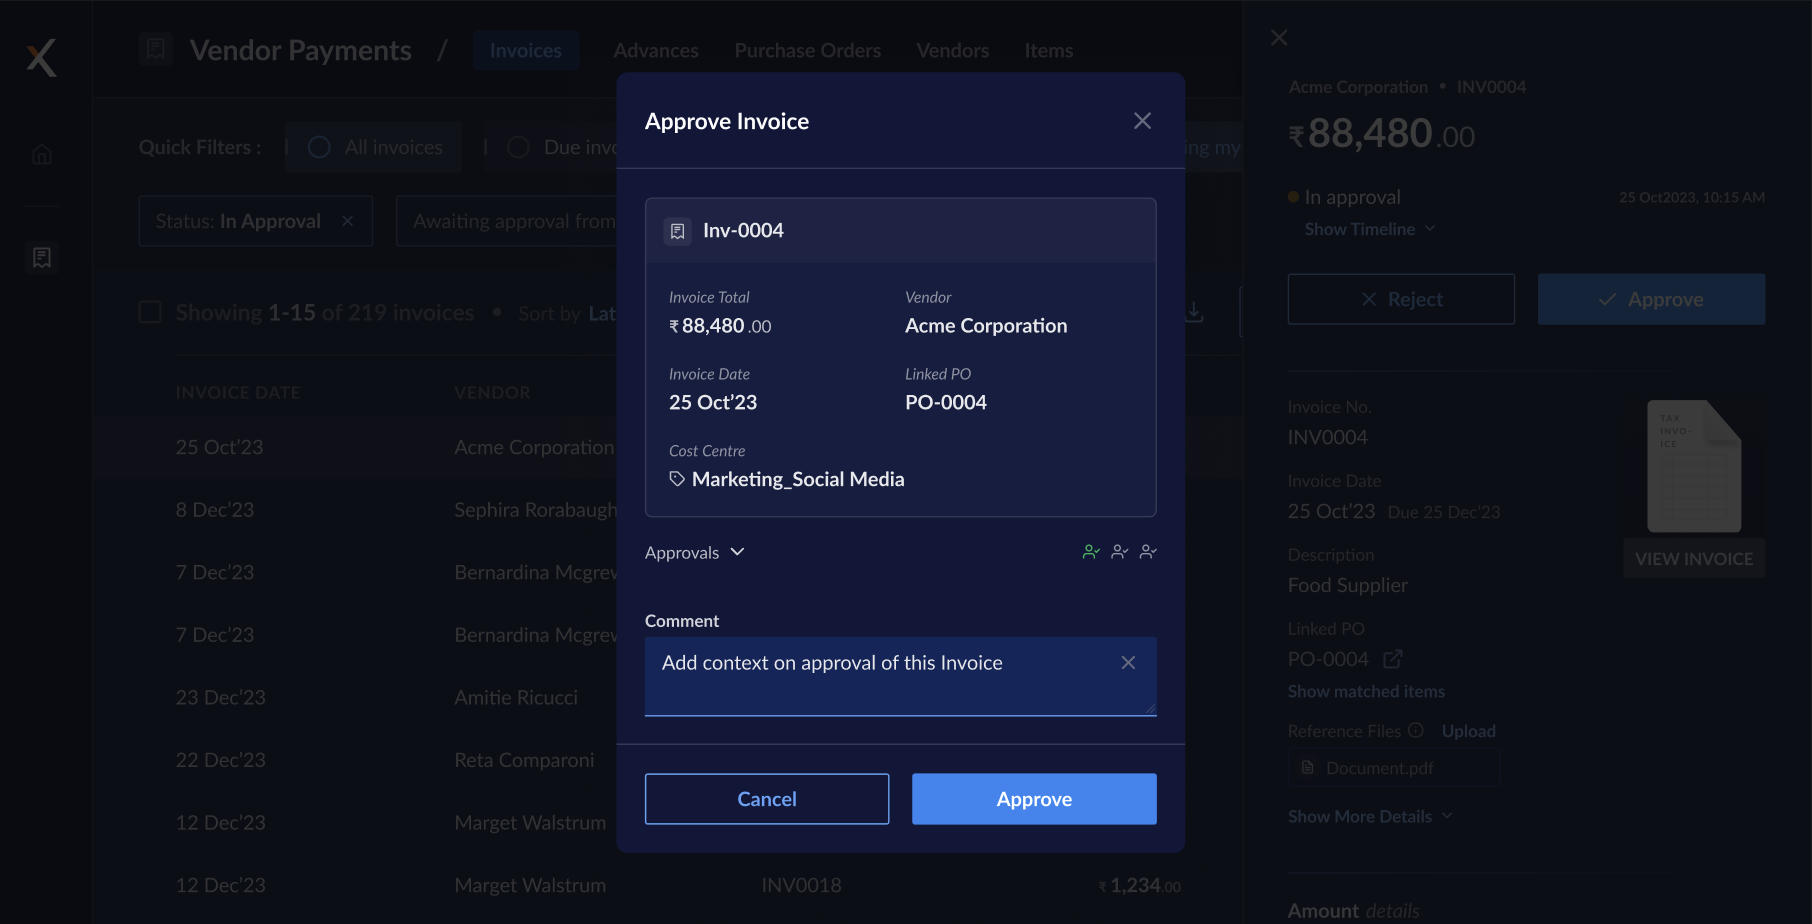
In Approvaland click APPROVE or REJECT or select it to view more details and click APPROVE or REJECT on the right-pane.- If you click APPROVE, the following screen appears. Enter comments and click Approve.
- If you click REJECT, enter the reason for rejection and click Reject.
- If you click APPROVE, the following screen appears. Enter comments and click Approve.
View the Invoices Workflow
To view the approval workflow after the setup:- Log in to the RazorpayX Dashboard.
- Navigate to the profile icon → My Accounts & Settings → Workflow → Invoices.
- Click View Workflows and select the cost center for which you want to view the workflow.