Available in🇮🇳 India
A Purchase Order (PO) is a crucial document in the world of business and commerce. It serves as a formal request made by a buyer to a supplier or vendor to acquire goods or services.
Advantages of Purchase Order
Advantages of Purchase Order
Purchase orders play a vital role in the procurement process by helping both parties, the buyer and the seller to:
- Ensure your planned expenditure does not exceed.
- Maintain clarity and accountability.
- Provide as a legal record of the agreement.
- Facilitate efficient inventory management.
- Track expenses and provide resolution for any potential disputes.
Purchase Order Life Cycle
Purchase Order Life Cycle
Given below are the different states of a Purchase Order.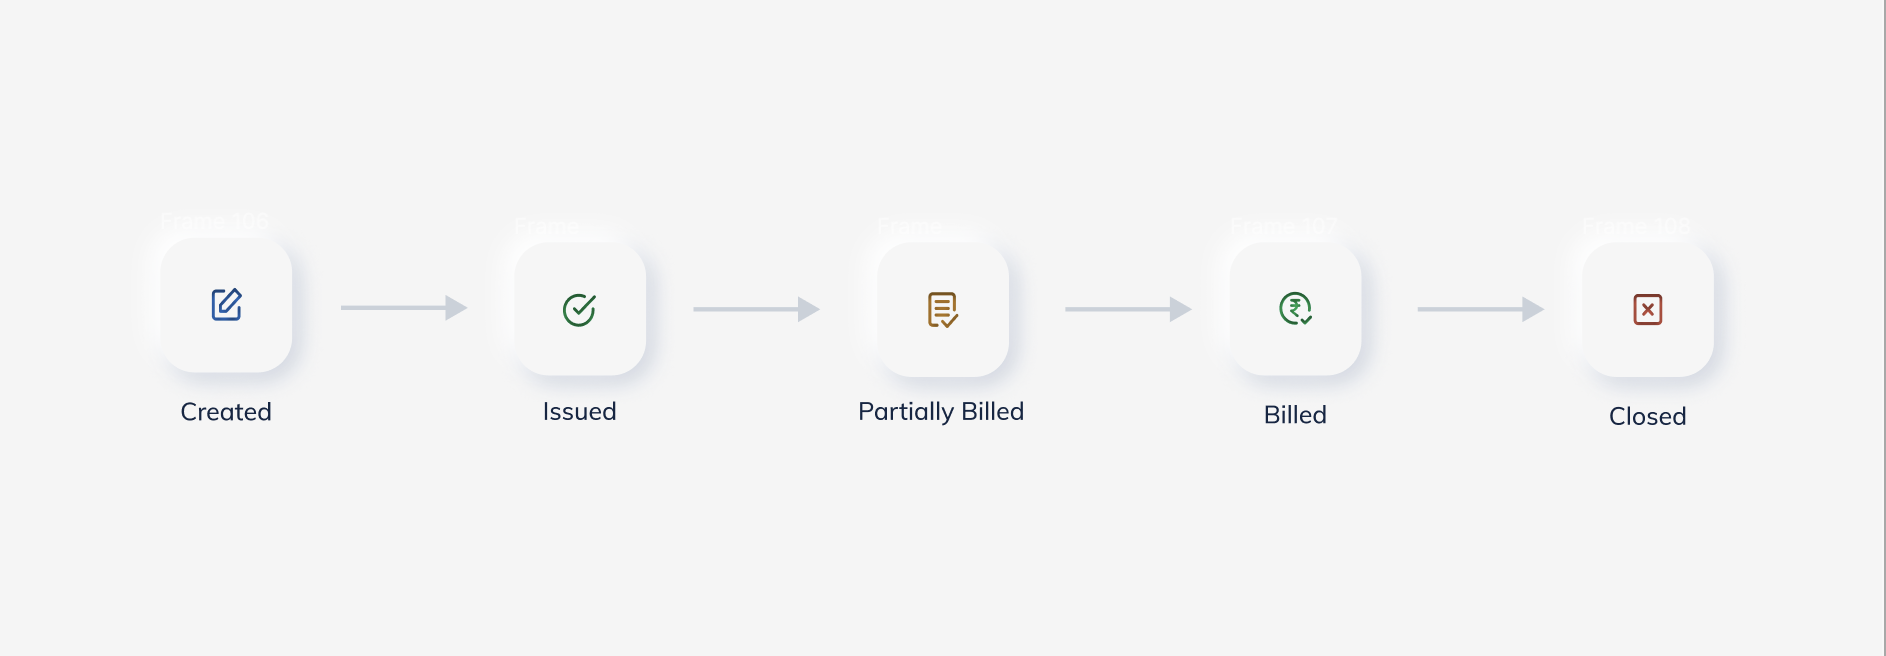
How it Works
You can initiate a Purchase Order, share it, link it to the payments, all from the RazorpayX Dashboard.- Create a Purchase Order.
- Send the Purchase Order to the Vendor.
- Link the Purchase Order to the respective invoice and advance payments.
- Close the Purchase Order.
Add Purchase Order
To add a Purchase Order:- Log in to the RazorpayX Dashboard.
- Navigate to Vendor Payments → Purchase Orders.
- Create new PO or Upload existing PO.
Create Purchase Order
Before creating your first Purchase Order, set your Billing Address via Branches that will appear on the header of the Purchase Order. You can add only 1 billing address. Shipping Address is the same as billing address by default. De-select the Same as billing address check box if you want to add a different shipping address. Enter the required details and click Save. Once the addresses are saved click Done.- SELECT a vendor or add NEW VENDOR. It is optional to + Add Address of the vendor. Enter the required details and click Save.
- Select or deselect the GST applicable vendor, as required. Enter the GSTIN.
- Review the address, you can Edit or click Next.
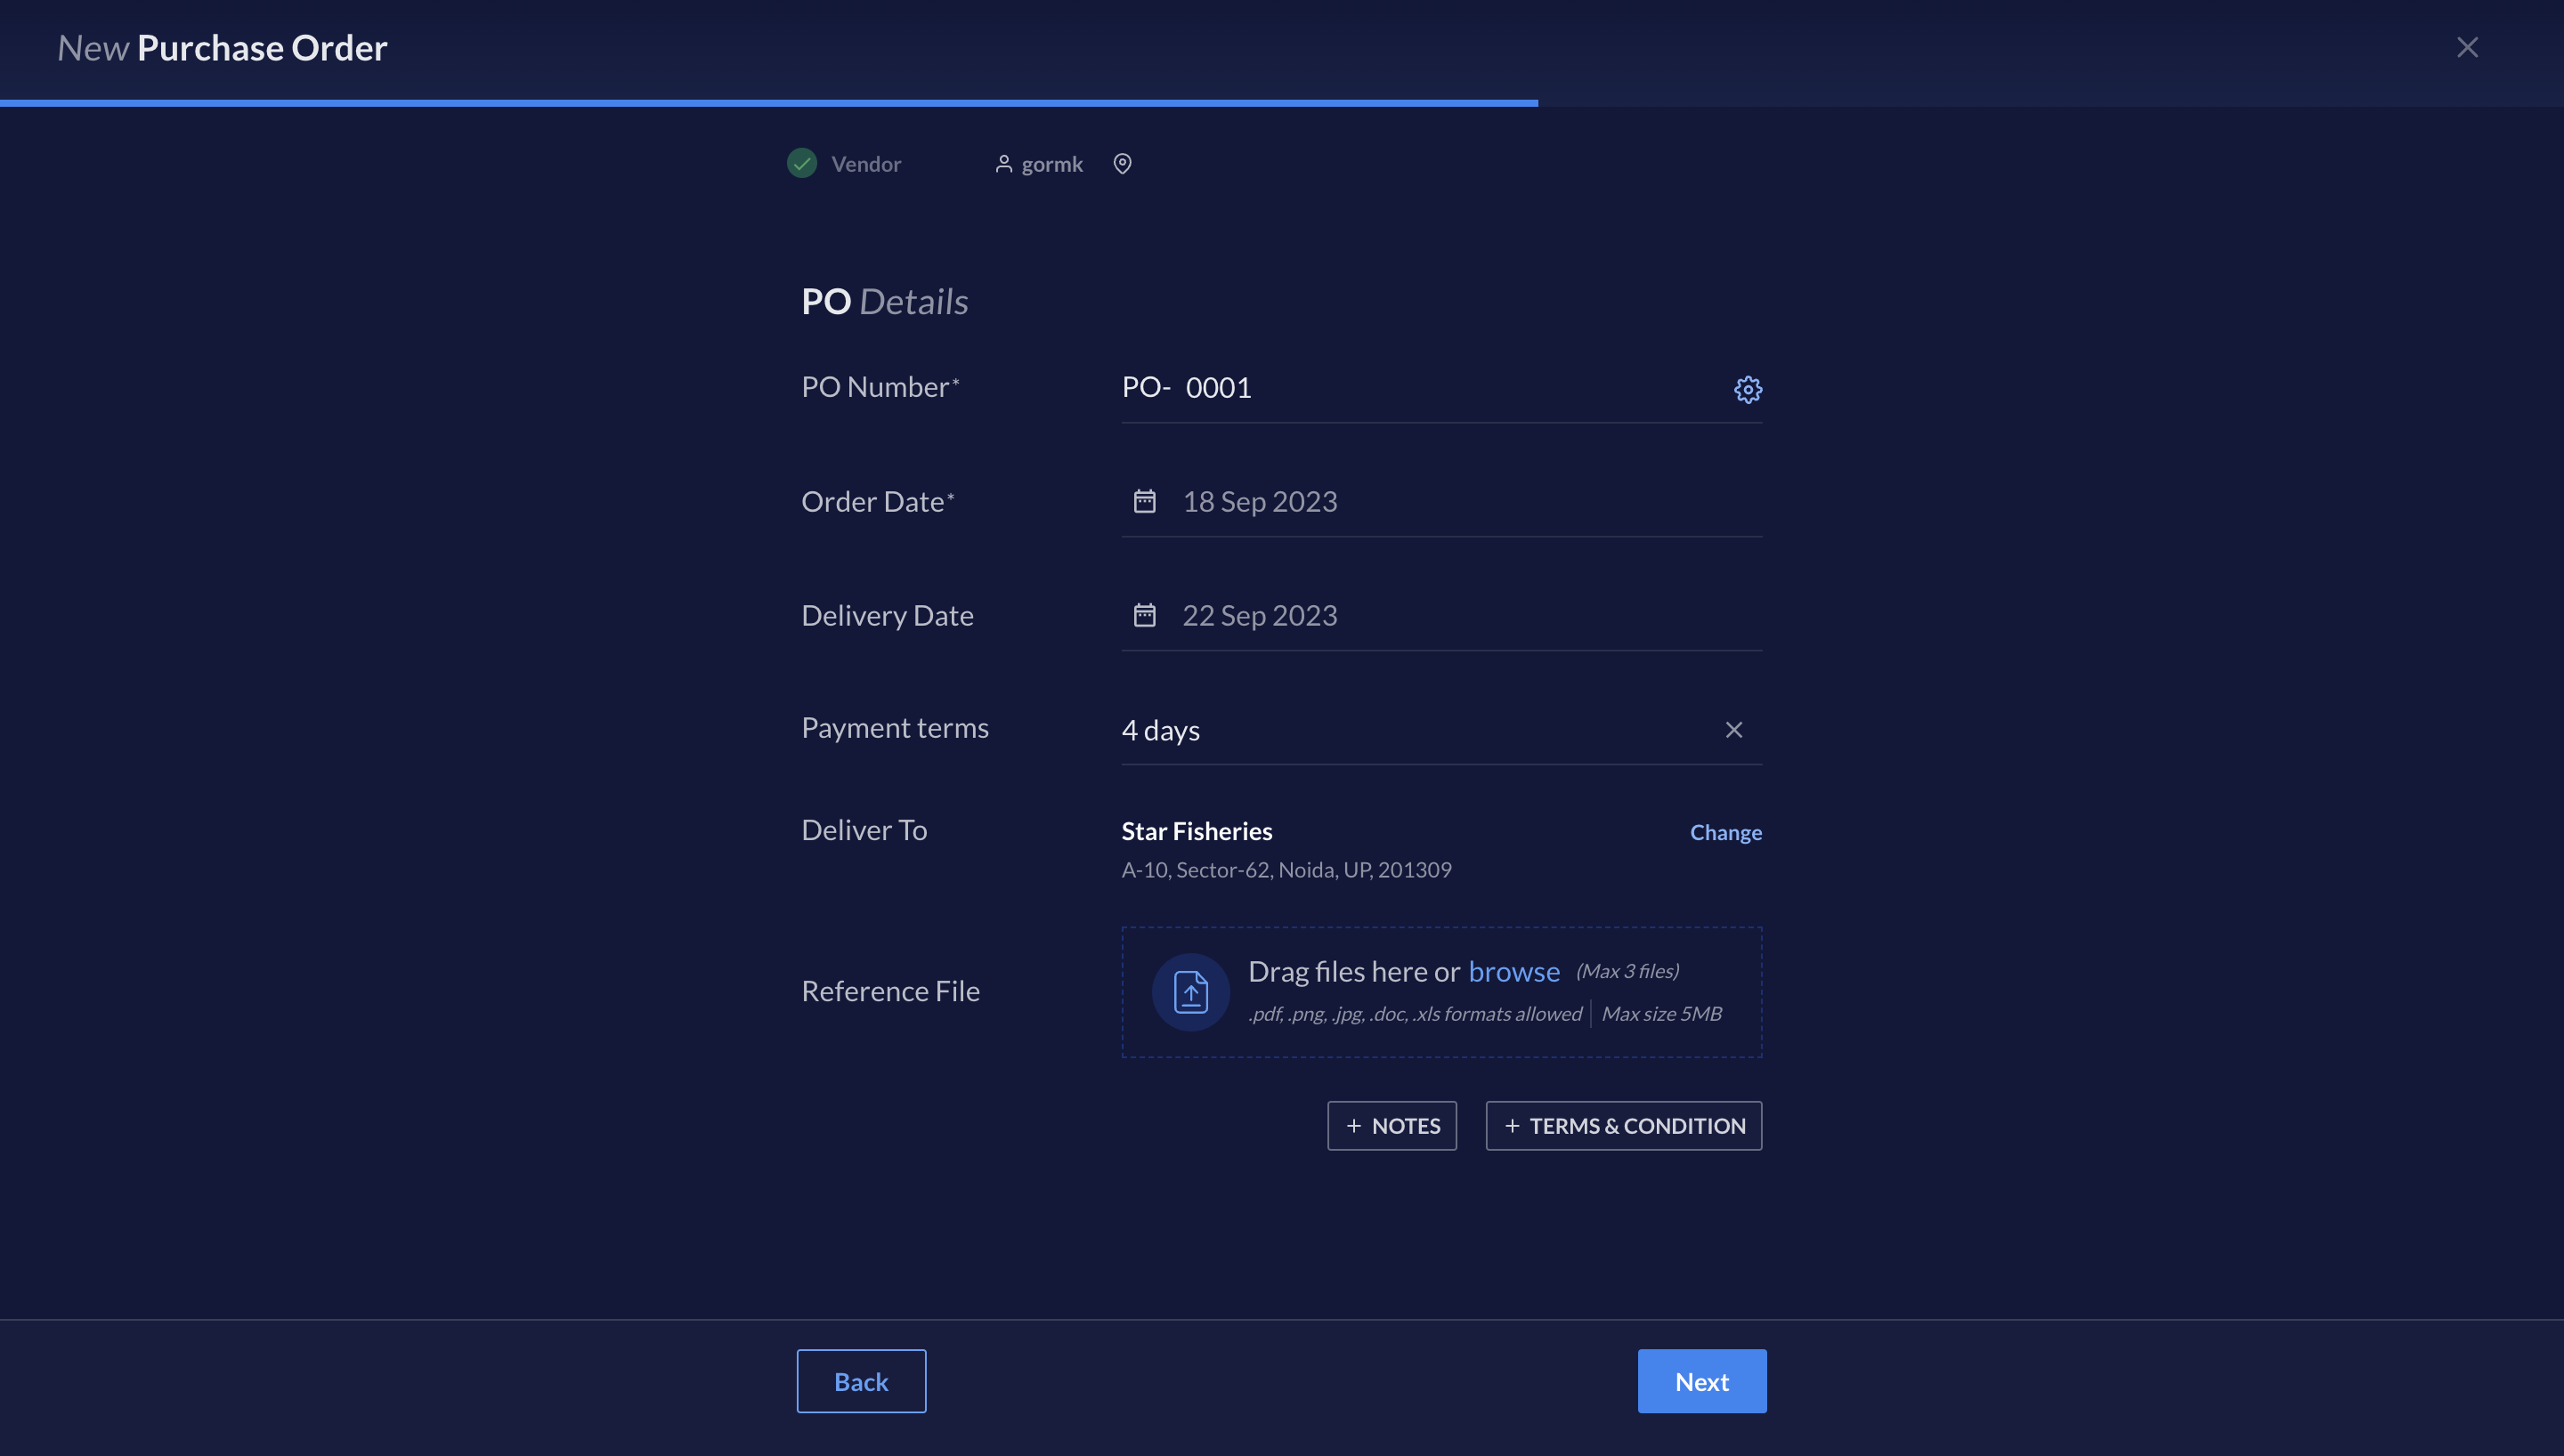
- Enter the PO Details as given below. Select the relevant Cost Center and click Next.
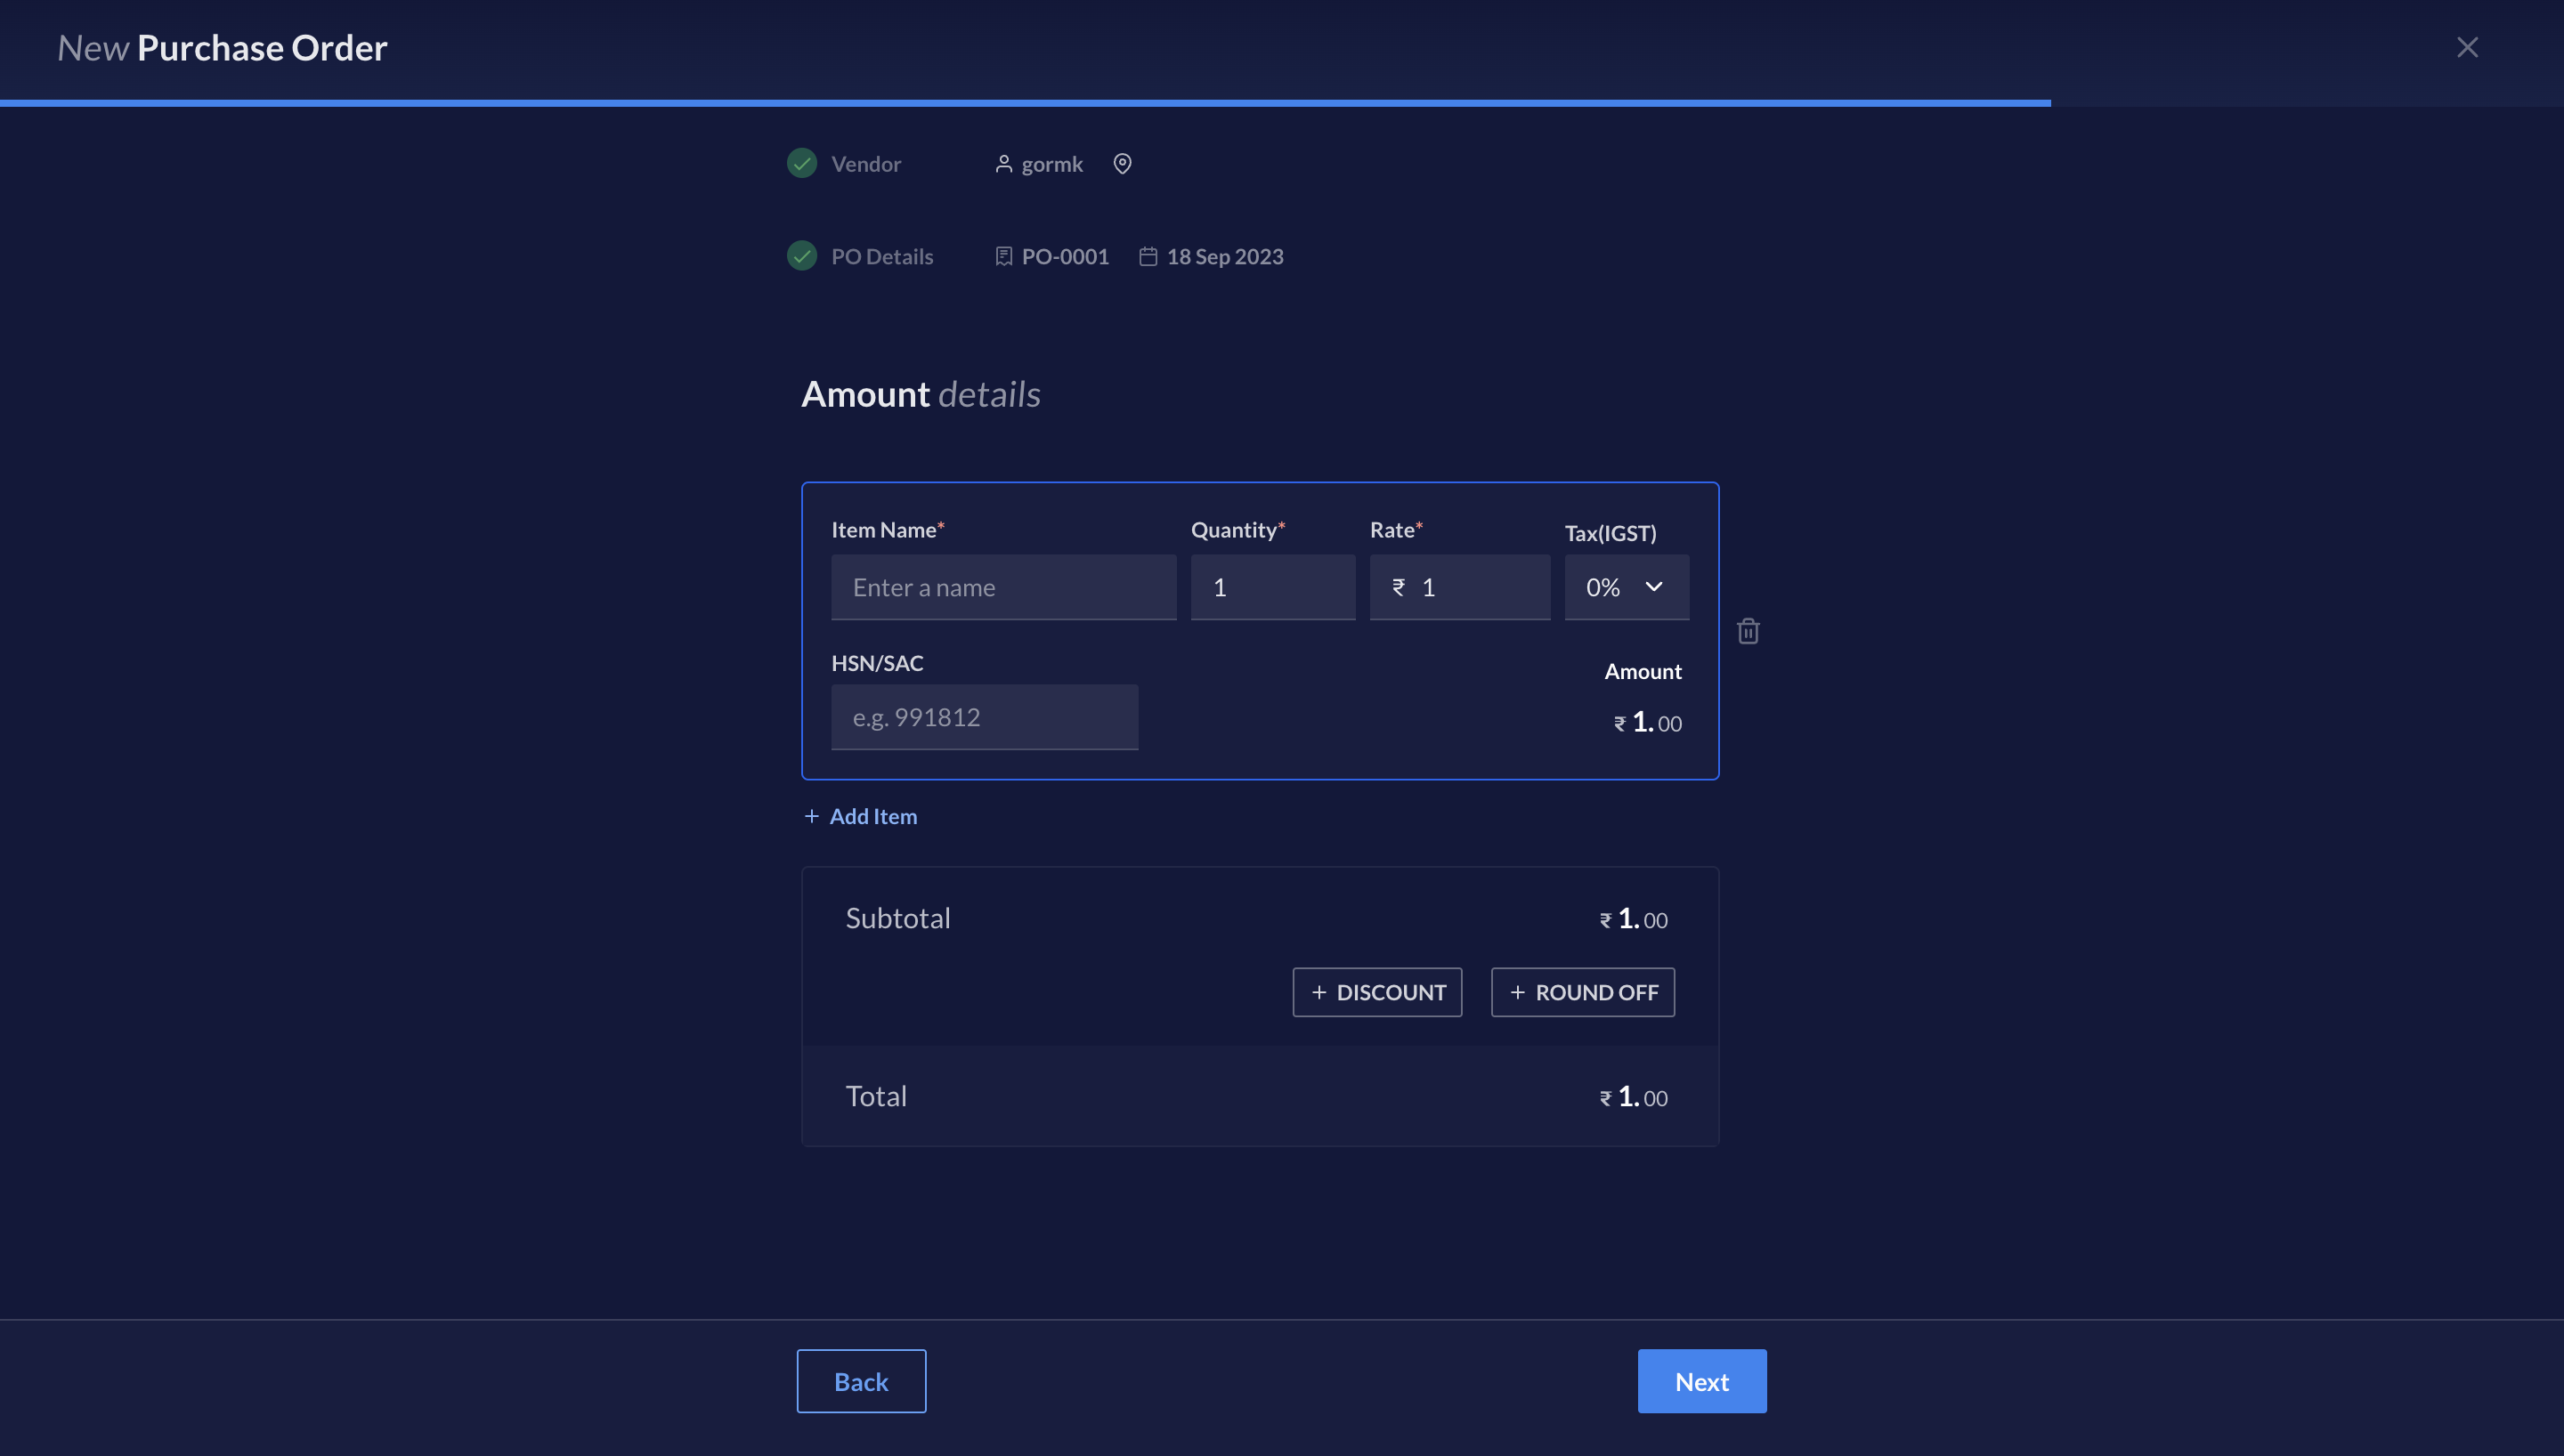
- Enter and verify the Amount details and click Next.
- Review the Purchase Order. You can Edit details, Save & close or Save & Send the Purchase Order.
Issue the PO to the vendor.
Upload Purchase Order
Click Upload PO. Select the file from your computer and click open or drag and drop the file. RazorpayX reads the uploaded file and you can review the PO. You can Edit details, Save & close or Save & Send the PO if required.Send Purchase Orders to Vendors via Email
- Log in to the RazorpayX Dashboard.
- Navigate to Vendor Payments → Purchase Orders.
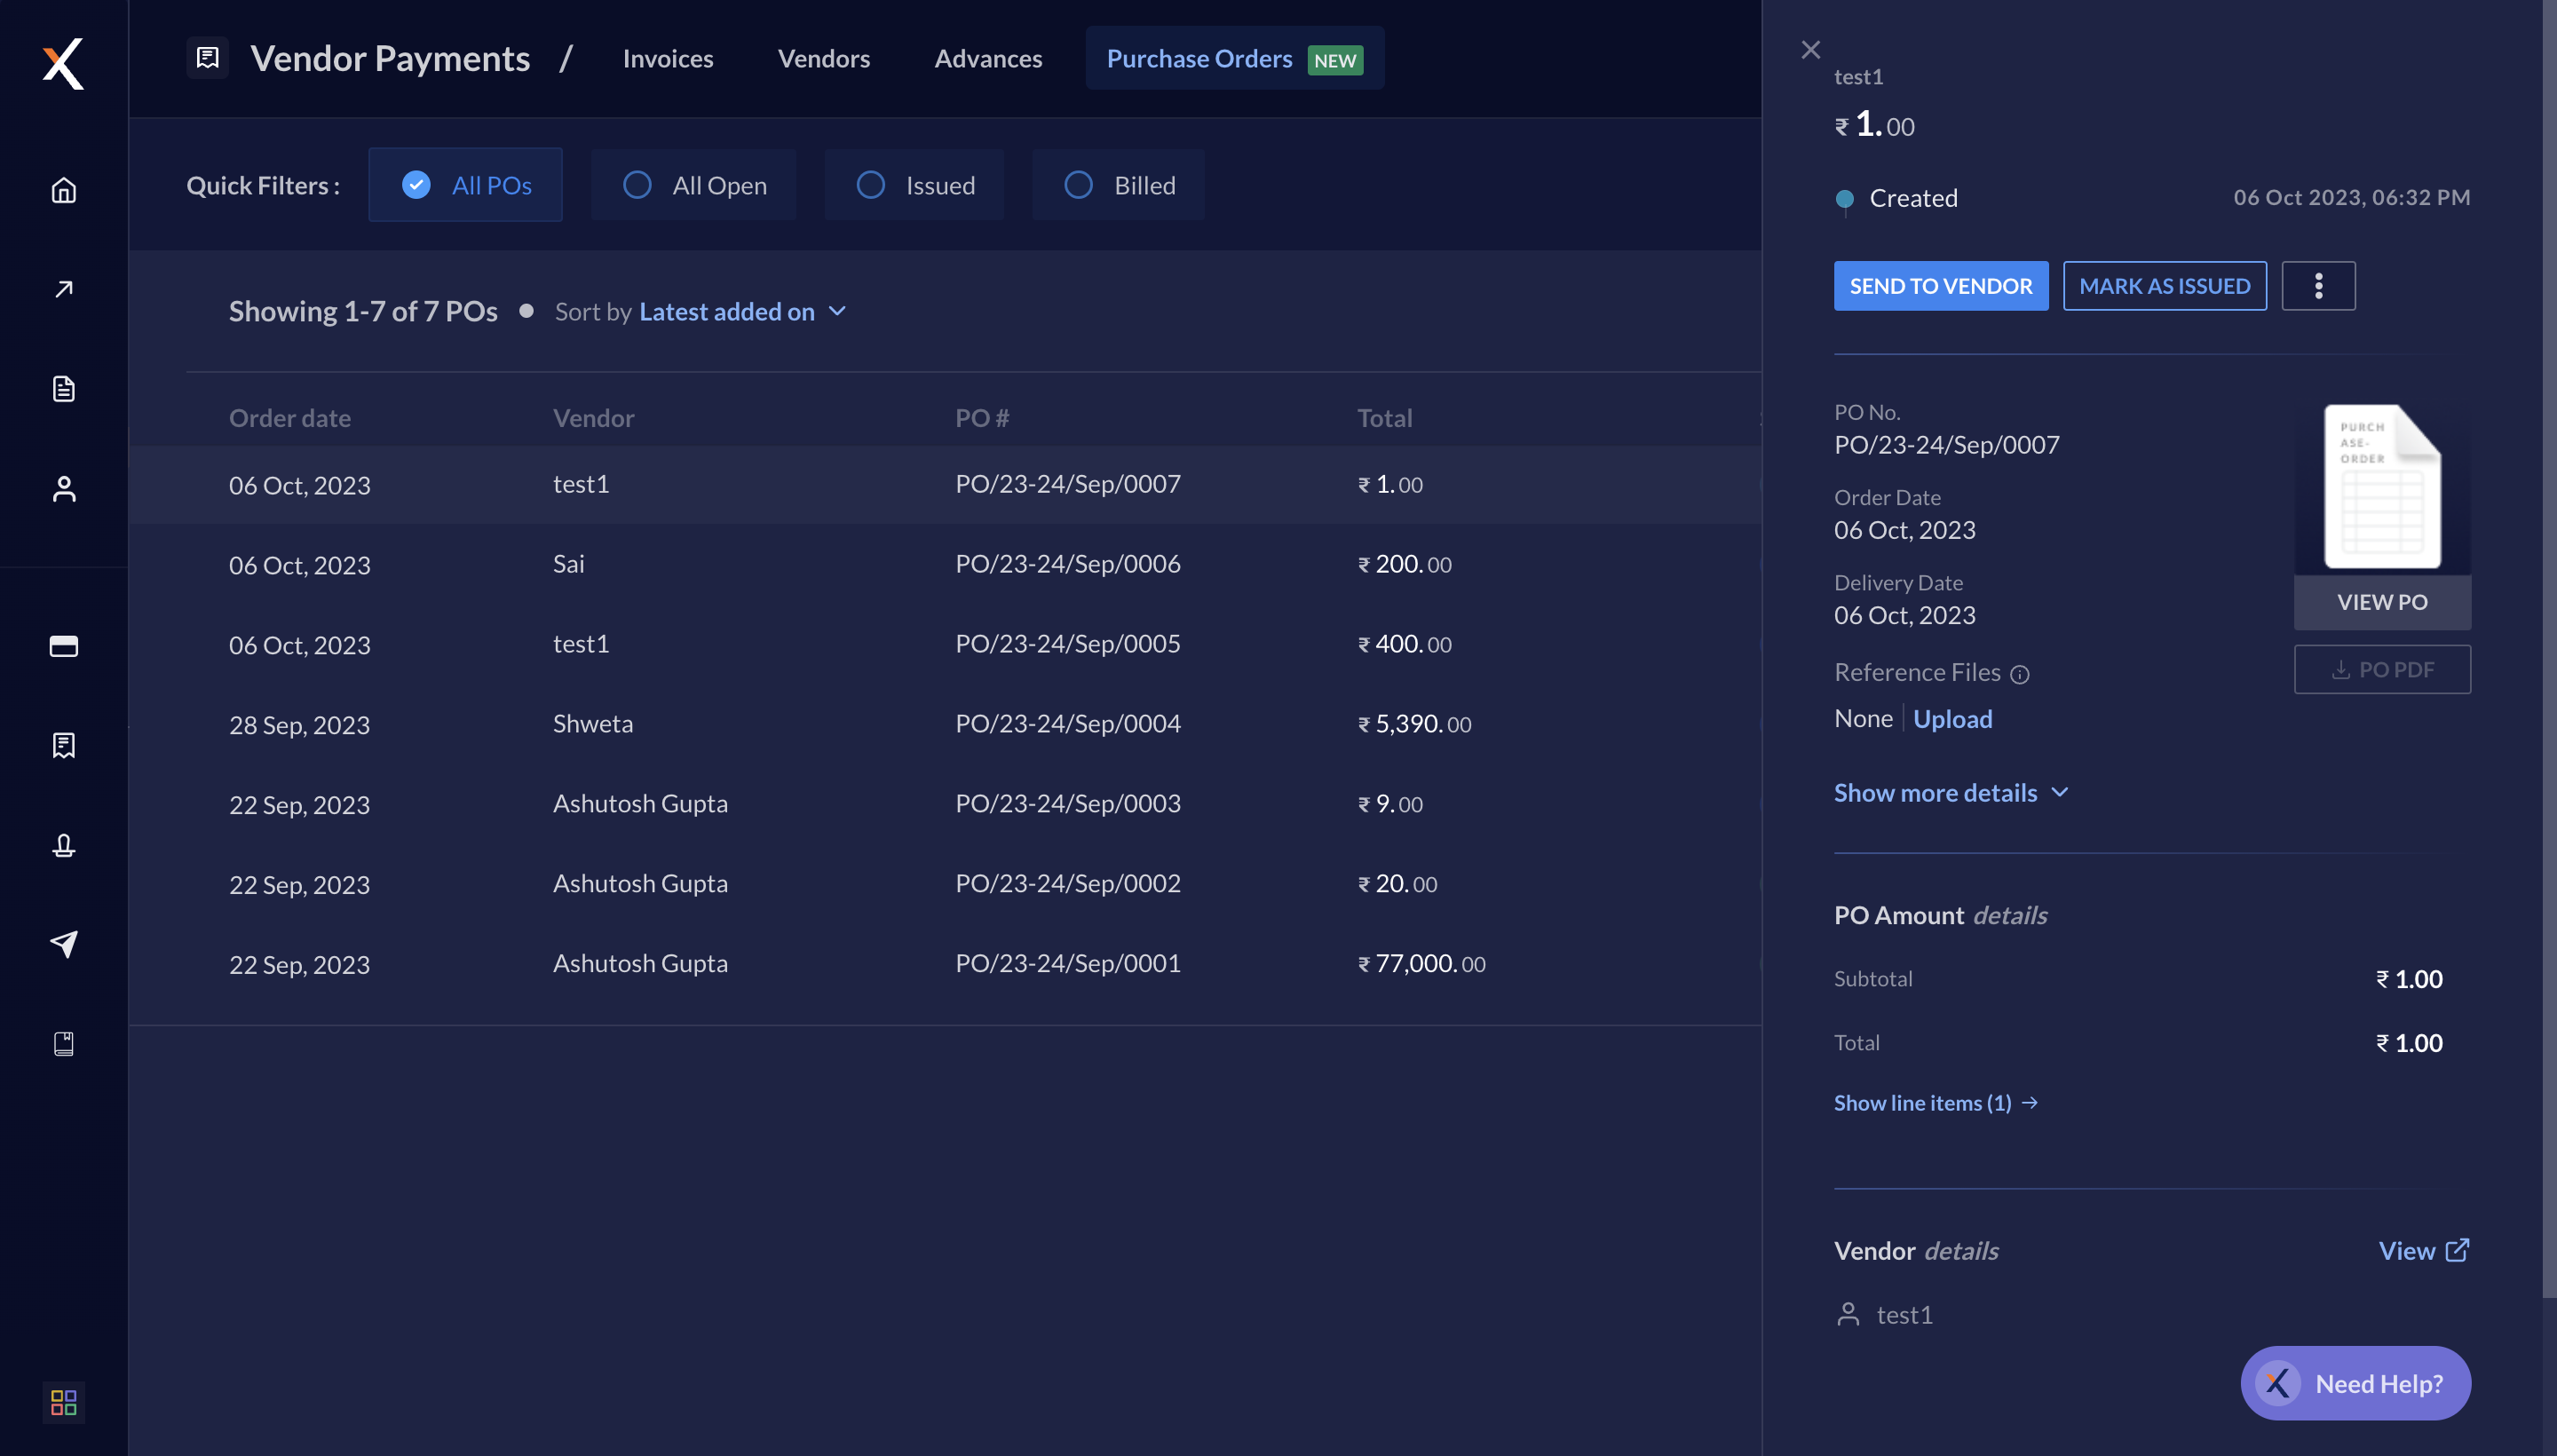
- Select the Purchase Order that you want to share with your vendor. In the right pane, click SEND TO VENDOR.
- Enter the email id and click Send PO.
Issued.
Mark as Issued
If you choose to Save & close the Purchase Order and decide to share it through another platform, you can manually mark the Purchase Order issued. You cannot edit a Purchase Order after issuing it. You can pay advances or link the Purchase Order to an invoice only after it isissued.
- Log in to the RazorpayX Dashboard.
- Navigate to Vendor Payments → Purchase Orders.
- Select the Purchase Order that you want to issue. In the right pane, click MARK AS ISSUED.
Mark as Closed
You can choose to close the Purchase Order at any state. It is advised to close the Purchase Order after the transactions are settled. To close the Purchase Order:- Log in to the RazorpayX Dashboard.
- Navigate to Vendor Payments → Purchase Orders.
- Select the Purchase Order that you want to close. In the right pane, click MARK AS CLOSED.
Cancel Purchase Order
To cancel a Purchase Order:- Log in to the RazorpayX Dashboard.
- Navigate to Vendor Payments → Purchase Orders.
- Select the Purchase Order that you want to cancel. In the right pane, select the three-dot menu and click Cancel PO.
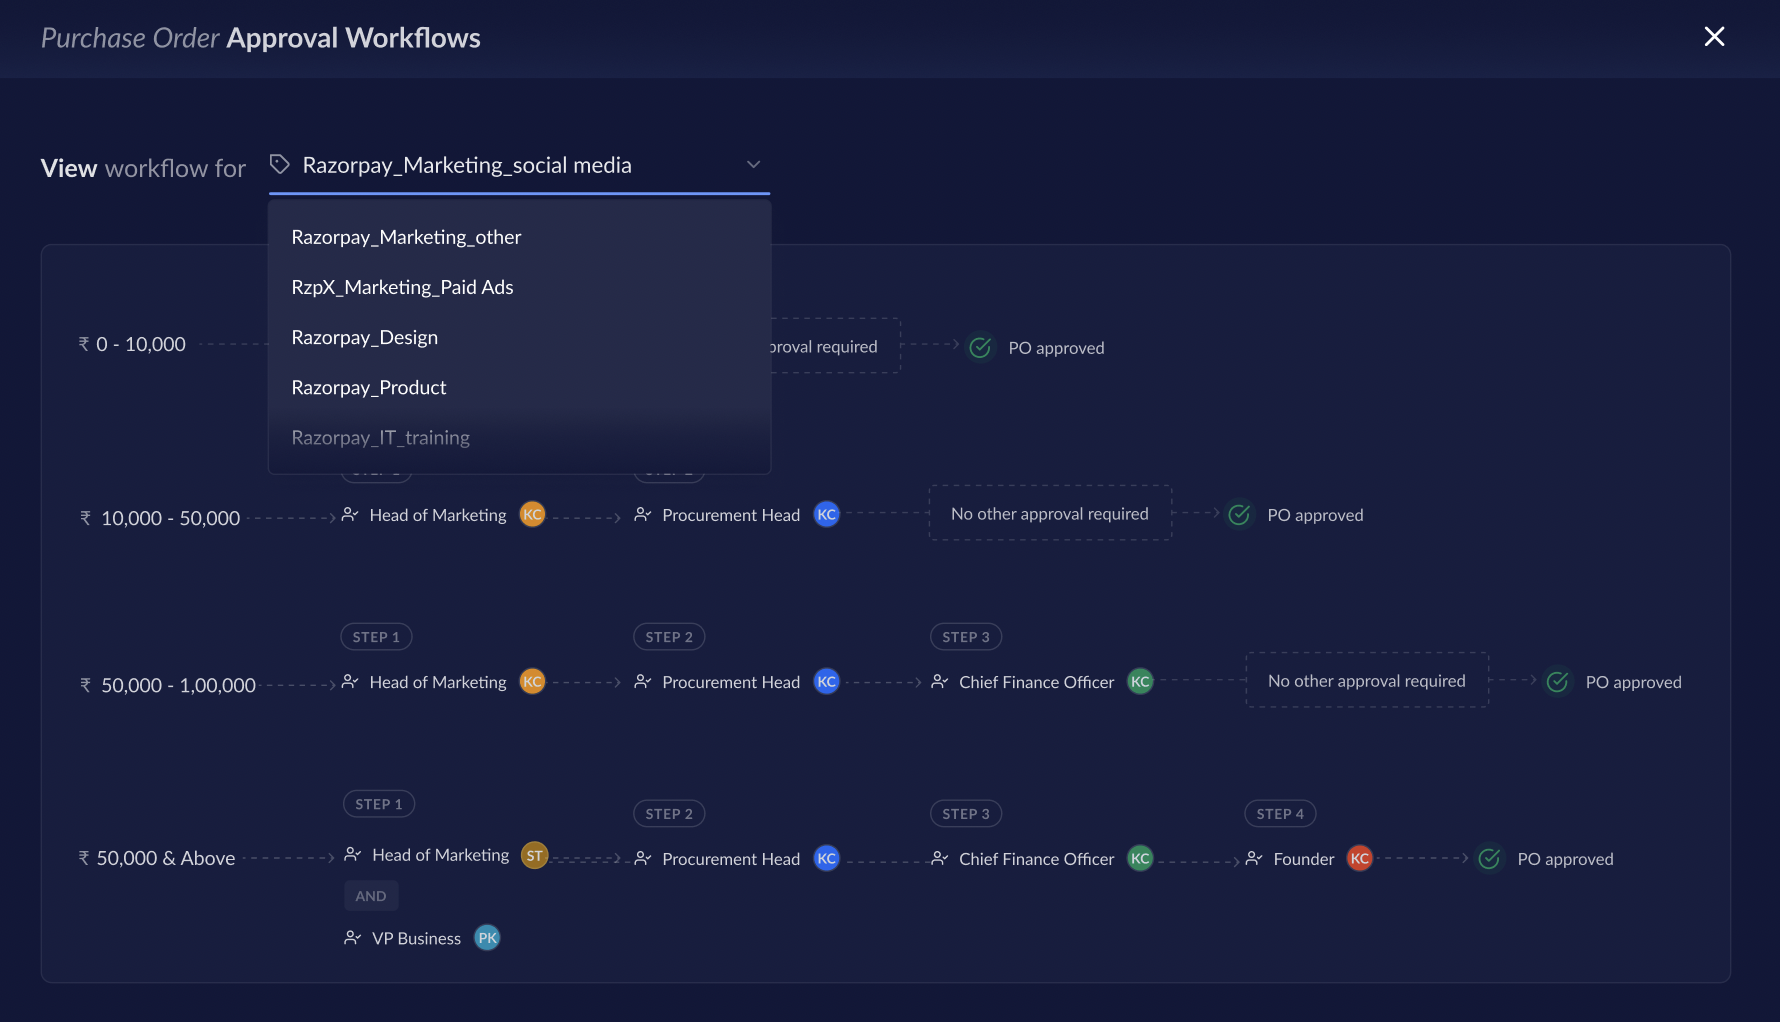
Purchase Order Approval Workflow
This approval workflow is based on the cost center that you have linked to your PO. You can contact support to setup this approval workflow and assign it to relevant team members.Approving a Purchase Order
Approving a Purchase Order
To approve or reject a Purchase Order:
- Log in to the RazorpayX Dashboard.
Handy TipsYou can either find the Purchase Orders waiting for your approval on the Dashboard or follow the steps below.
- Navigate to Vendor Payments → Purchase Orders.
- Hover over the required Purchase Order
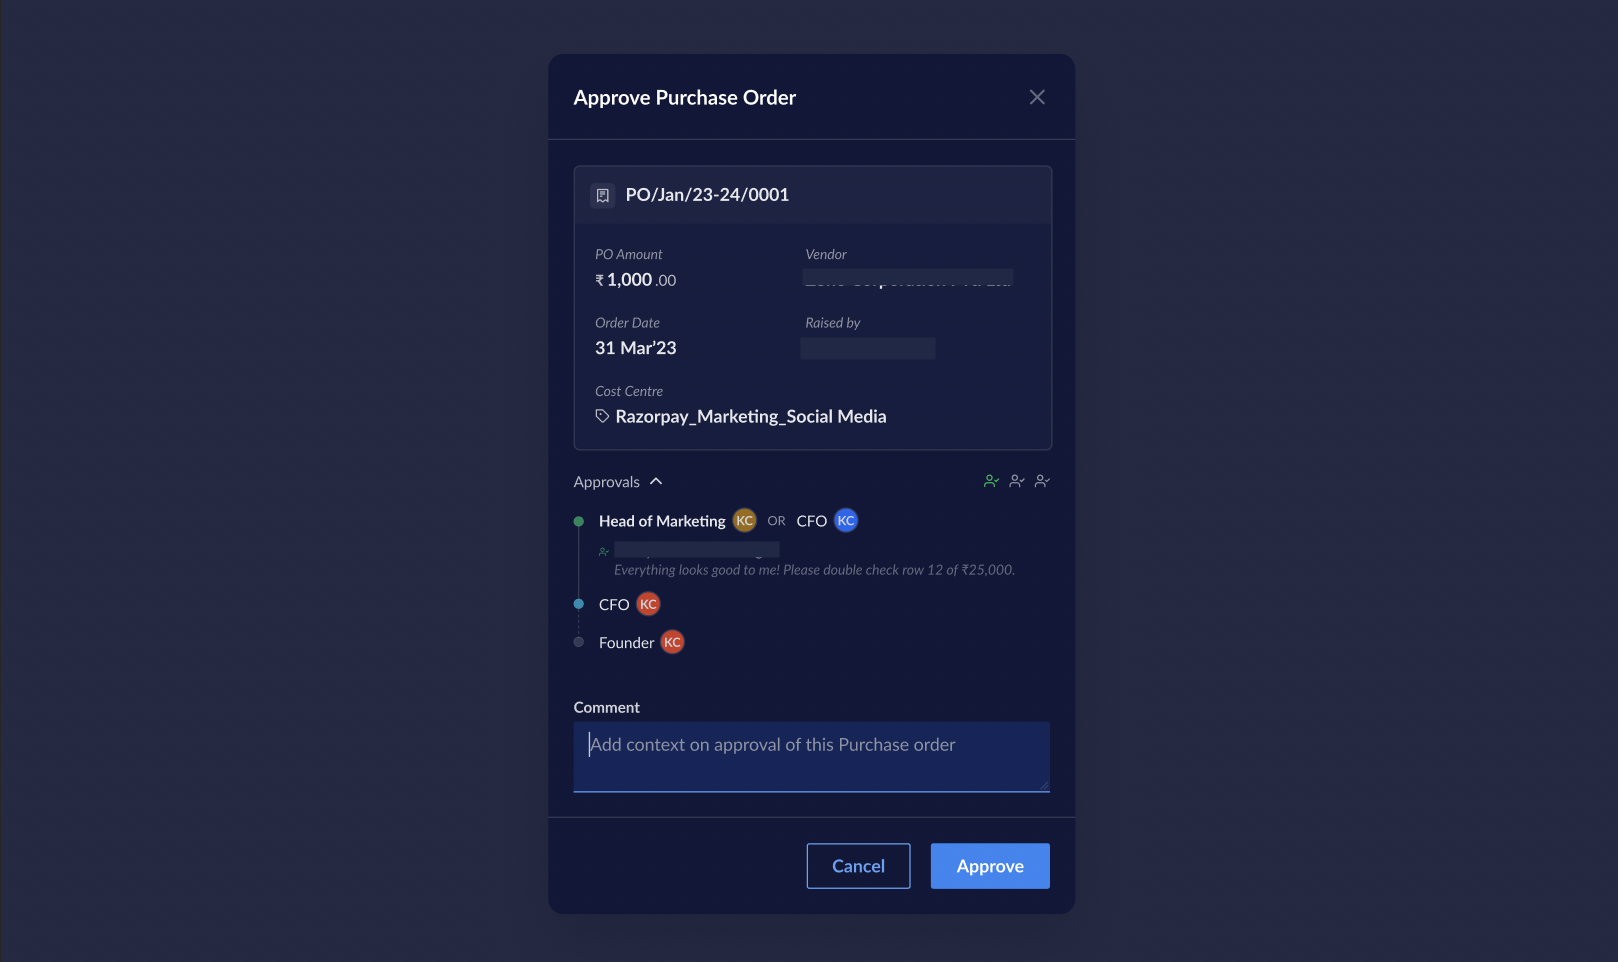
In Approvaland click APPROVE or REJECT or select it to view more details and click APPROVE or REJECT on the right-pane.- If you click APPROVE, the following screen is displayed. Enter comments and click Approve.
- If you click REJECT, enter the reason for rejection and click Reject.
- If you click APPROVE, the following screen is displayed. Enter comments and click Approve.
View the Purchase Order Workflow
To view the approval workflow after it is setup:- Log in to the RazorpayX Dashboard.
- Navigate to the profile icon → My Accounts & Settings → Workflow → Purchase Orders.
- Click View Workflows and select the cost center for which you want to view the workflow.