

Available in🇮🇳 India
After you sign up with Payroll, you can begin to set up your account and Dashboard.
Set Up Payroll Account
The following guide provides a checklist of prerequisite steps and best practices to set up your organisation’s payroll account and system.Add All Employees
Add All Employees
You can add employees individually or in bulk on the Payroll Dashboard to set up the payroll recipients.To add employees:
- Log in to the Payroll Dashboard.
- Navigate to ADMIN OPTIONS → People.
- Click Add One to add an individual employee, or Add Multiple to add multiple employees. You can also invite your employees using their email ids using Invite many.
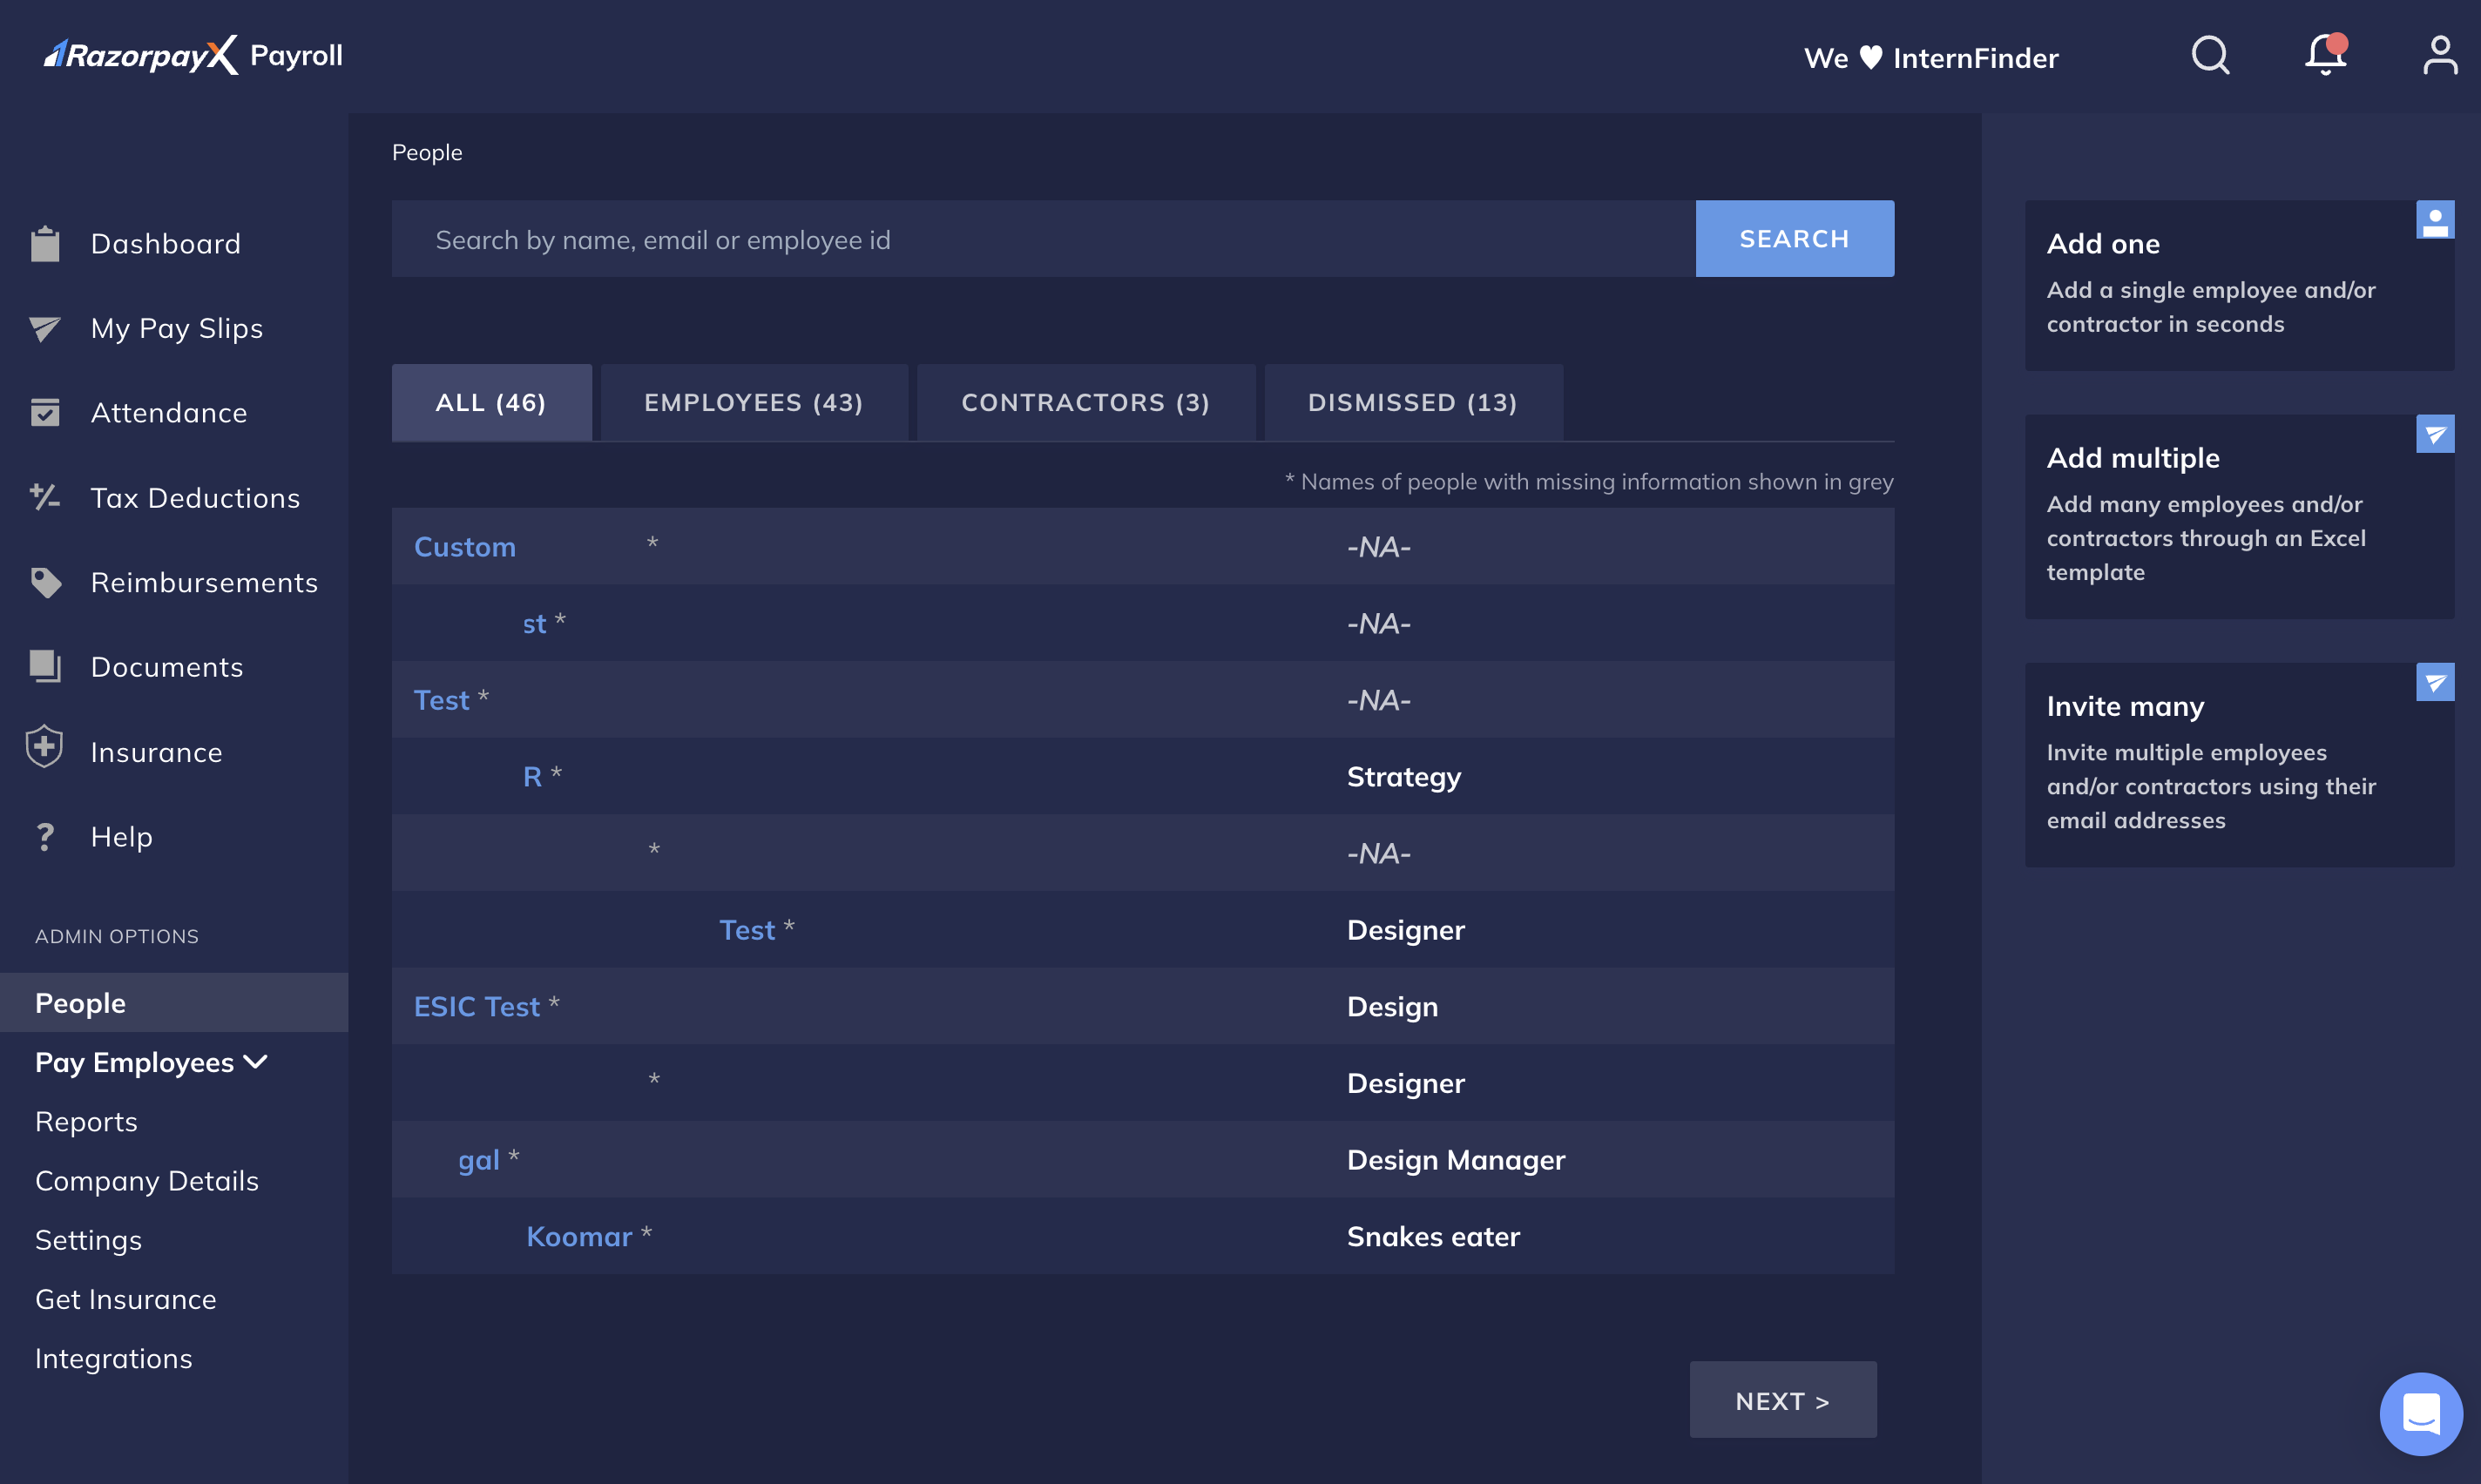
- Enter the employees’ information such as joining date, authorised email id, salary information and more.
- Click CONTINUE.
Enable Compliances
Enable Compliances
Update your organisation’s compliance details as applicable. We support and automate many monthly statutory compliance payments.To enable compliances applicable:
- Log in to the Payroll Dashboard.
- Navigate to ADMIN OPTIONS → Company Details in the left menu.
- Click Provident Fund / ESIC / Professional Tax / LWF → EDIT and enable compliances from the respective drop-down menu as applicable.
-
Click CONTINUE to save the changes.
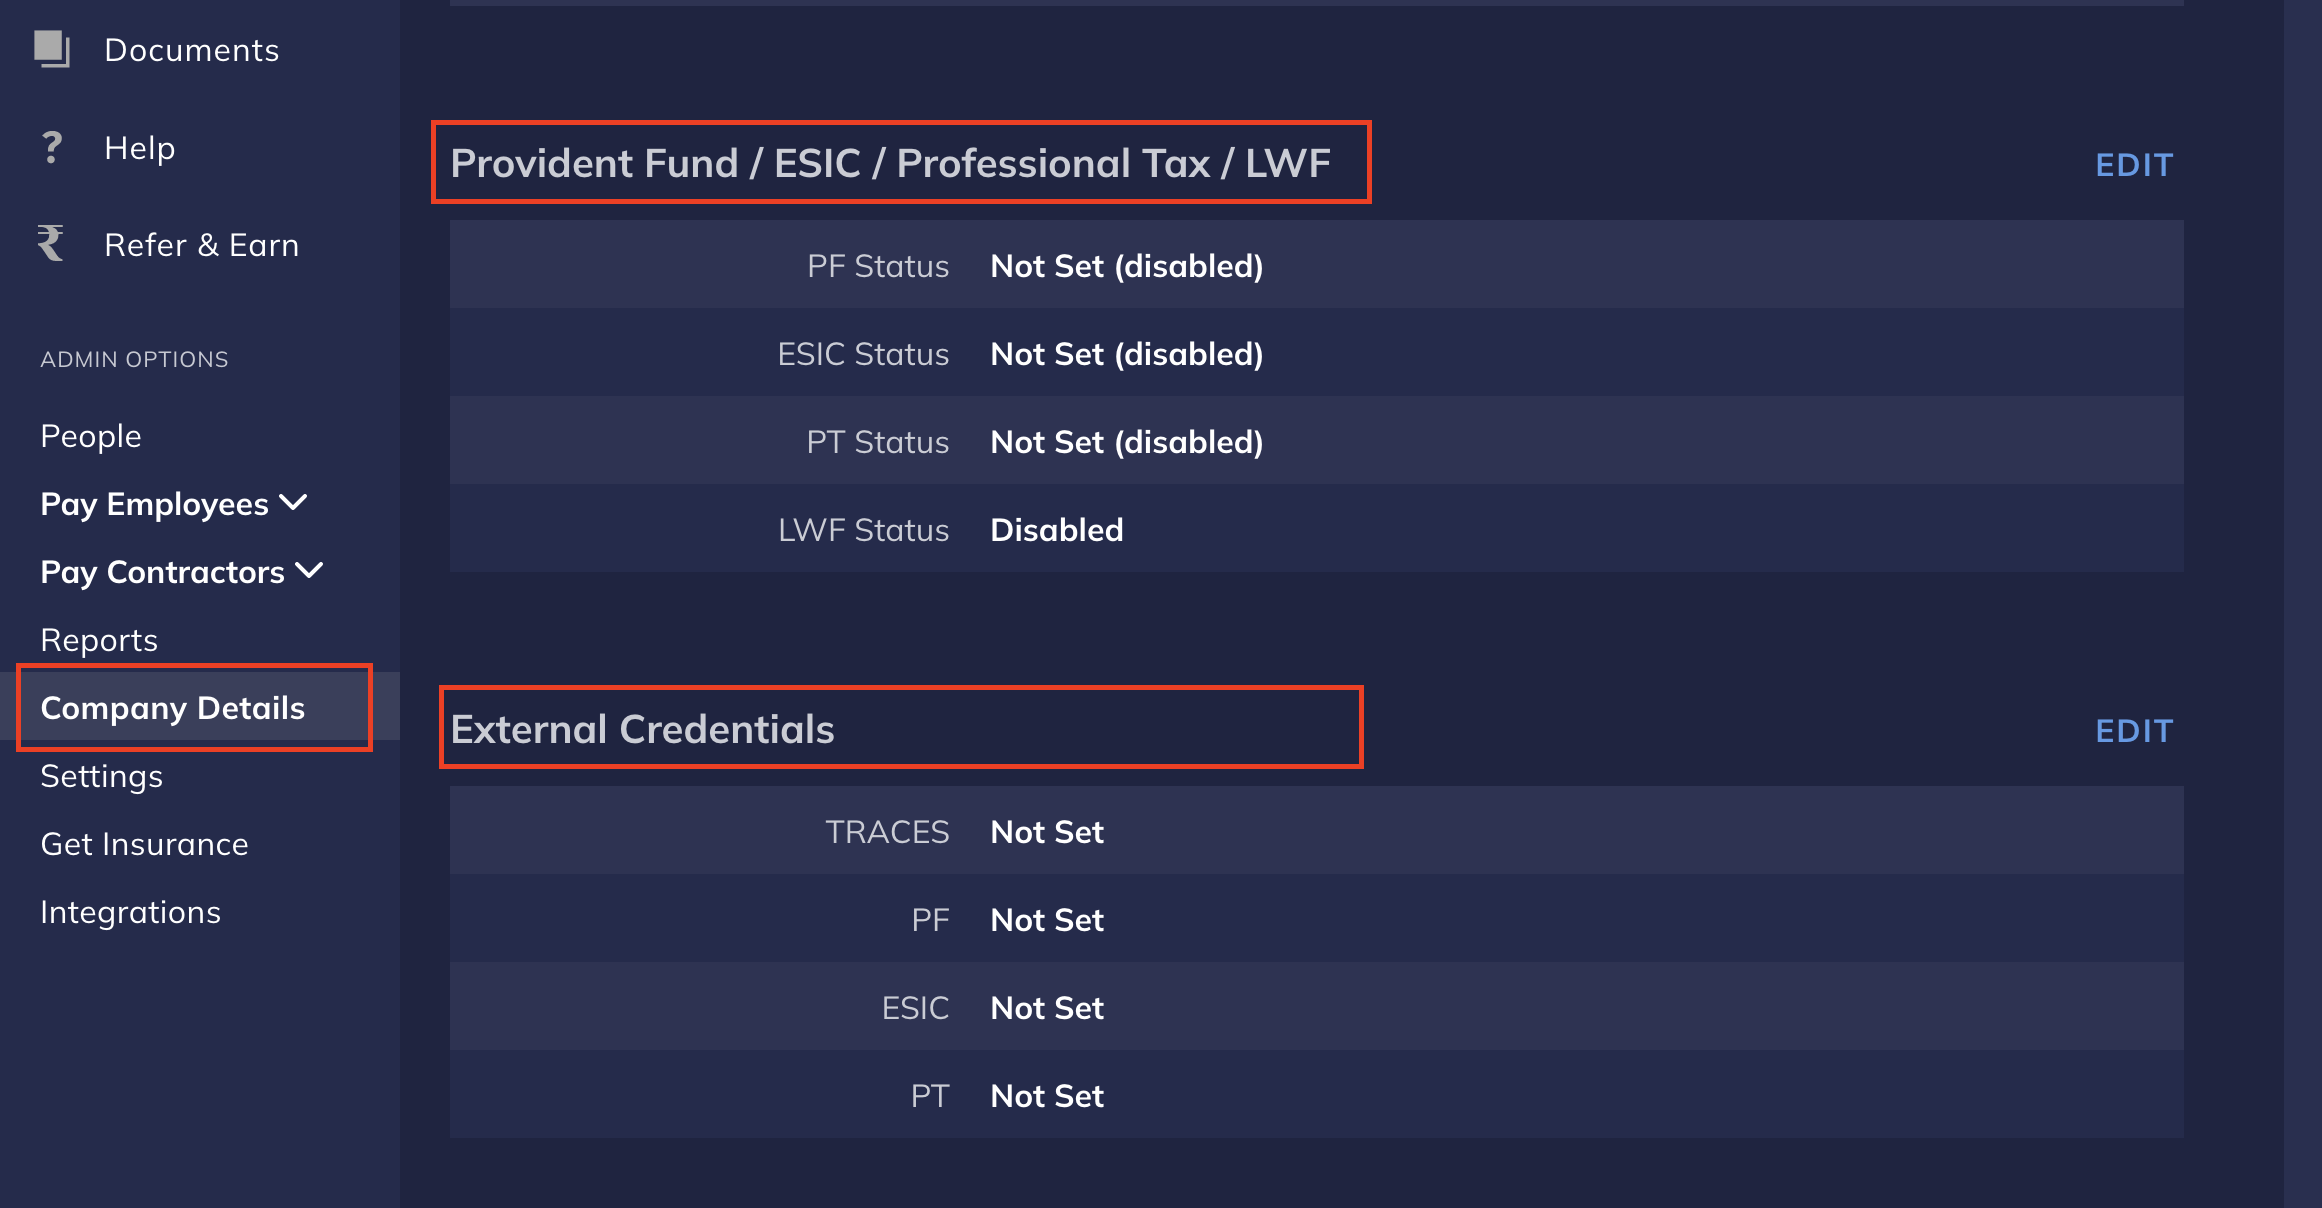
- Go to External Credentials in Company Details → EDIT.
- Enter the user ids and passwords to authenticate your credentials.
- Click CONTINUE to save the changes.
Upload Company Logo
Upload Company Logo
You can upload your company logo to reflect on both the Dashboard and the payslips. Ensure you meet the following conditions for the logo:
- Must be a PNG file.
- Must have a 5:1 aspect ratio or be rectangular shaped.
- Must have a transparent background.
- Log in to the Payroll Dashboard.
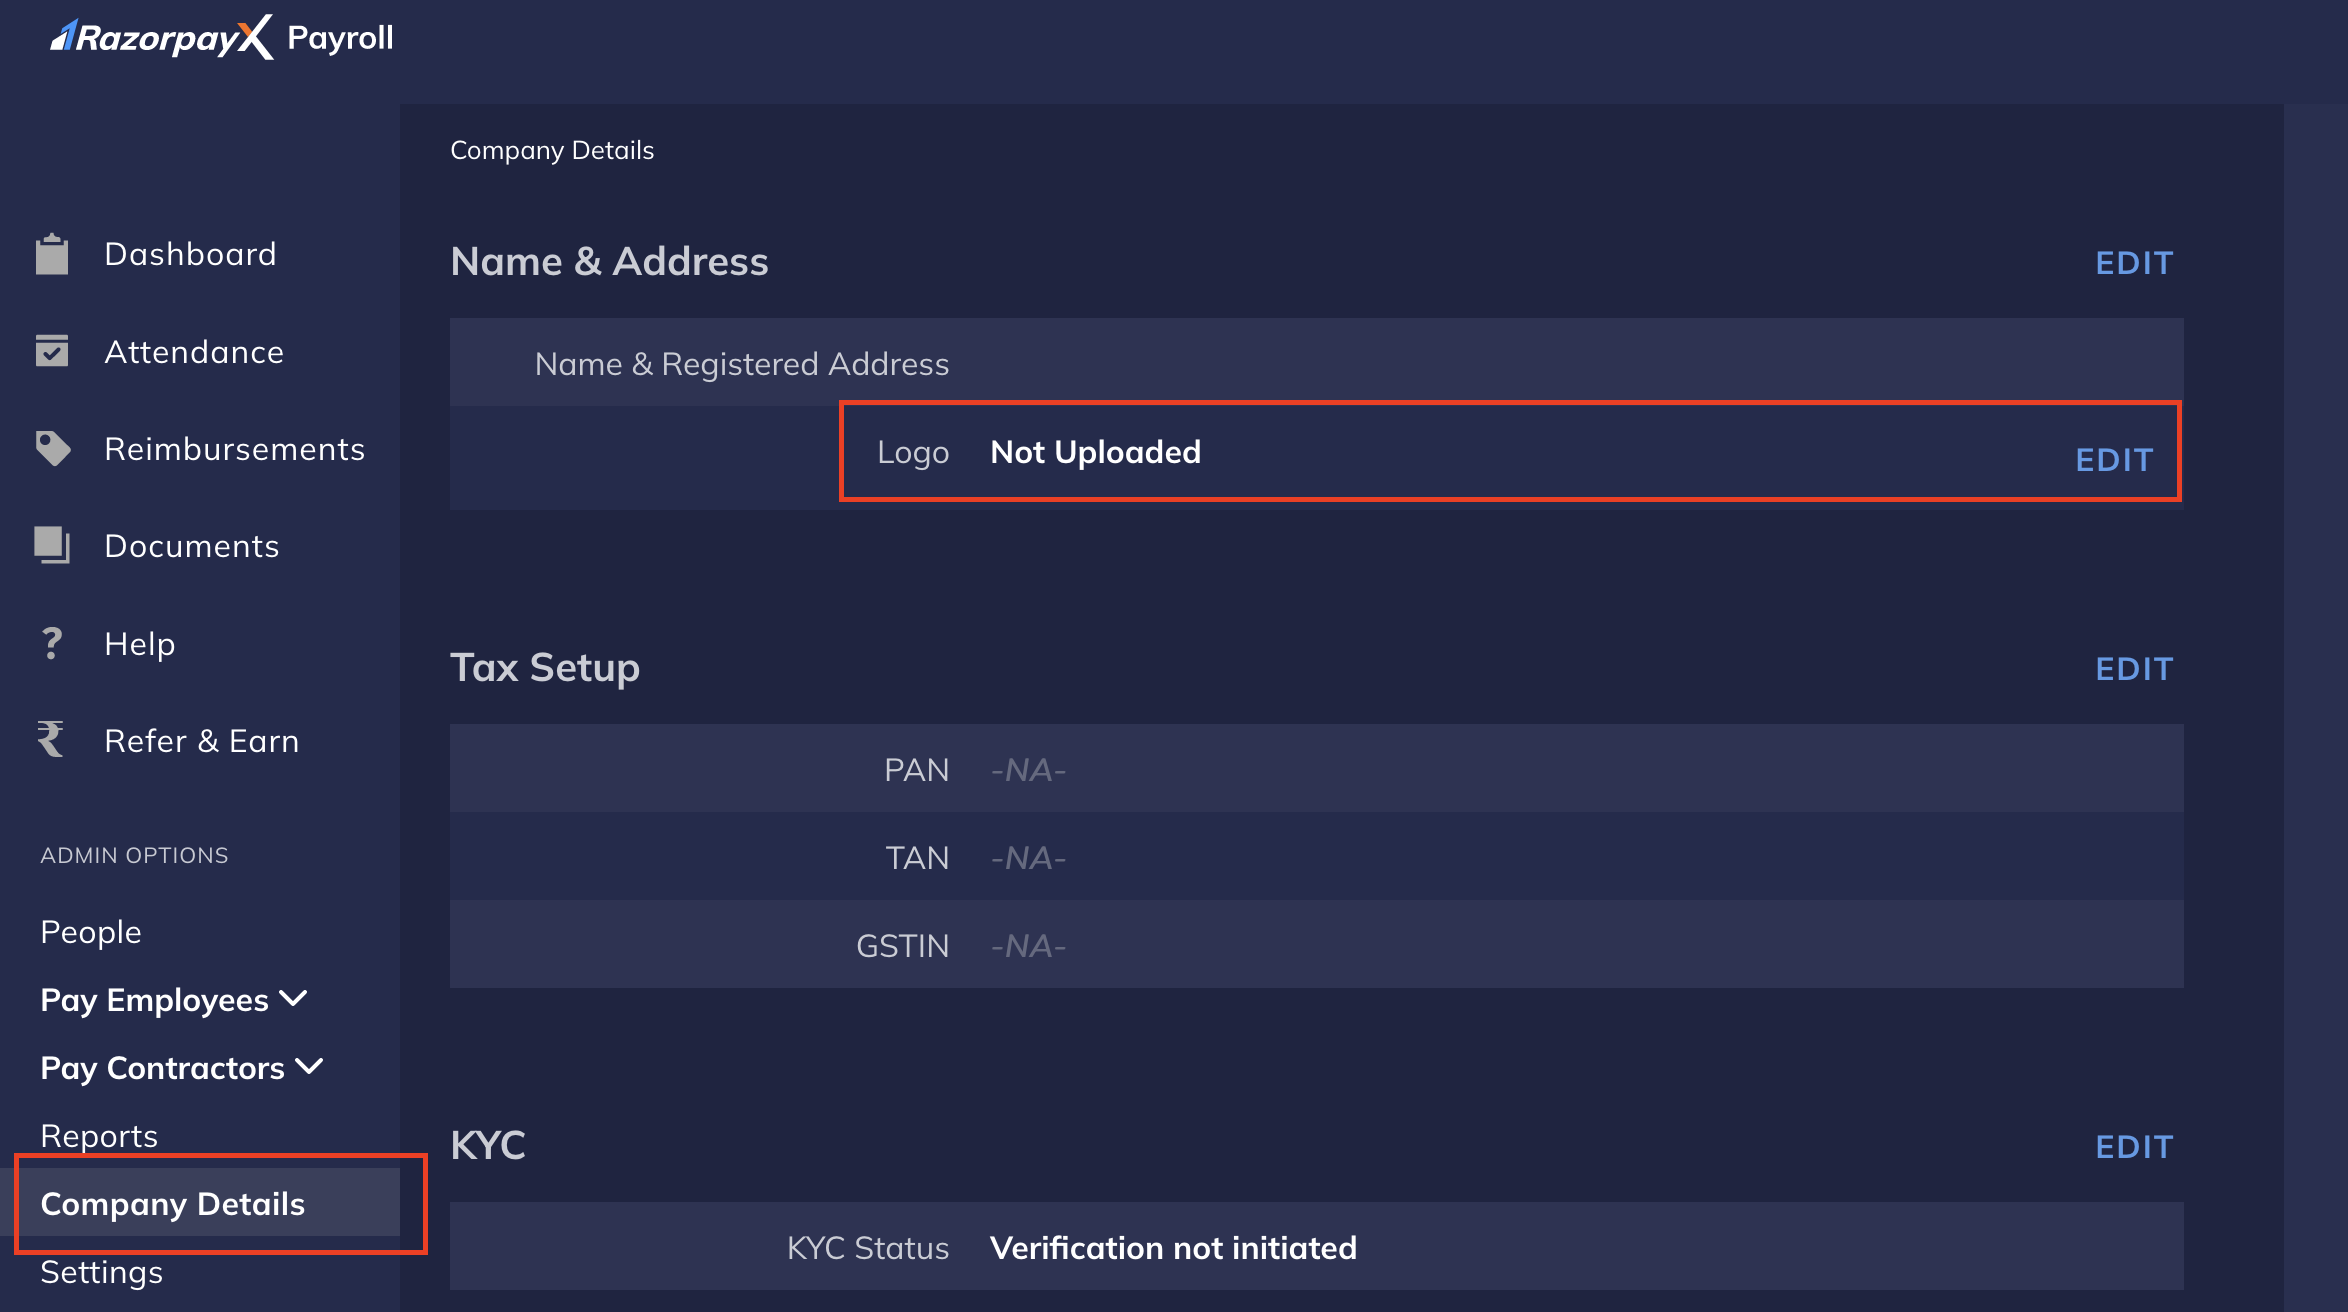
- Navigate to Company Details → Name & Address → EDIT.
-
Upload the photograph and click PREVIEW.
Setup Default Salary Structure
Setup Default Salary Structure
To set up a default salary structure for your organisation: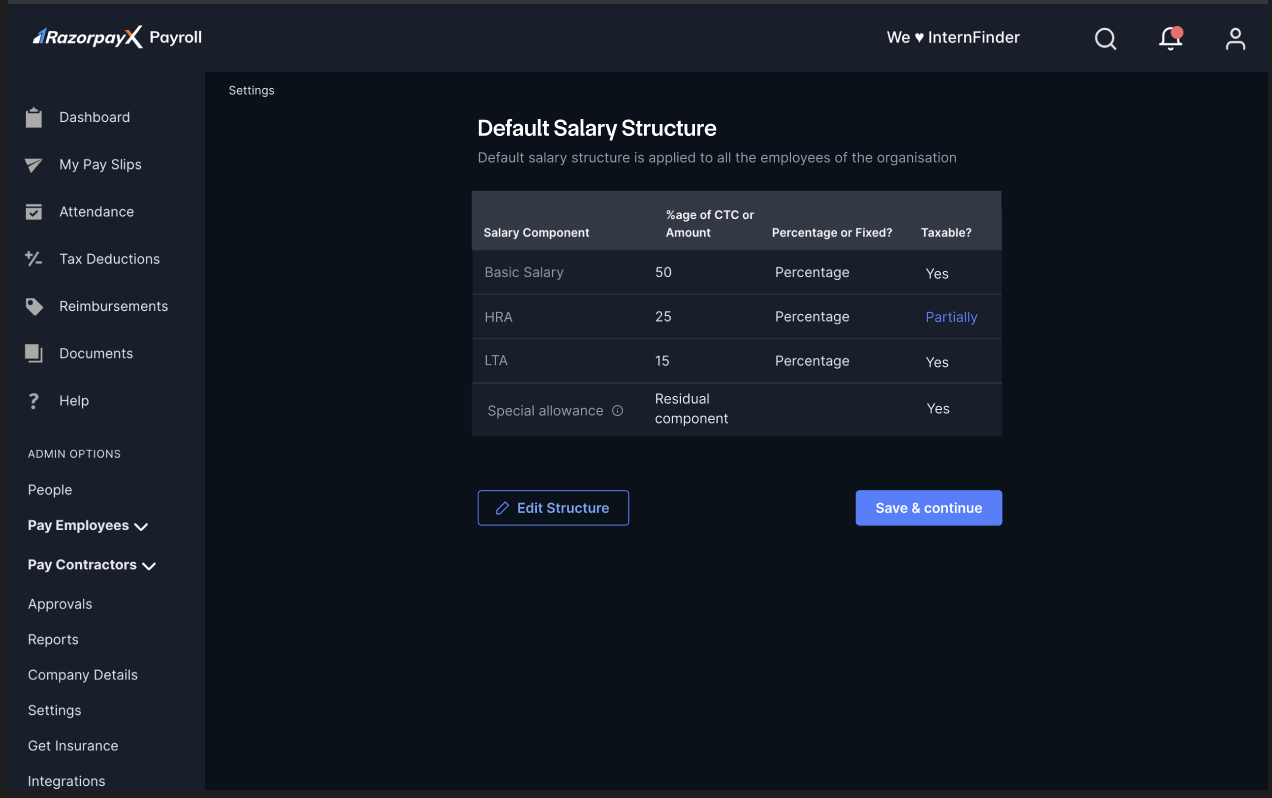
- Log in to the Payroll Dashboard.
- Navigate to Settings from the left menu.
- Locate the Default Salary Structure section and click Edit Structure.
- On the setup page, you’ll see the components that can be included in the default structure:
- Basic Salary: Usually set at 50% of CTC as per best practices.
- House Rent Allowance (HRA): Typically 25% of basic salary.
- Leave Travel Allowance (LTA): Usually 15% of basic salary.
- Special Allowance: Set as a residual component to balance the CTC.
- For each component, configure:
- % age of CTC or Amount: Set either a percentage of total CTC or a fixed amount.
- Percentage or Fixed?: Choose whether the component is calculated as a percentage or a fixed amount.
- Taxable?: Specify if the component is taxable (Yes, No or Partially).
- Click Save & Continue to apply the changes.
Modify Existing Default Structure
Modify Existing Default Structure
If you need to update your organisation’s default salary structure:
- Log in to the Payroll Dashboard.
- Navigate to Settings from the left menu.
- Locate the Default Salary Structure section and click Edit Structure.
- Make the necessary changes to the existing components:
- Adjust percentages or amounts
- Change calculation methods (percentage vs. fixed)
- Update taxability status
- To remove a component, you can set its value to 0 or completely remove it.
- To add new components, follow the steps outlined in the “Add Custom Components” section.
- Click Save & Continue to apply the changes.
Add Custom Components
Add Custom Components
You can add components to your default salary structure to better match your organisation’s compensation philosophy:
- Follow steps 1-3 above to access the Default Salary Structure setup.
- Scroll to the bottom of the components list, where you’ll see dropdown fields labelled Add component.
- Click on the dropdown and select an existing component from your Salary Component Library. To define a brand-new component (Earnings, Deduction, Non-Payable Benefit or Perquisite), create it in the Component Library first, then return here to add it.
- For the selected component (for example, Conveyance Allowance):
- Set the Amount value or percentage.
- Choose Fixed or Percentage from the dropdown.
- Set the taxability status.
- You can add multiple components by repeating steps 3-4 for each additional component.
- Click Save & Continue to apply the changes.
Check for Missing Information
Check for Missing Information
Before you execute payroll, ensure you your employees’ data is available and up-to-date.To check for missing information: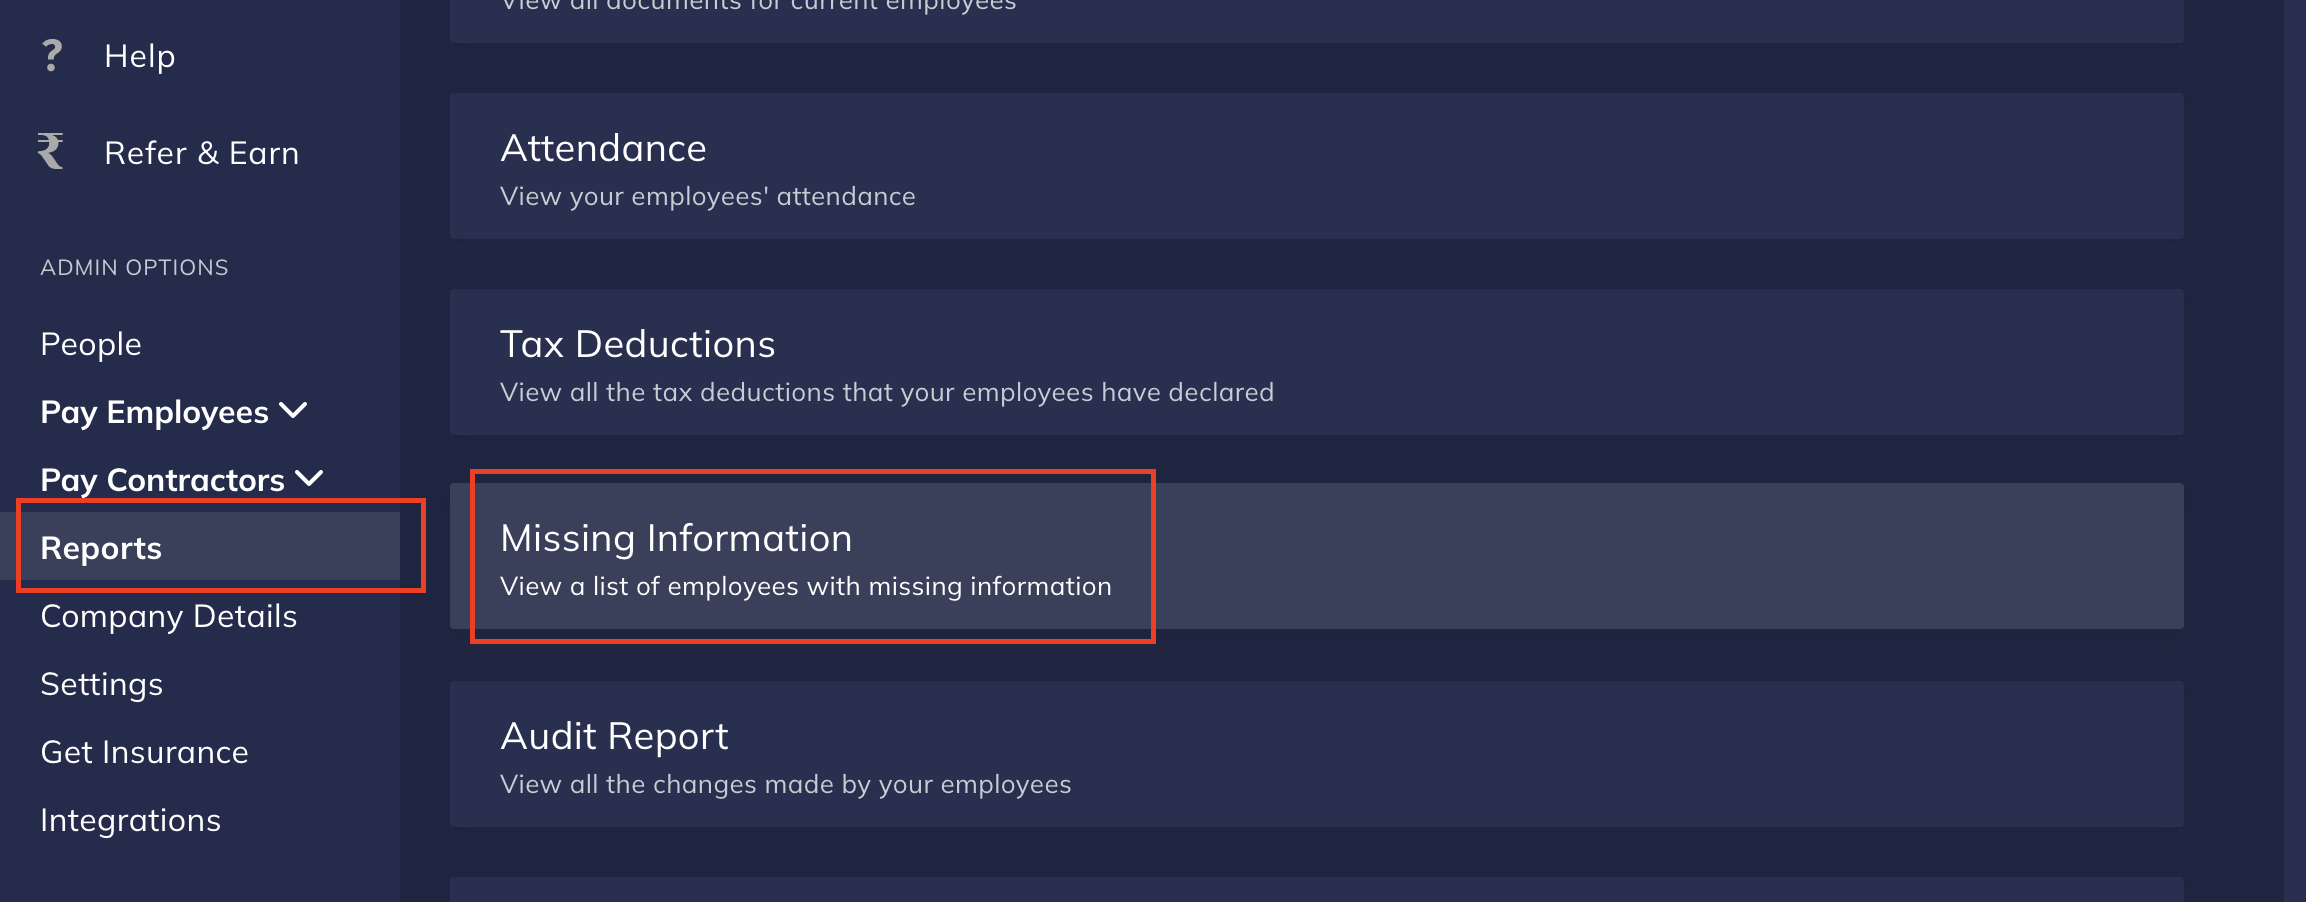
- Log in to the Payroll Dashboard.
- Go to ADMIN OPTIONS → Reports → Missing Information. This opens the Missing Information page with a list of employees and their missing information.
- Select the checkboxes against the employees’ names and click SEND EMAILS. You can also select all employees using the checkbox against Employee Name.
- Click SEND EMAILS to re-confirm.
Confirm Salary Components
Confirm Salary Components
You should re-check the salary components and net salary calculations.To re-check salary information: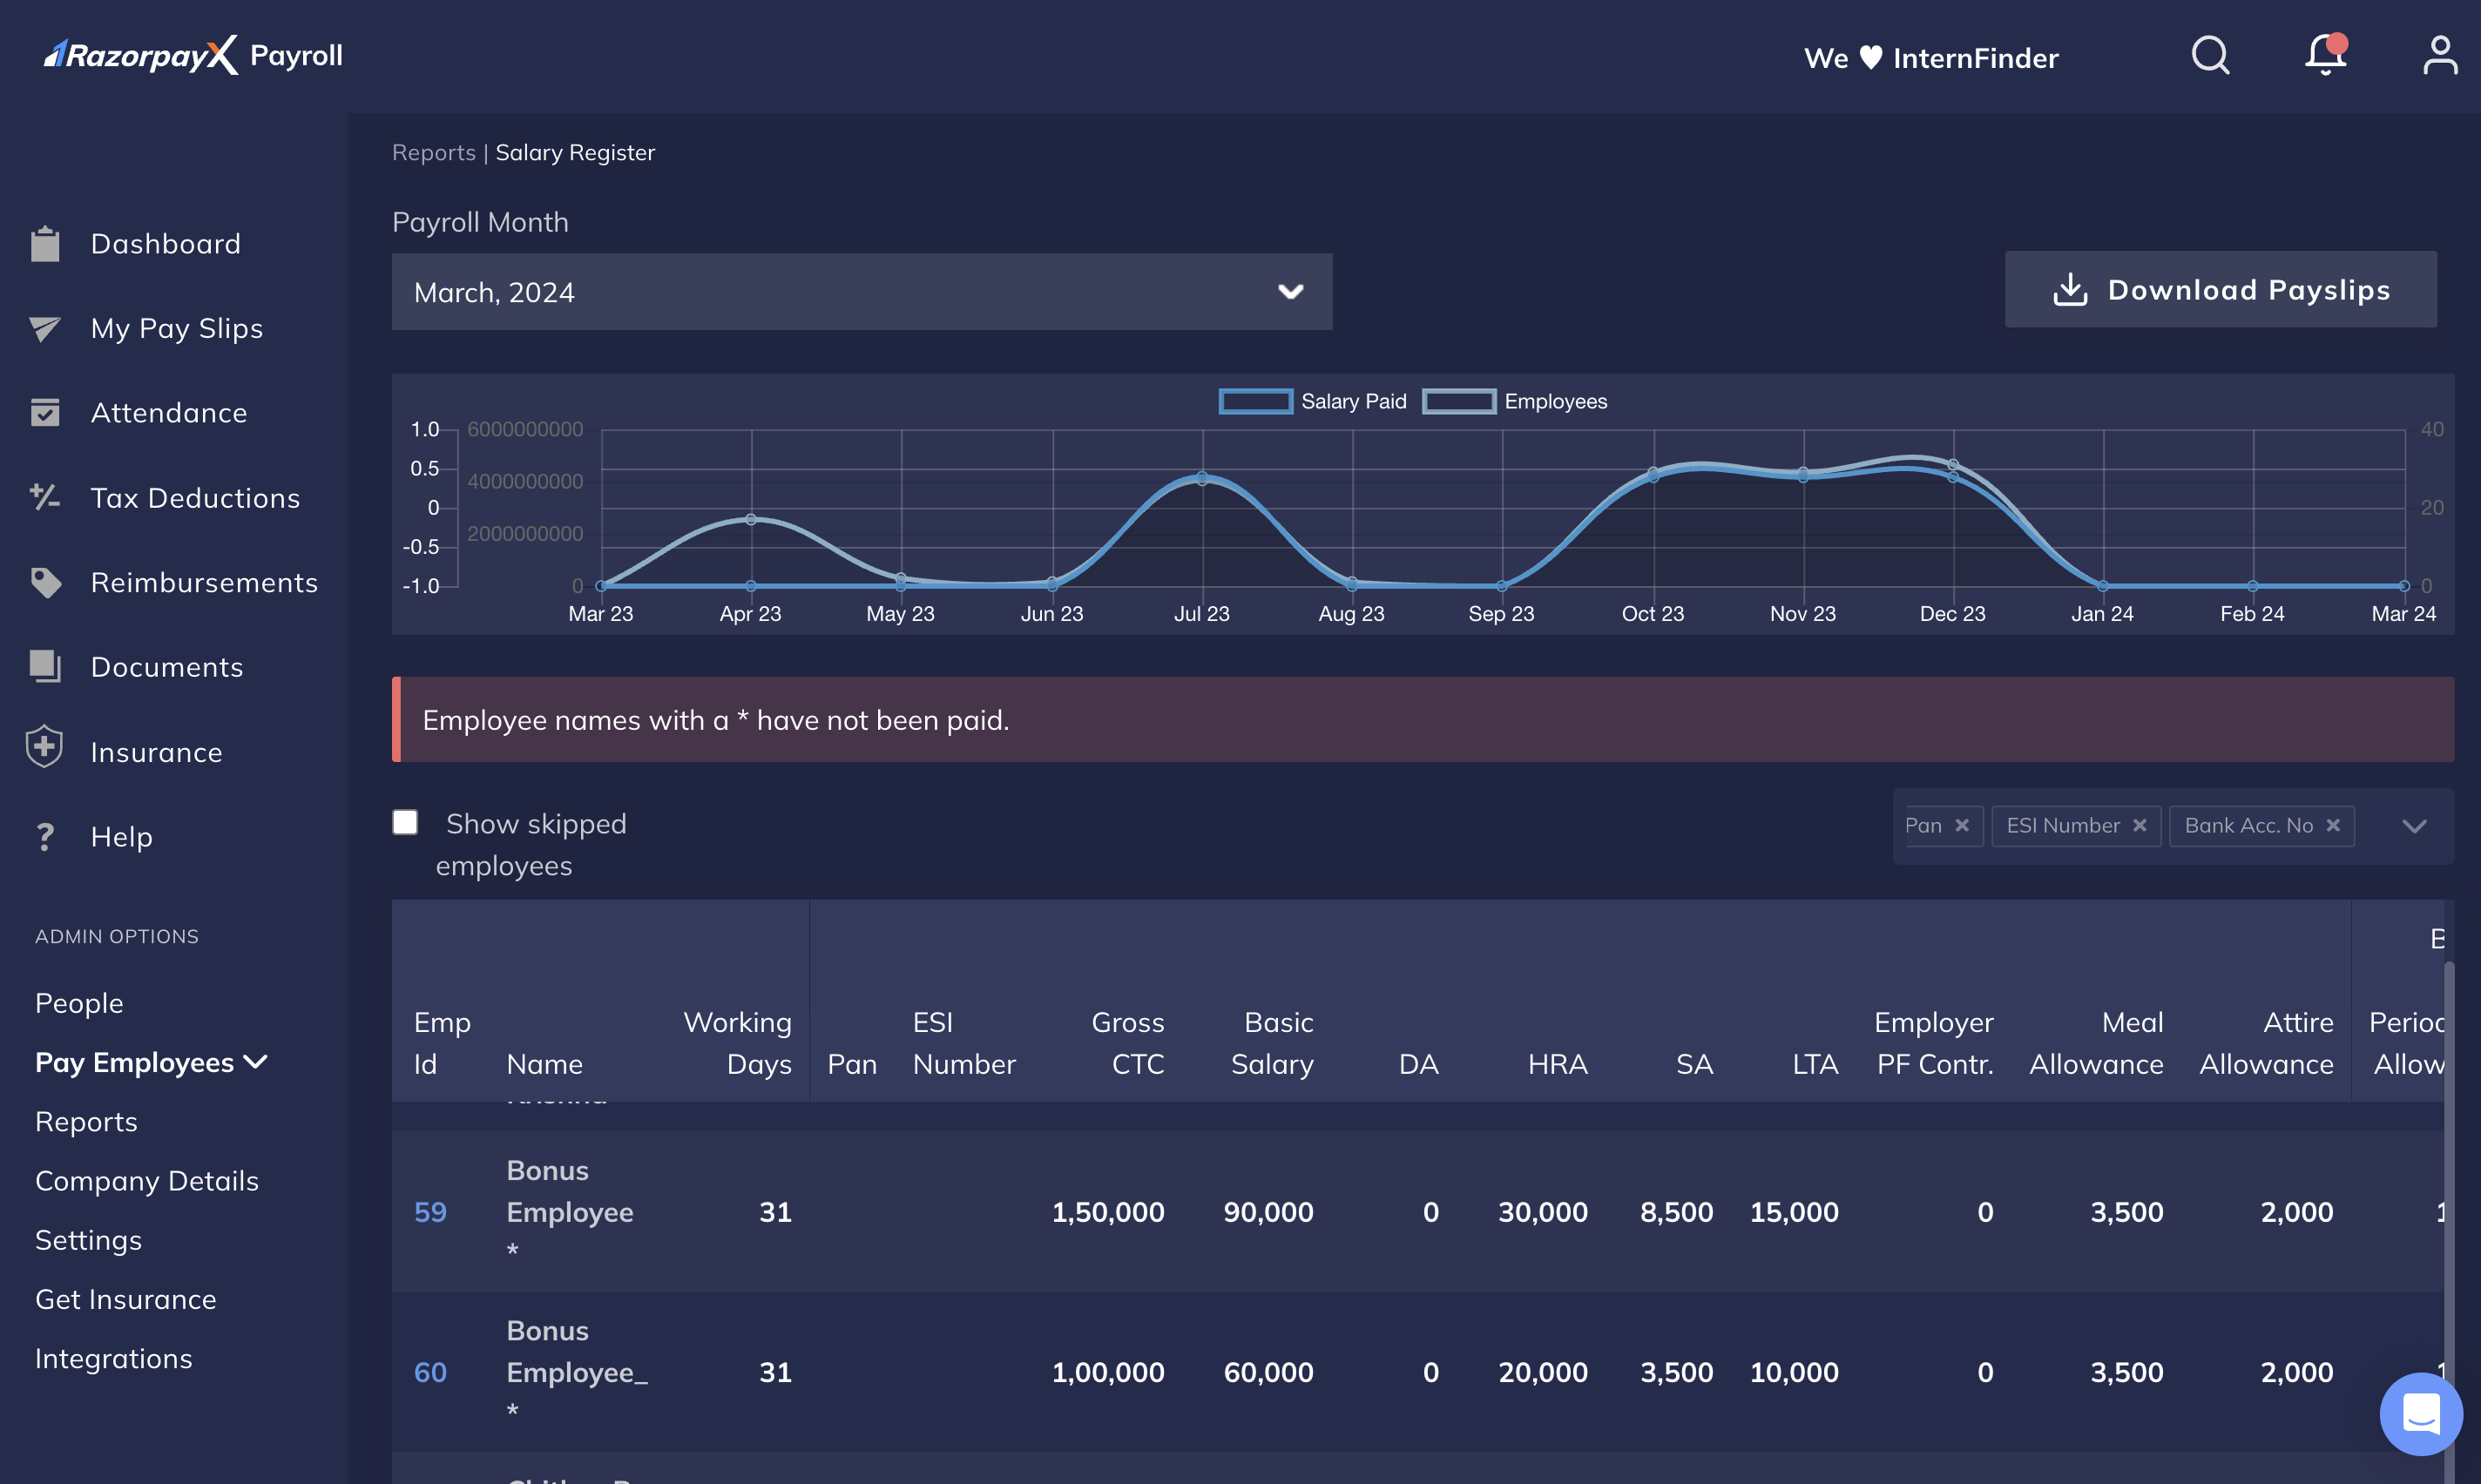
- Log in to the Payroll Dashboard
- Navigate to ADMIN OPTIONS → Reports.
- Select Salary Register and select the relevant month. You can filter the information, download the payslips for that month and download the data as a .CSV file to process the data better.
Employee Tax Declarations
Employee Tax Declarations
You must ask your employees to update their tax deductions and declarations on the Employee Dashboard.Employees must navigate to Tax Deductions on their Dashboard to update their tax details and minimise their deductible taxes.
Add RazorpayX Payroll as Beneficiary
Add RazorpayX Payroll as Beneficiary
To enable fund transfers, you need to add your Payroll Account as a beneficiary. You can find your account details in the Payroll Money Transfer page.
Update UAN
Update UAN
Update your employees’ Universal Account Number (UAN) if applicable.To update UAN:
- Log in to the Payroll Dashboard.
- Navigate to ADMIN OPTIONS → People.
- Select the employee From the list of employees and open their profile.
- Update their PF details in Provident Fund → Professional Tax & ESI.
Enable Resignation
Enable Resignation
You can enable employee resignations and allow employees to submit resignation requests.
- Log in to the Payroll Dashboard.
- Go to Settings → Employee Resignation Setup → EDIT.
- Select the Enable resignations feature check box.