Available in🇮🇳 India
After you log in to your Payroll Account as a first-time user, you must set up your employee profile. This includes the following:
- View and update your user profile including statutory payments (TDS, PF and more), leave set up, user roles, benefits availed and more.
- Upload an identity photo.
- Upload necessary documents.
- Customise notifications preferences.
- Customise and manage 2FA modes.
Set Up Profile
The user profile provides a detailed view of your employment, attendance payment and benefits information.Available Now!Watch the video on to how to set up employee profile.
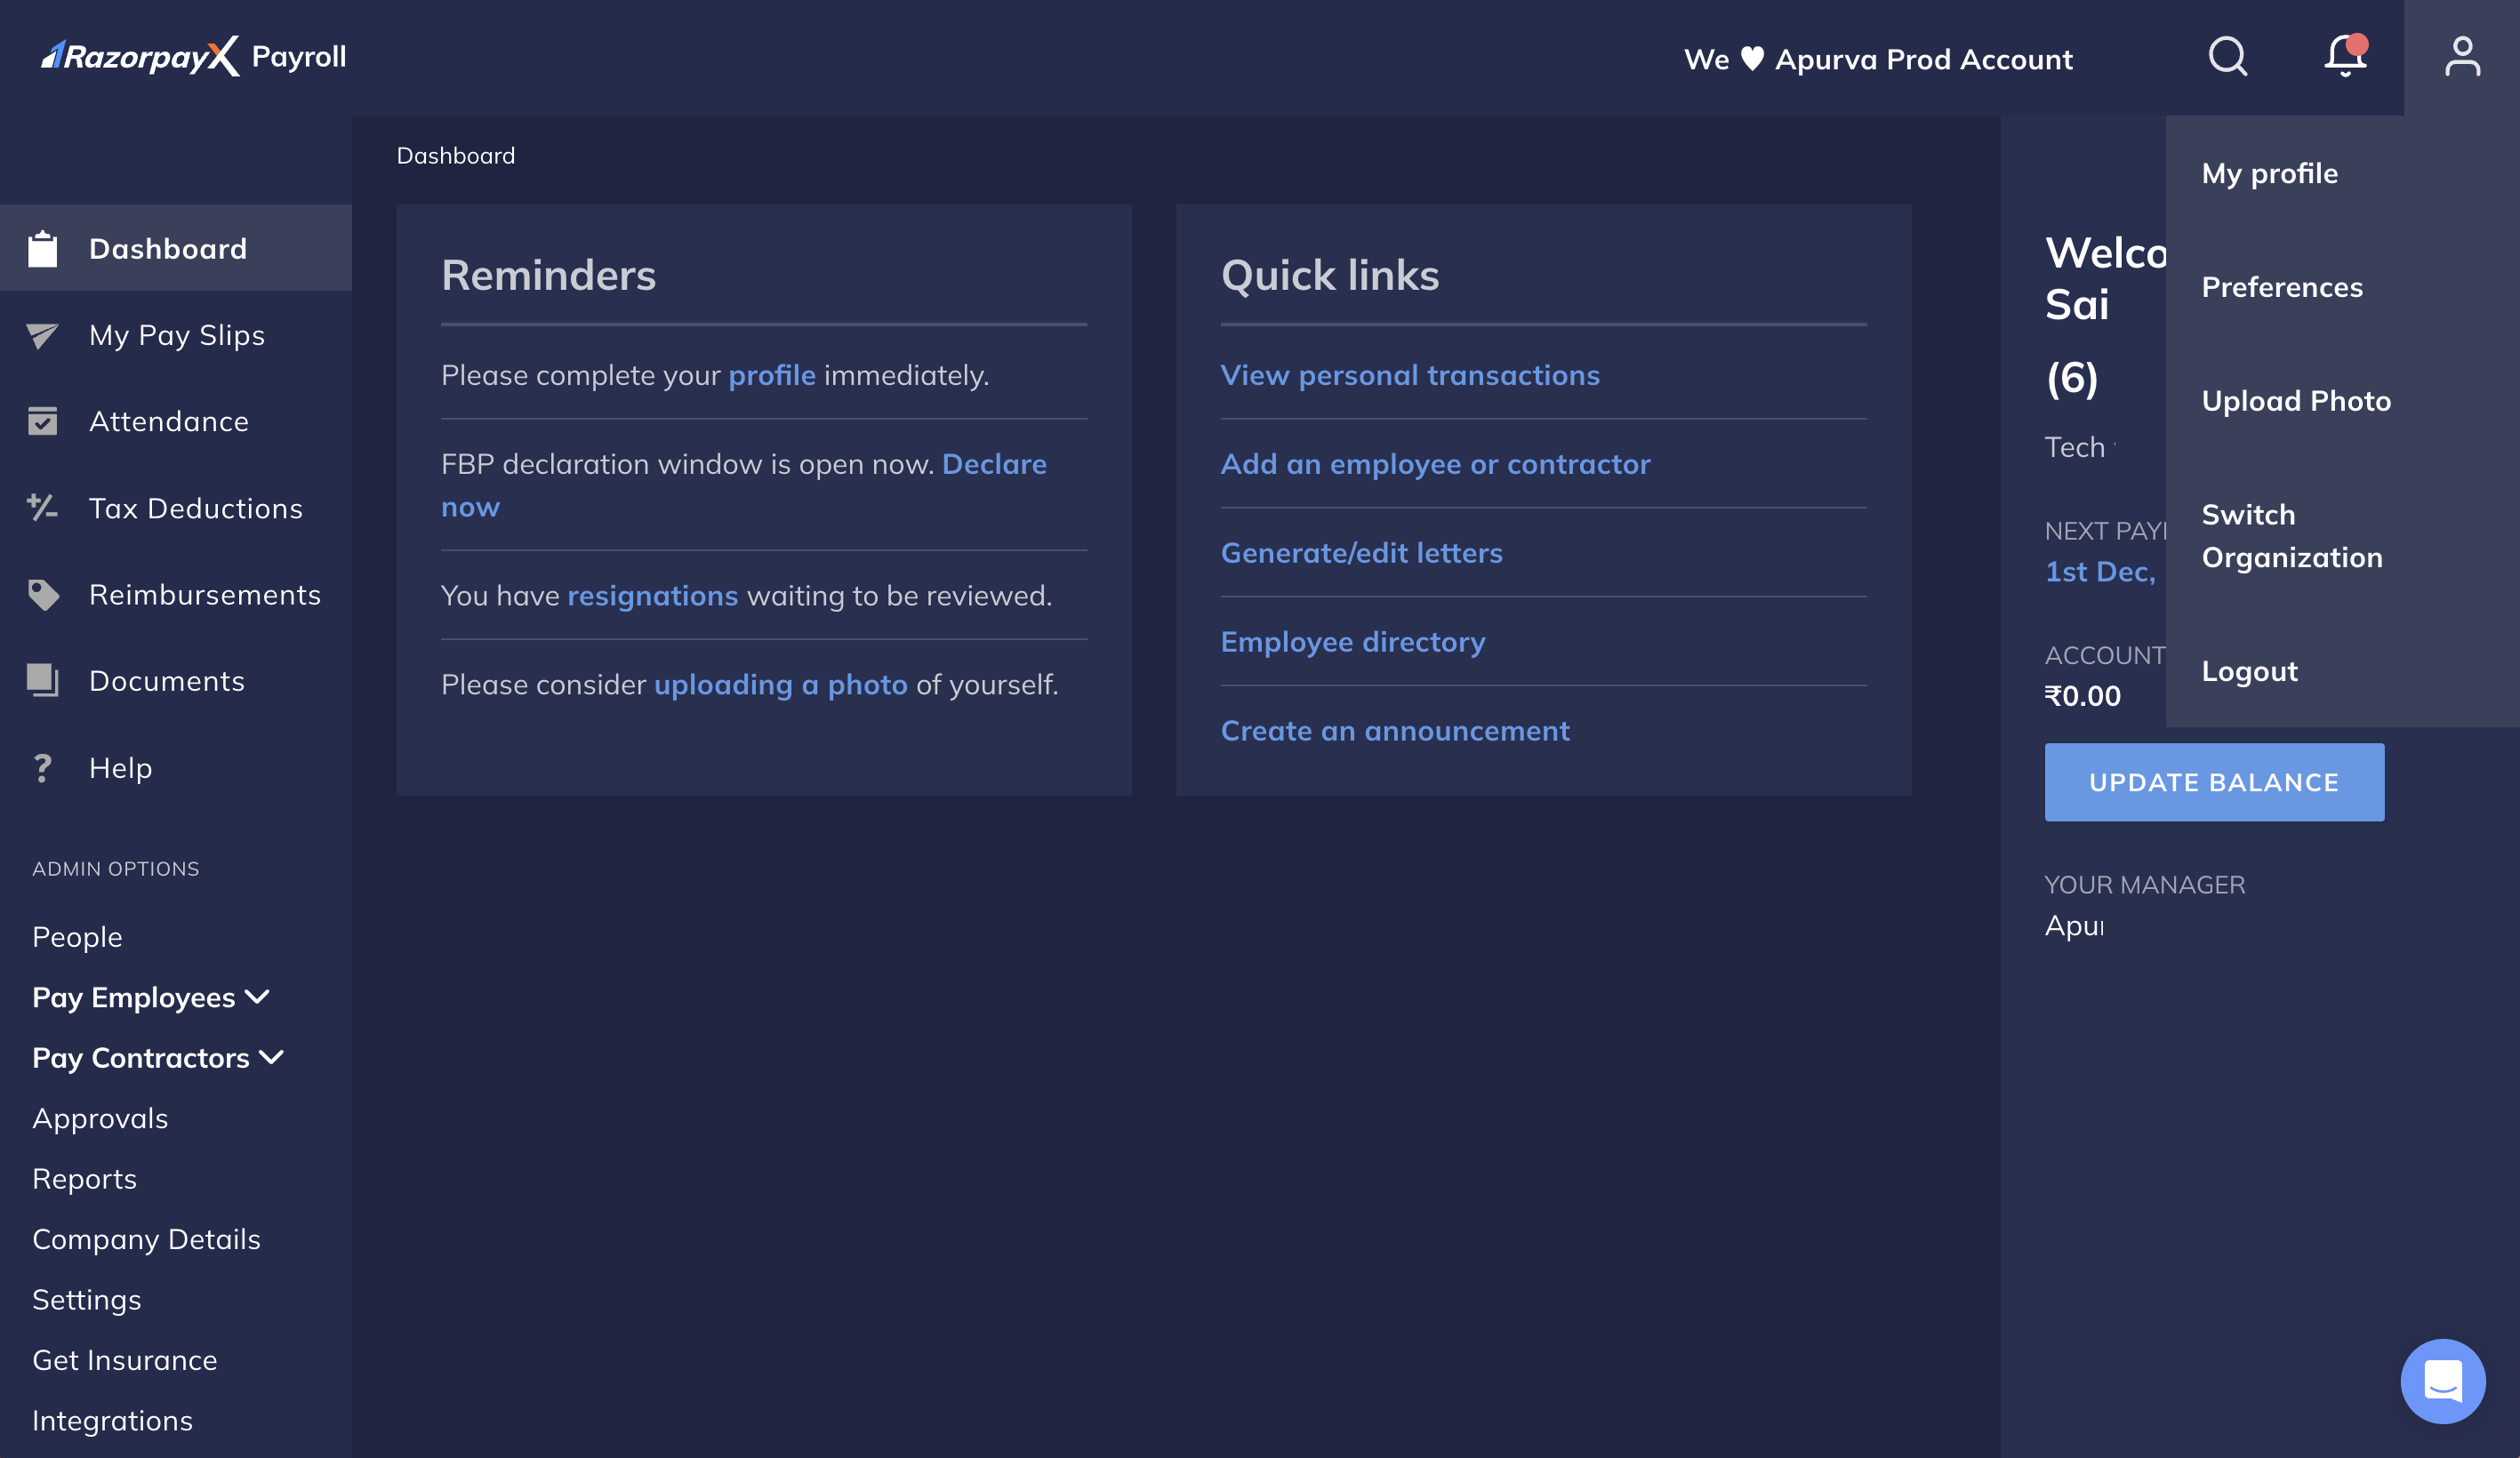
- Log in to the Payroll Dashboard.
-
Go to the user profile icon at the top-right corner of the page and click My profile. This opens your user profile.
Basic Information
Basic Information
In the Basic Information section, you can view your employment details: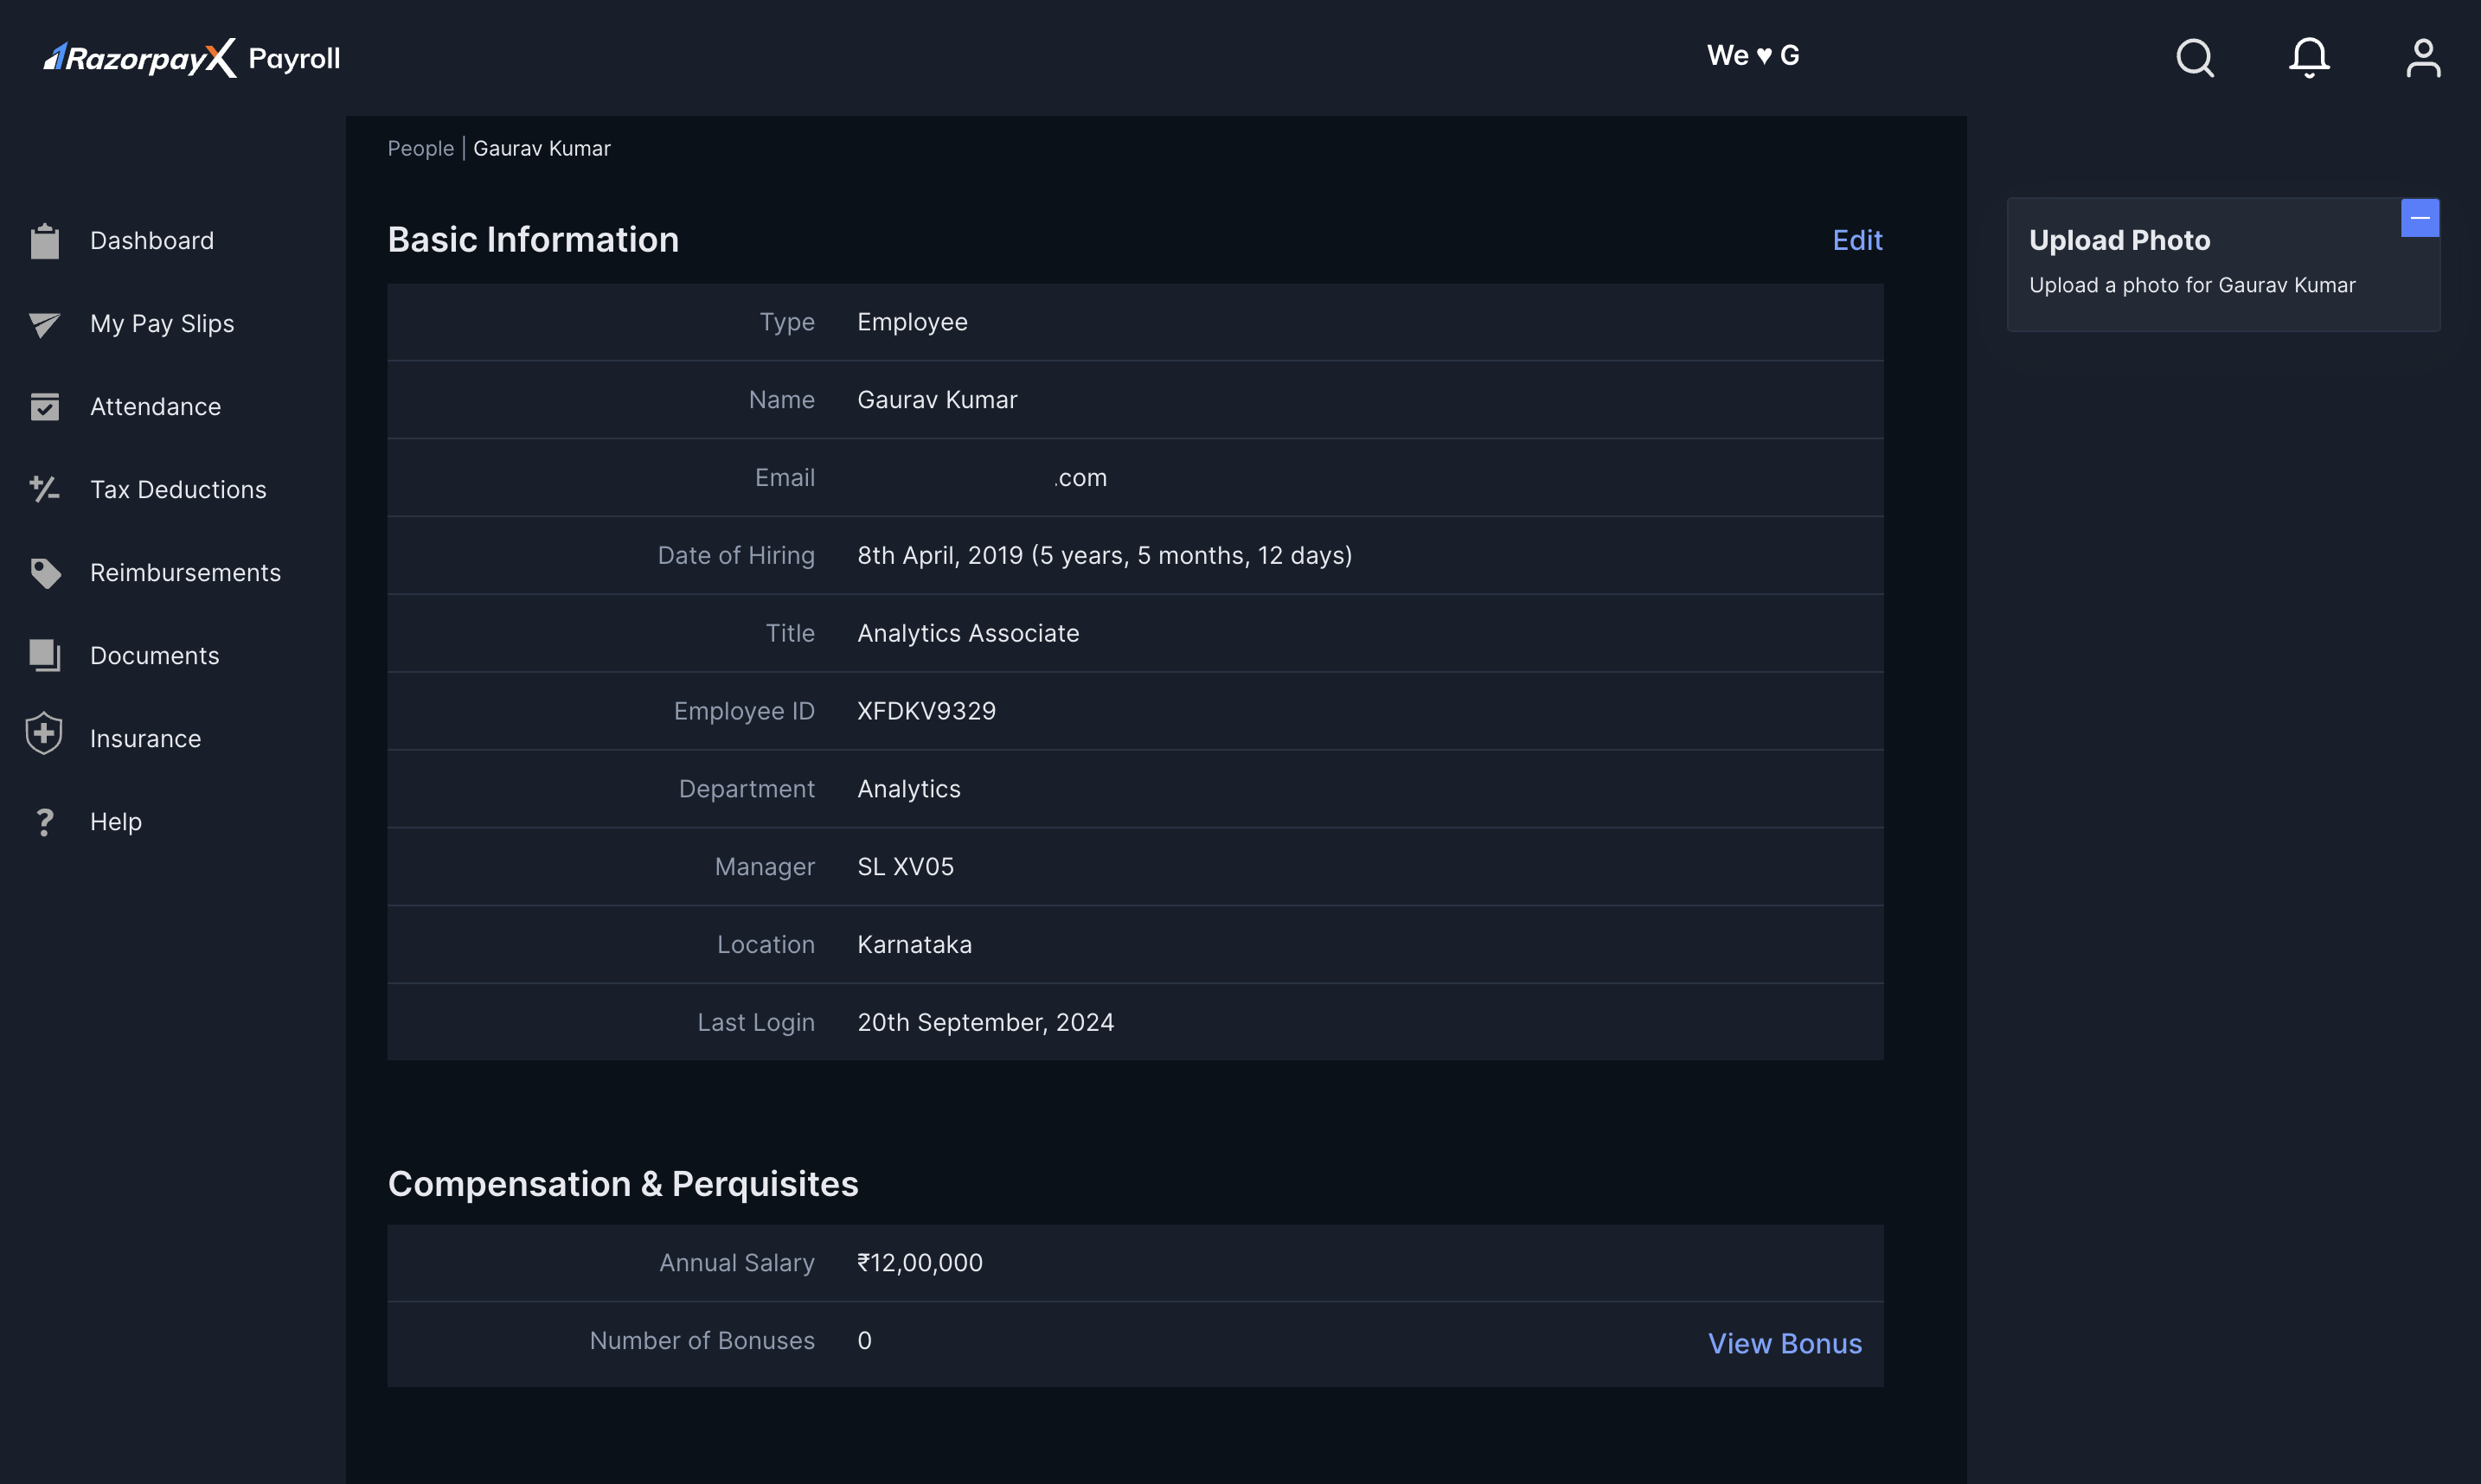
- Type as in Employee or Contractor
- Registered Email
- Date of Hiring
- Title
- Employee ID
- Department
- Manager
- Location of employment
- Last Login
Upload Photo
Upload Photo
Click Upload Photo in the right pane to add your photo.Ensure your photo is a 300x300 pixels close-up of your face. Choose the file to upload and click UPLOAD PHOTO.
Compensation & Perquisites
Compensation & Perquisites
In the Compensation & Perquisites section, you can view:
- Annual Salary. This is your CTC. To view the salary break down, navigate to My Pay Slips.
- Number of Bonuses. Click VIEW BONUS to view the bonuses you were paid.
Advance Salary
Advance Salary
In the Advance Salary section, you can view:
- Advance Salary, if you have availed it.
- Advance Salary EMI amount. Your employer deducts this amount from your monthly salary.
Leaves & Attendance
Leaves & Attendance
In the Leaves & Attendance section, you can view:
- Shift timing. This can be either:
- Default shift or the working hours defined in your offer letter.
- Custom shift with timings. For example,
12:30 - 17:30.
- Total Earned Leaves balance.
- Other leaves’ balance as configured by your organisation. For example, Medical leaves.
Past Payroll in FY
Past Payroll in FY
In the Past Payroll in FY section, you can view:
- Total Taxable Salary.
- Exemption from salary.
- TDS deducted for the previous year.
- Previous Employer(s) Taxable Salary.
- Previous Employe(s) TDS Deducted.
Payment Information
Payment Information
In the Payment Information section, you can view the following. Click EDIT to change:
- PAN (Permanent Account Number)
- Bank Account Number. Enter your bank account number twice to confirm.
- IFSC Code. You can find the IFSC in your bank account’s cheque book or you can search online at bankifsccode.com.
- Beneficiary Name
- Payment mode. Possible options:
- Default, as set up by your organisation.
- IMPS
- NEFT
Provident Fund, Professional Tax, ESI, LWF
Provident Fund, Professional Tax, ESI, LWF
In this section, you can check the compliance payments and their statuses.
- PF Status: Can be disabled for you, or you have opted in/opted out. Contact your HR/organisation administrator to make changes.
- PF UAN: Provide your UAN if applicable. If you do not have a UAN, Payroll can register you for PF and generate a UAN.
- Professional Tax: If your employment location state in India (as set in Basic information) collects Professional Tax, the status is
Enabled. - ESIC Status: Shows the status of your ESIC registration for employees.
- ESIC IP Number: View the unique ESIC ID called ESIC IP number.
Other Information
Other Information
In this section, you can add other information to your Payroll account.
- Phone number: Add your phone number to receive salary credit notifications from Payroll. You can also configure Two-factor authentication using your phone number and OTP and enhance security. 2FA is possible only if your employer has enabled it for you.
- WhatsApp Integration: If your organisation has integrated Payroll with WhatsApp, you can receive your monthly payslips on your WhatsApp chat. Select the check box to enable the feature.
- Gender: Select your gender from the options in the drop-down menu.
- Date of Birth: Click the text box to open the calendar modal and enter your date of birth.
- Blood group: Enter your blood group in the text box.
- Business Unit: Provide the business unit you belong to. This is usually pre-configured for you by your organisation.
- Click SKIP to save the changes made and skip adding the other information.
- Click CANCEL to discard your changes.
User Roles & Permissions
User Roles & Permissions
In this section, you can view your role as defined by your organisation. By default, you are an Employee/Contractor.Other roles are visible if you are added as a collaborator or are assigned any User Roles by the Payroll Administrator.
Set Preferences
You can set email preferences for events and modify your password on the Preferences page.- Log in to the Payroll Dashboard.
- Navigate to the user profile icon and click Preferences.
- On the Preferences page, you can change the following:
Change the Password
Change the Password
To change your password:
- Click RESET against Password.
- In the Reset Password pop-up modal, click RESET PASSWORD.
Change Email Preferences
Change Email Preferences
To set email preferences:
- Go to Email Preferences on the Preferences page.
- Select and clear the check boxes against the events listed on-screen.
- Click SAVE PREFERENCES.
Change Default 2FA Mode
Change Default 2FA Mode
To change the default 2FA mode:
- Go to My profile → Preferences page.
- Navigate to Two Factor Authentication → MANAGE.
-
Select between either Email or Authenticator app as the preferred mode of authentication. Click CONTINUE.
If you select Authenticator app:
- Download the preferred authenticator app on your mobile device.
- Scan the QR code displayed on the Authenticator App Setup page.
- Enter the 6-digit code from the authenticator app.
- Click VERIFY & SETUP.
Upload Documents
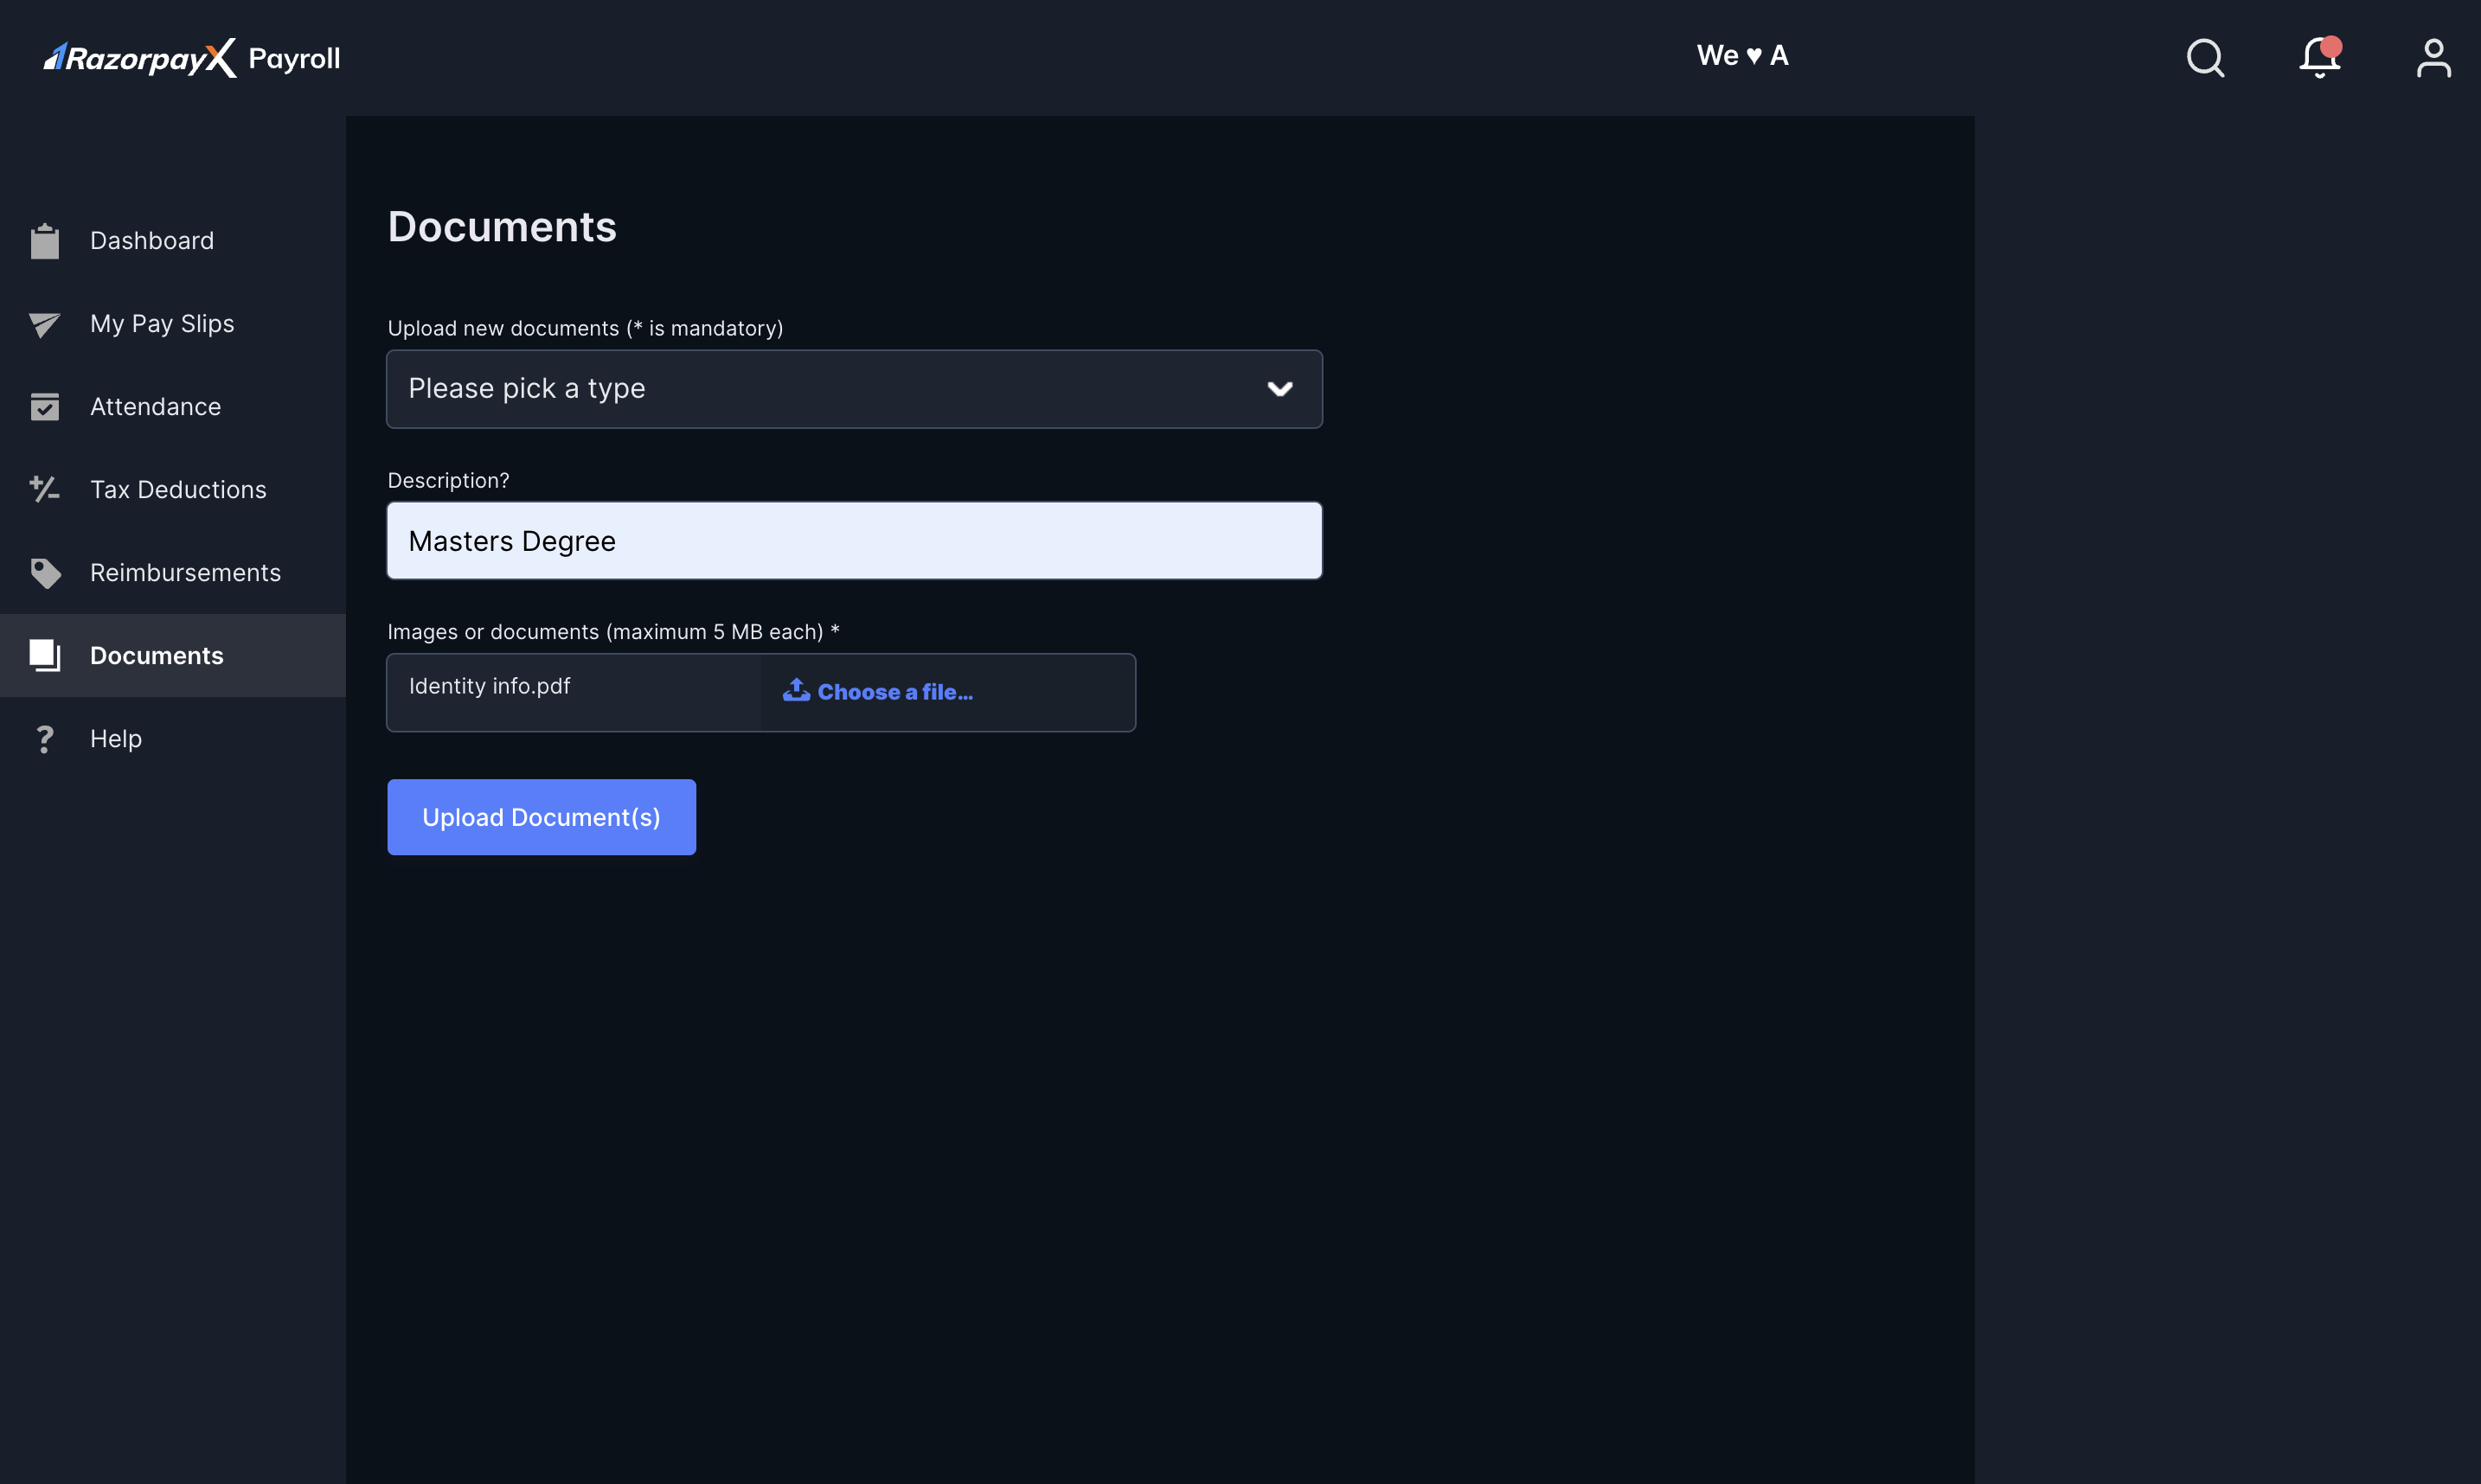
As directed by your HR/Manager, you can upload the relevant documents on the Payroll Dashboard. To upload documents:- Log in to the Payroll Dashboard.
- Navigate to Documents in the left menu. You can also navigate to Reminders and click documents.
- Select the type of document to upload using the drop-down menu. You can also add a description
- Select the relevant documents to upload. Refresh the page to cancel the upload.
-
Click UPLOAD DOCUMENT(S).