Available in🇮🇳 India
You can create a set of custom rules for transactions using different parameters such as payment method, card type, and so on. Also, you can add gateways in priority order and split traffic between gateways.
Let us assume you want to set up a custom rule wherein:
This means that if the success rate of Razorpay and ABC drops below a certain level, all transactions will automatically be routed to XYZ.
Steps
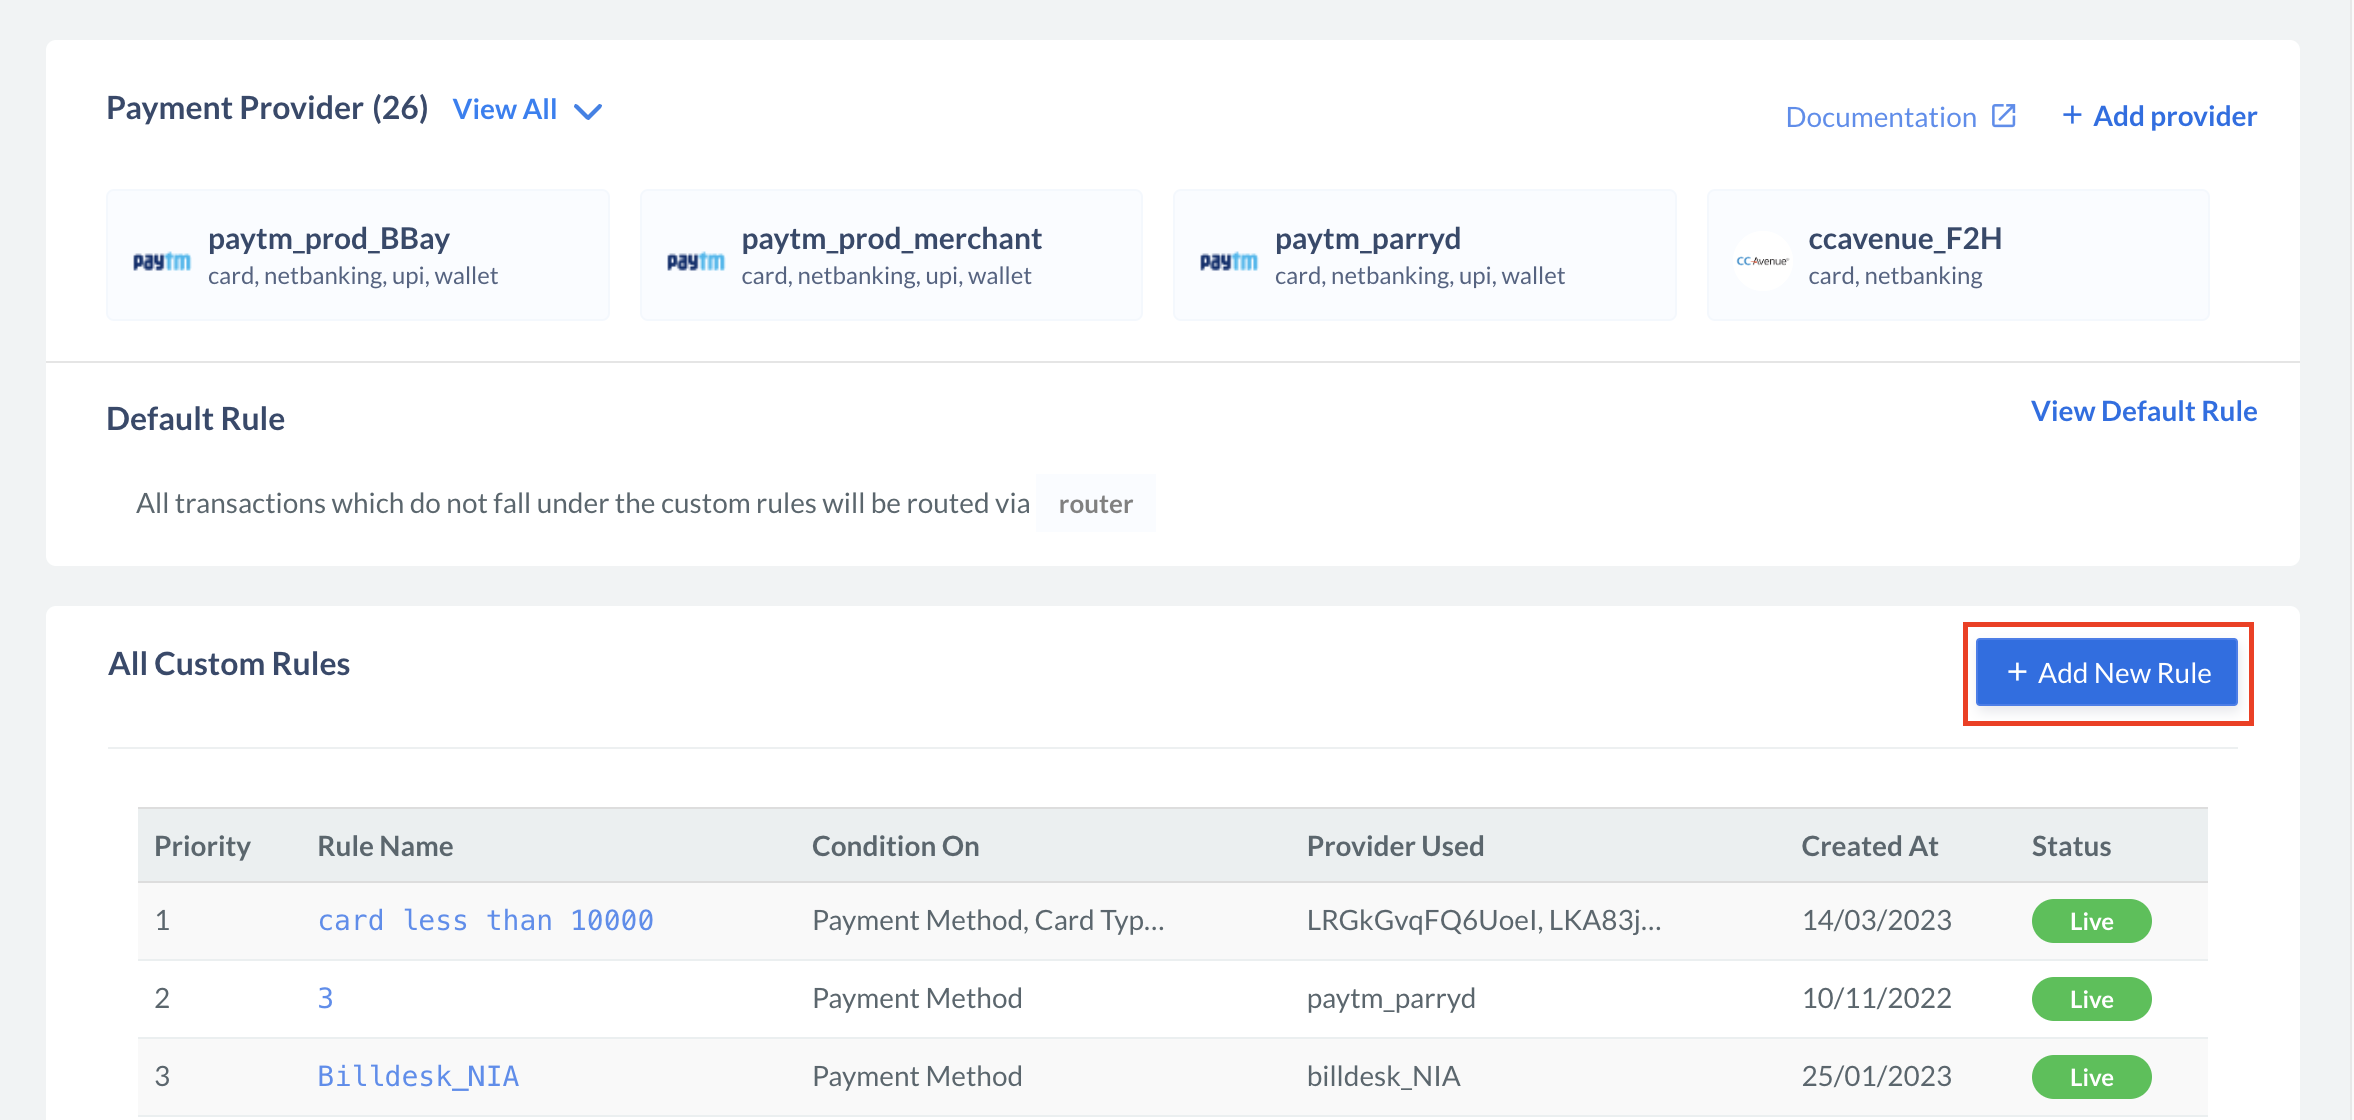
To set up the custom rule:- Click +Add New Rule.
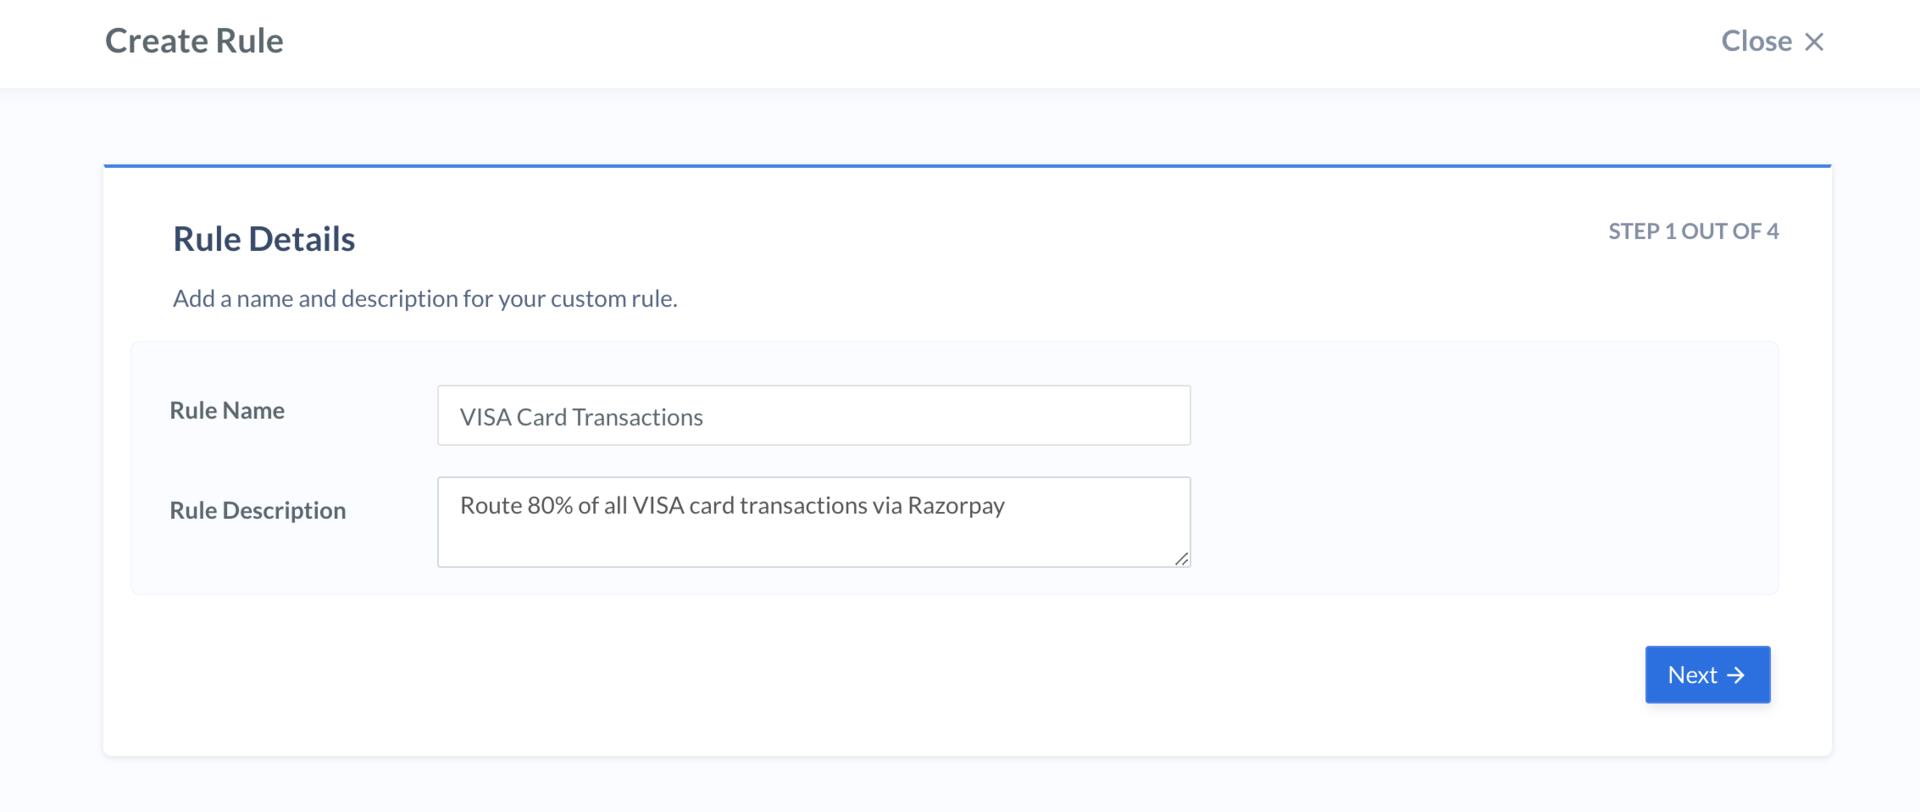
- In the Create Rule screen, add the rule details:
- Rule Name - Add a name for the rule. For example,
VISA Card Transactions. - Rule Description - Enter a description. For example,
Route 80% of all VISA card transactions via Razorpay.
- Rule Name - Add a name for the rule. For example,
- Click Next.
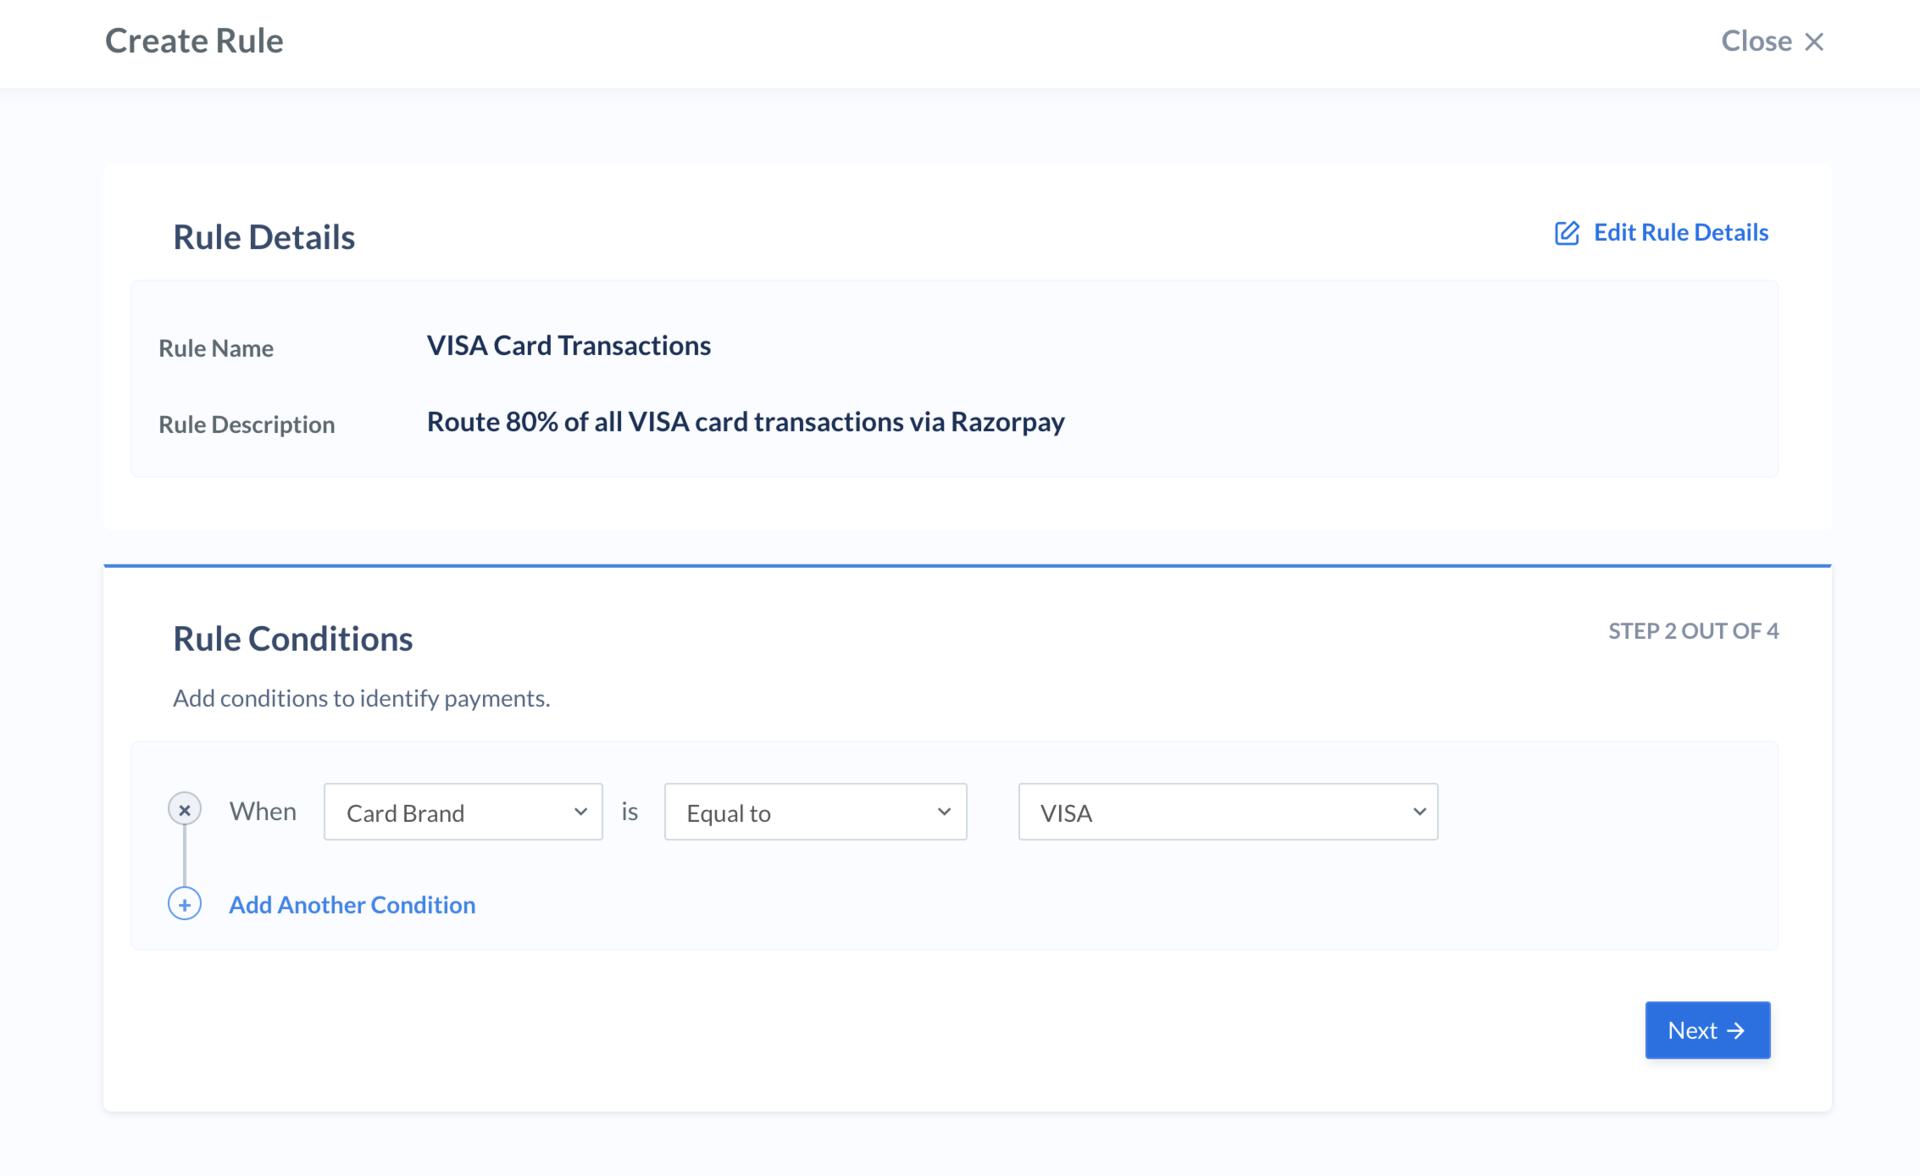
- Add the rule conditions:
Custom Identifiers
Know more about custom identifiers.
Know more about custom identifiers.
• One of
• Equal to
• Not equal to
• Between
• Starting with
• Ending with
• Less than
• Greater than
• Contains
• Greater than equal
• Less than equal | | Select Comparing Value | Depends on the When field value. | Continuing with our VISA card rule example, the values will be as follows:
- When - Select
Card Brand. - is - Select
Equal to. - Select Comparing Value - Select
VISA. - Click Next.
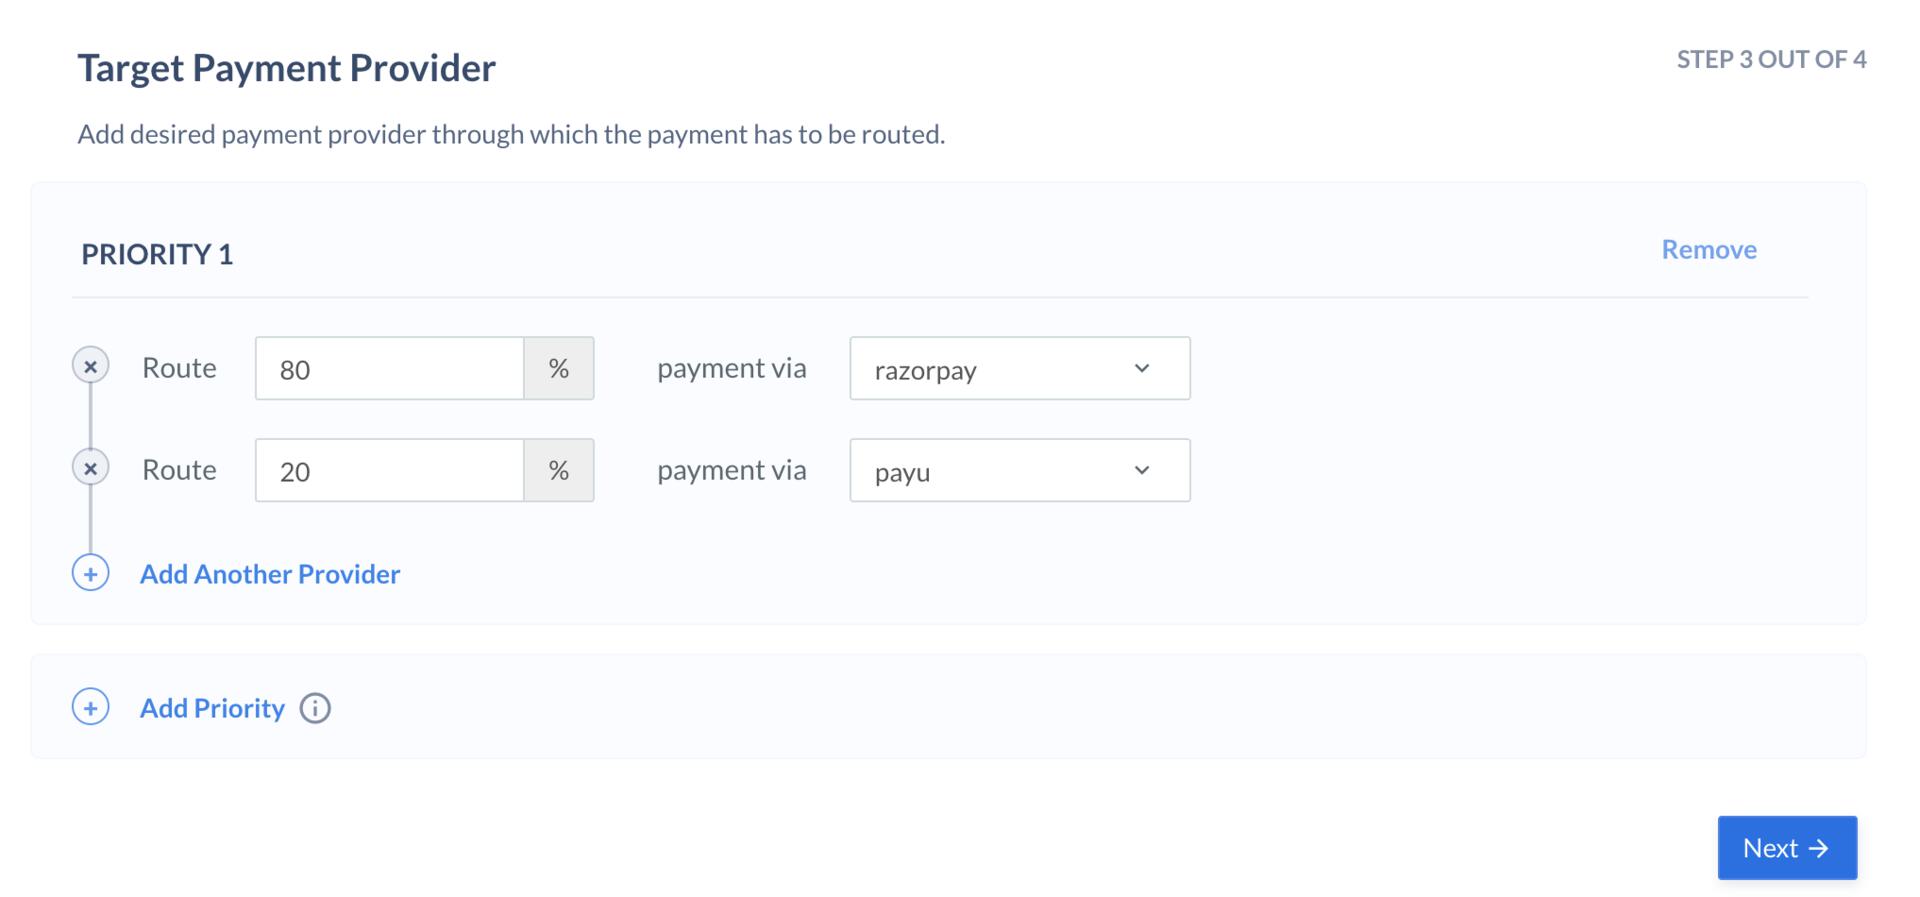
- Add the target payment provider through which the transactions should be routed:
- Click Edit Target Provider to set the priority.
- Enter the following details:
- For example, for Razorpay gateway, provide the values for Route as 80 and payment via as
Razorpay. - Click Add Another Provider.
- For example, for ABC gateway, provide the values for Route as 20 and payment via as
ABC.
- For example, for Razorpay gateway, provide the values for Route as 80 and payment via as
- You can choose to add another provider as Priority 2. To do this, click Add Priority and enter the following details:
- For example, for XYZ gateway, provide the values for Route as 100 and payment via as
XYZ.
- For example, for XYZ gateway, provide the values for Route as 100 and payment via as
- Click Next.
- Click Publish Rule to publish immediately. Alternatively, you can save the rule in draft state and publish later.
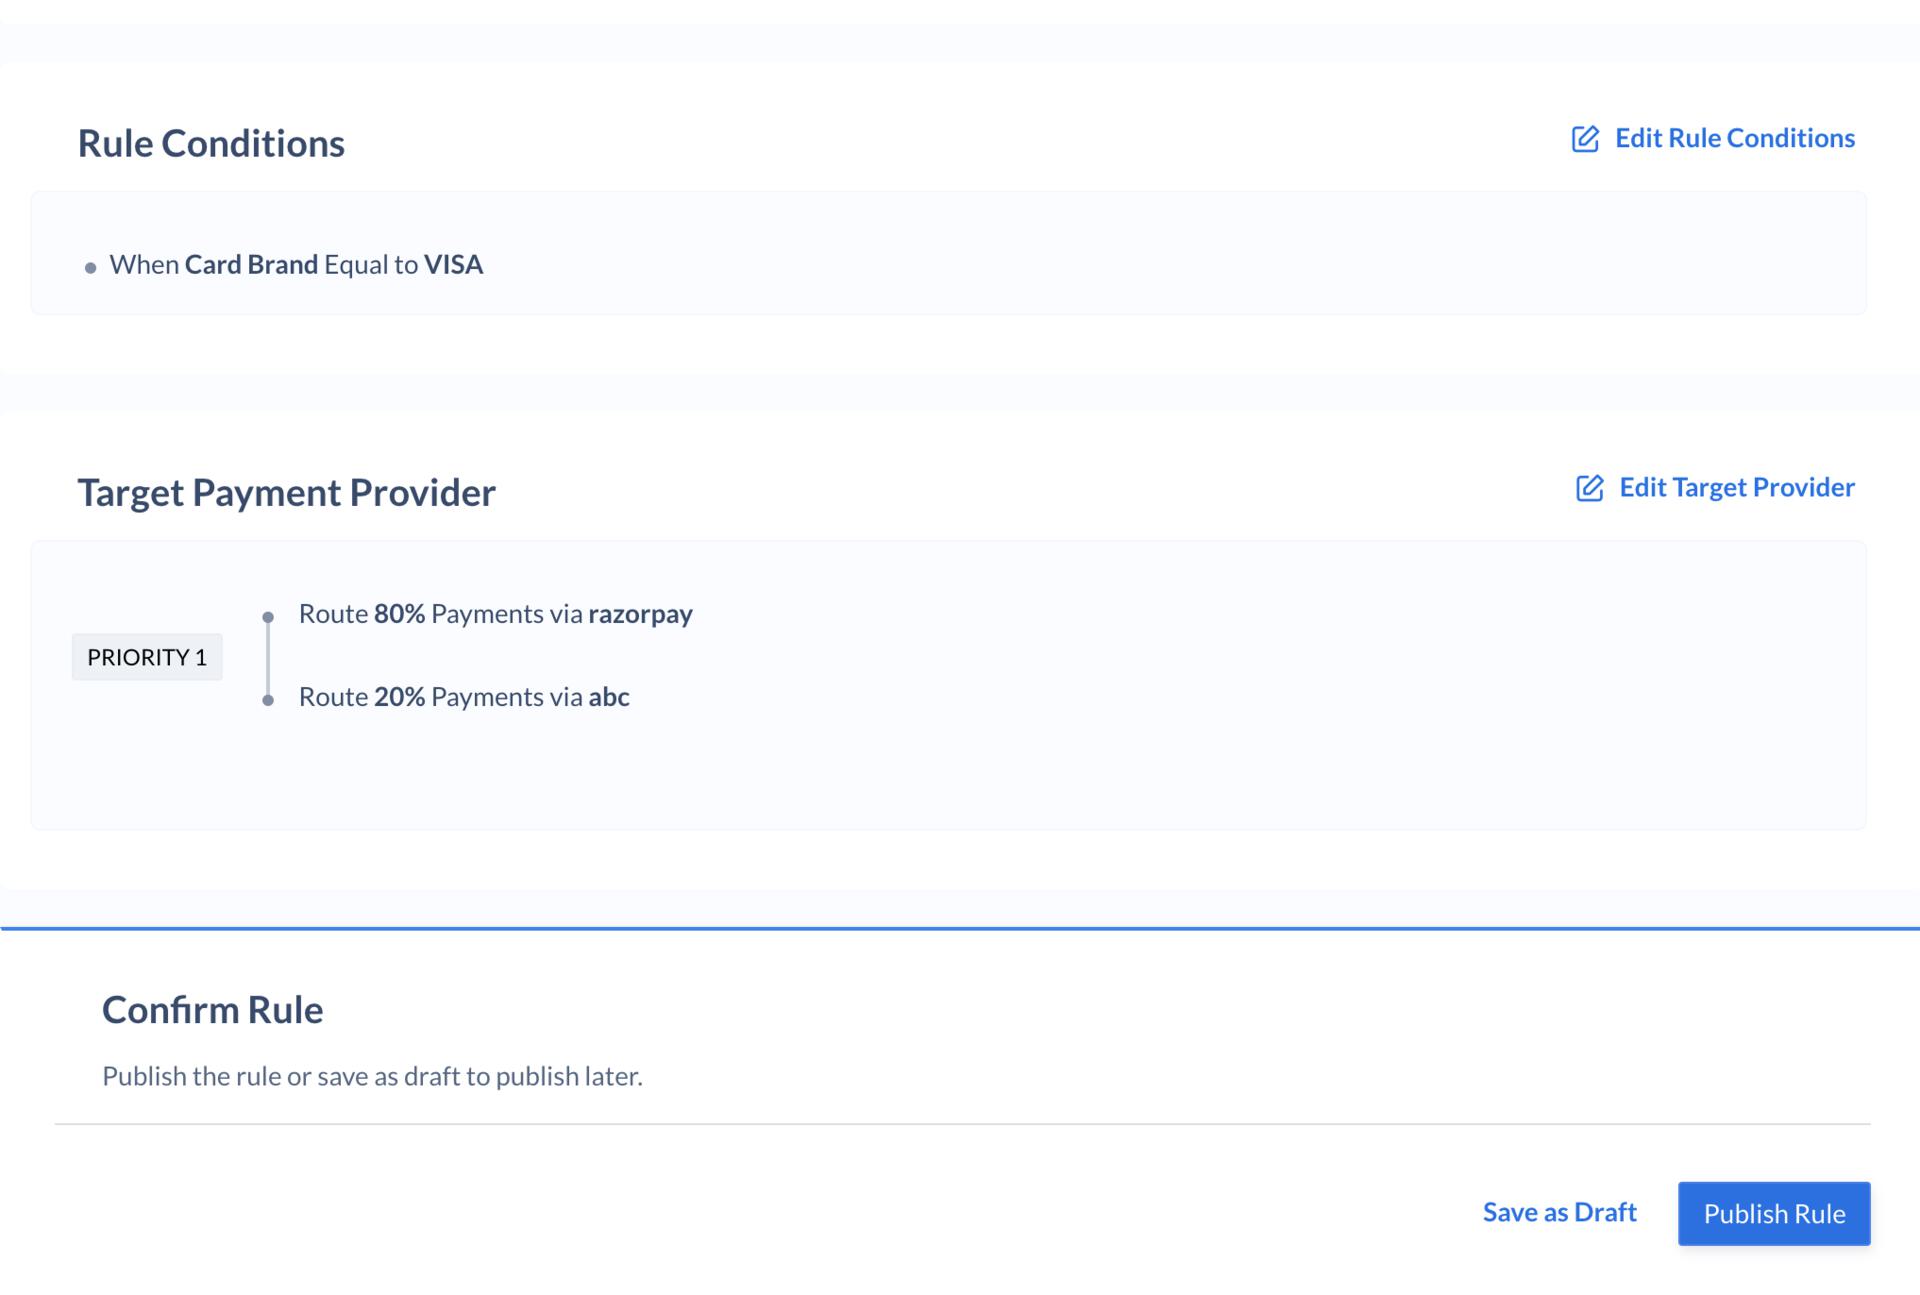
Custom Identifiers
Custom identifiers are texts (strings) that can be used to construct routing rules. For instance, you can use custom identifiers to route transactions through Razorpay when you pass a custom textxyz and to PayU when you pass the text abc.
How to send the values for custom identifier? There are three field defined for custom identifiers:
- optimizer_identifier_1
- optimizer_identifier_2
- optimizer_identifier_3
Sample Code
Given below are sample codes which show how thenotes parameter should be passed in the Orders API and the Standard Checkout code:
Orders API
Standard Checkout
Standard Checkout Code
Turbo UPI on Optimizer
Watch this short video of how you to route your transactions for Turbo UPI using Optimizer.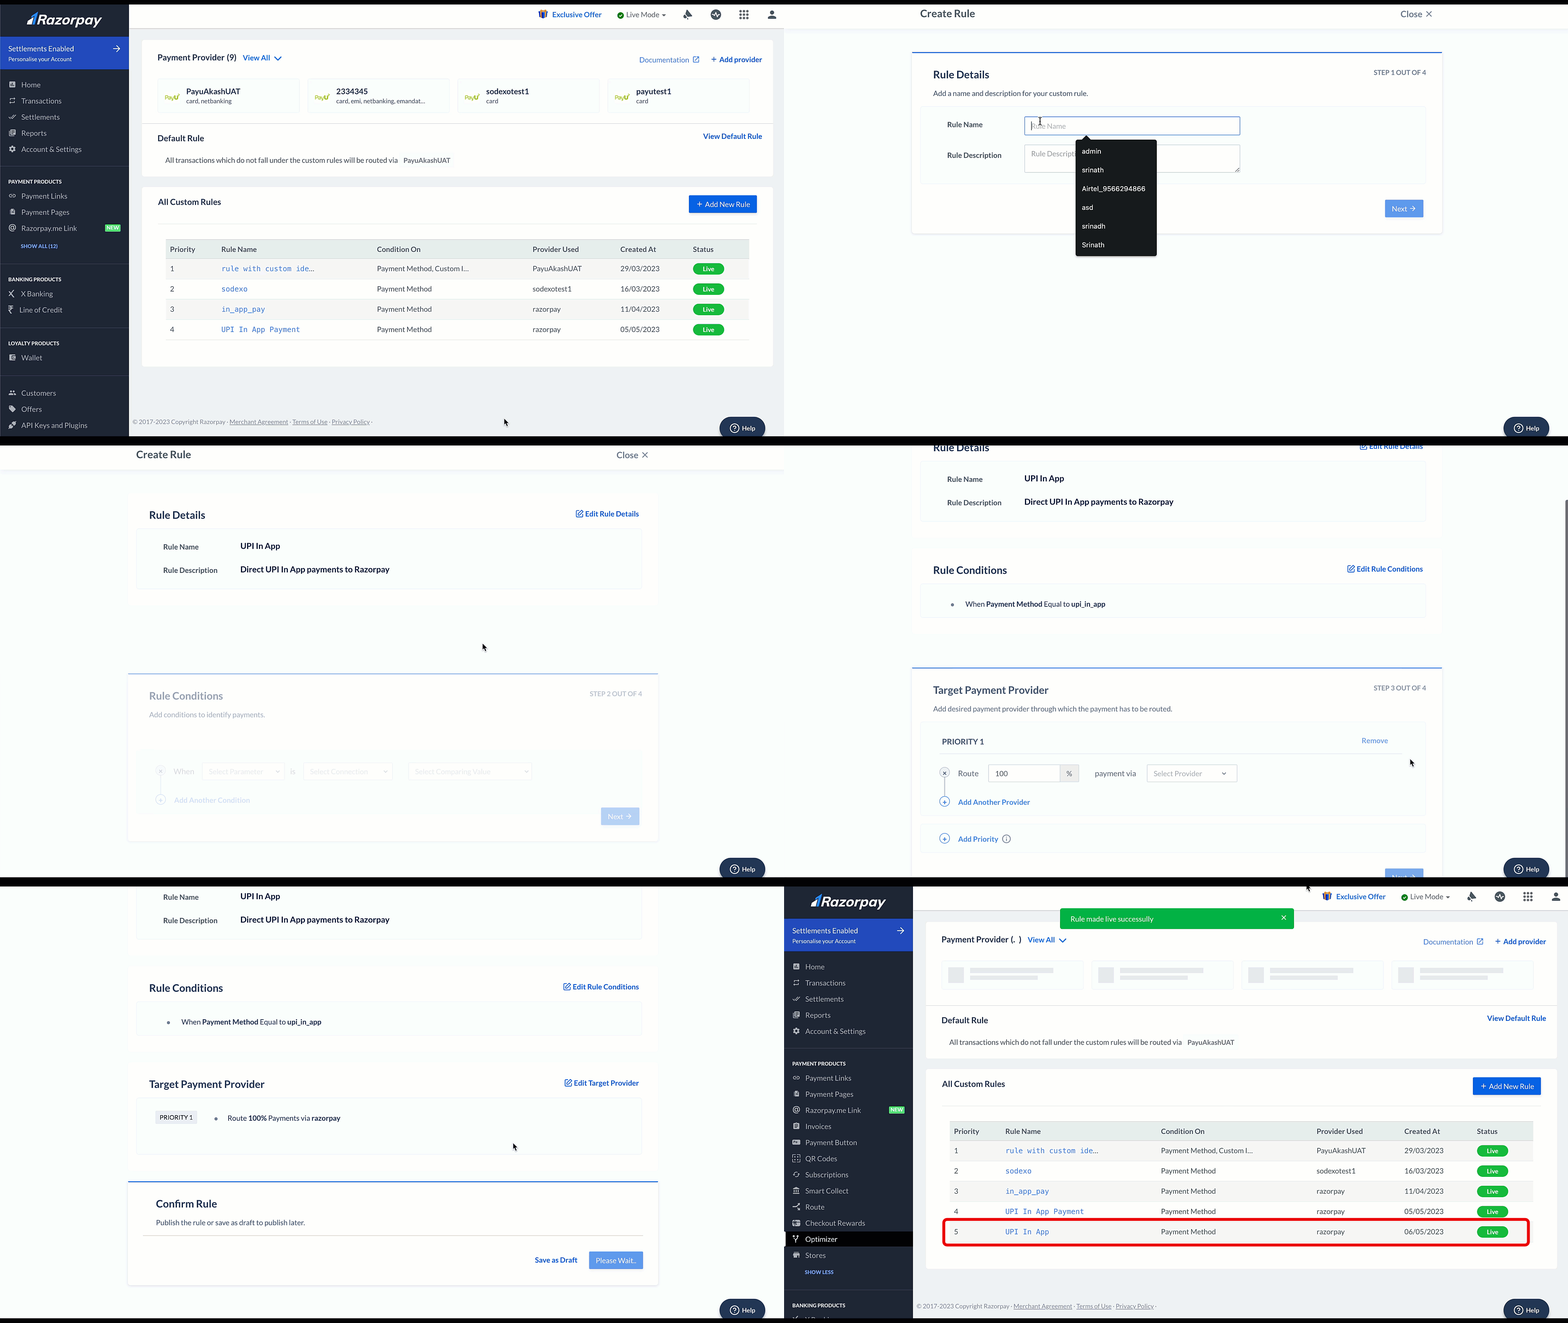
Handy TipsMake sure that you have enabled Turbo UPI as a payment method. If it is not yet enabled, please get in touch with your sales POC to activate this feature for your account.
- Log in to your Dashboard.
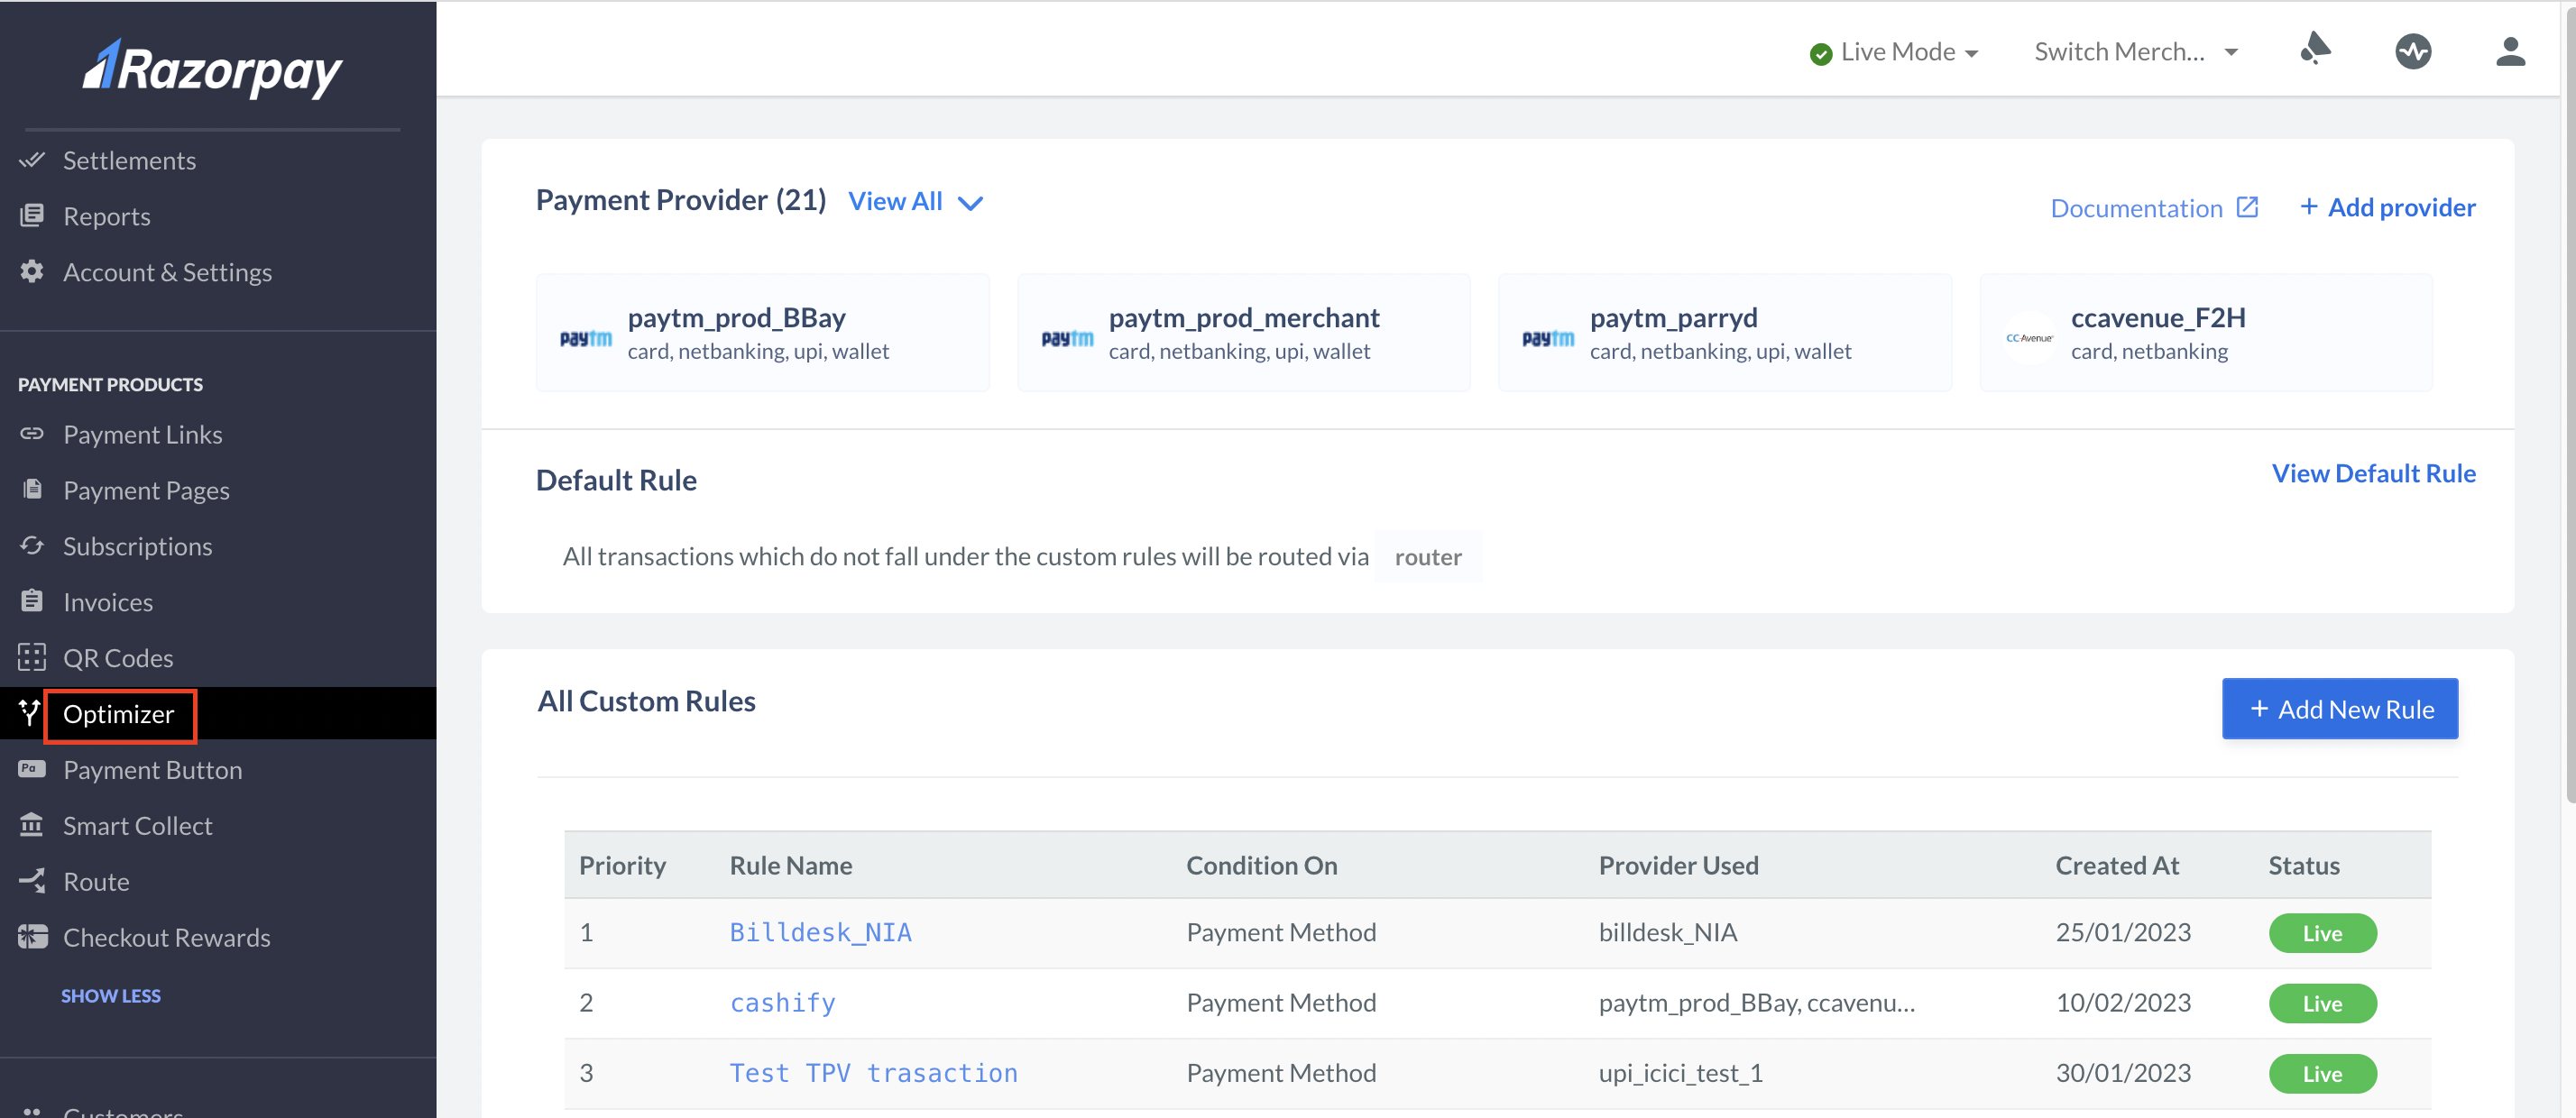
- Go to the PAYMENT PRODUCTS section and click Optimizer.
- Click Add New Rule.
- Enter the Rule Name and Rule Description and click Next.
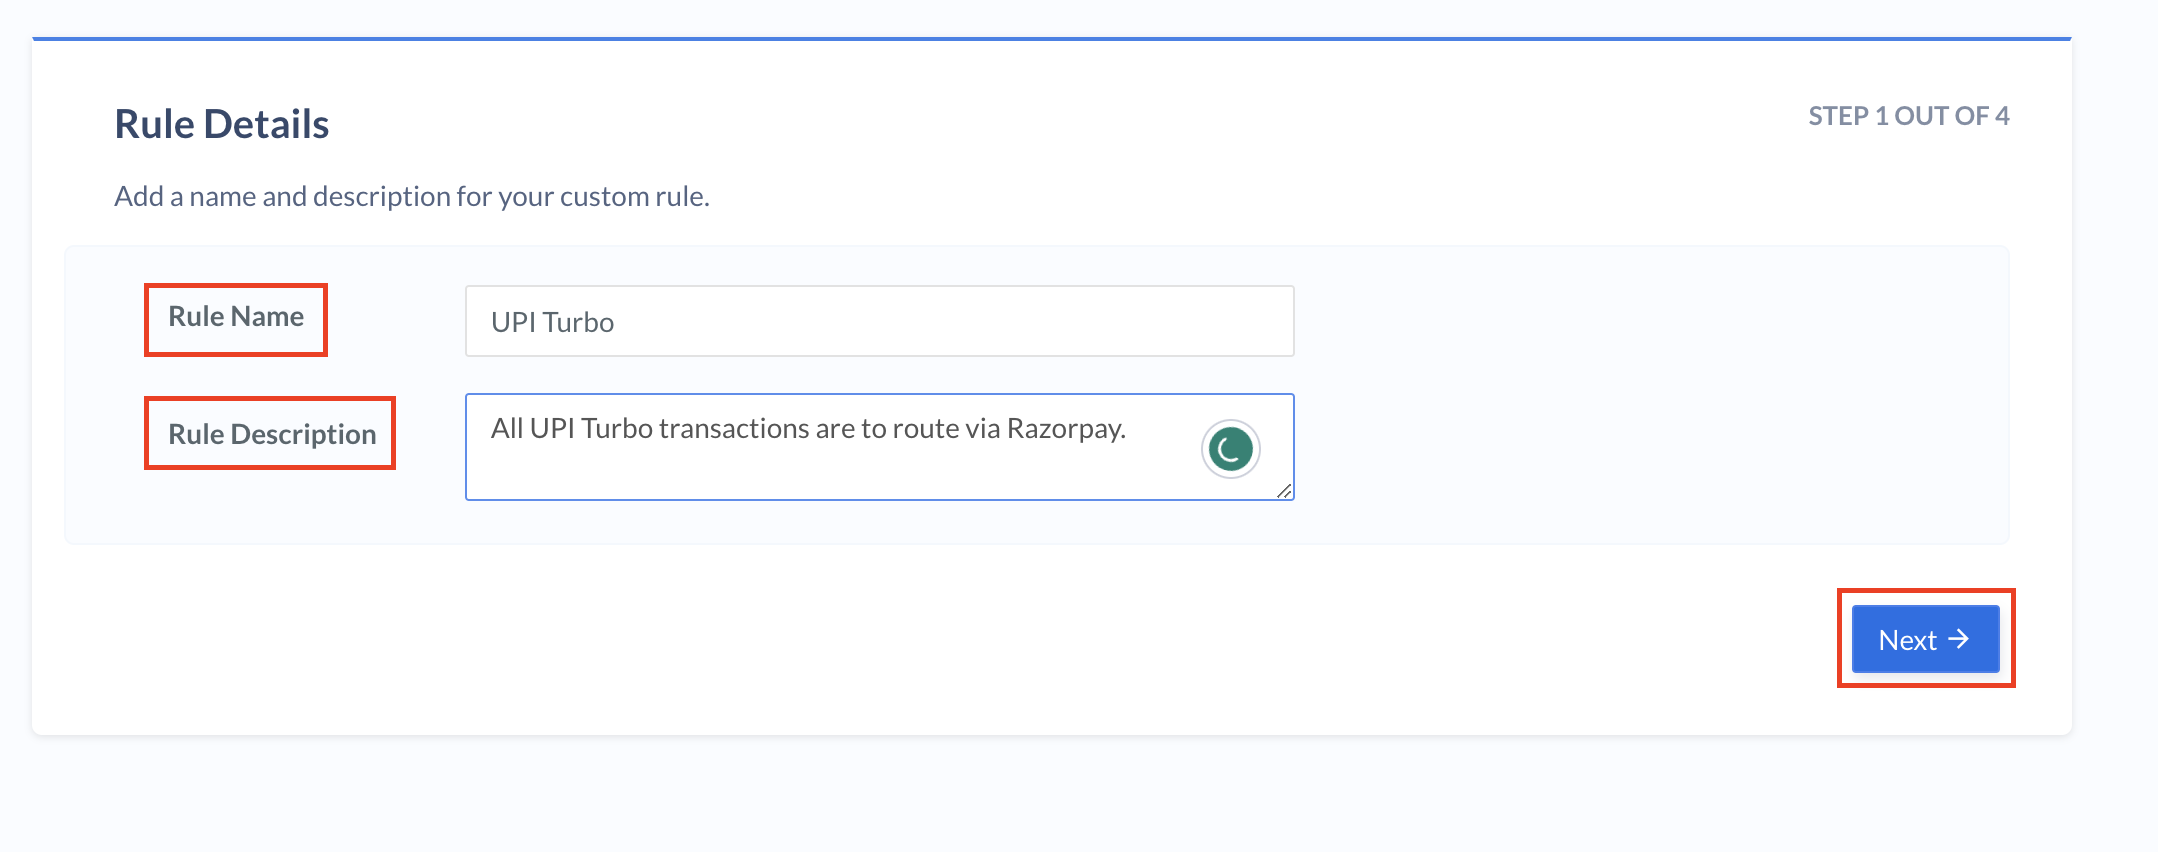
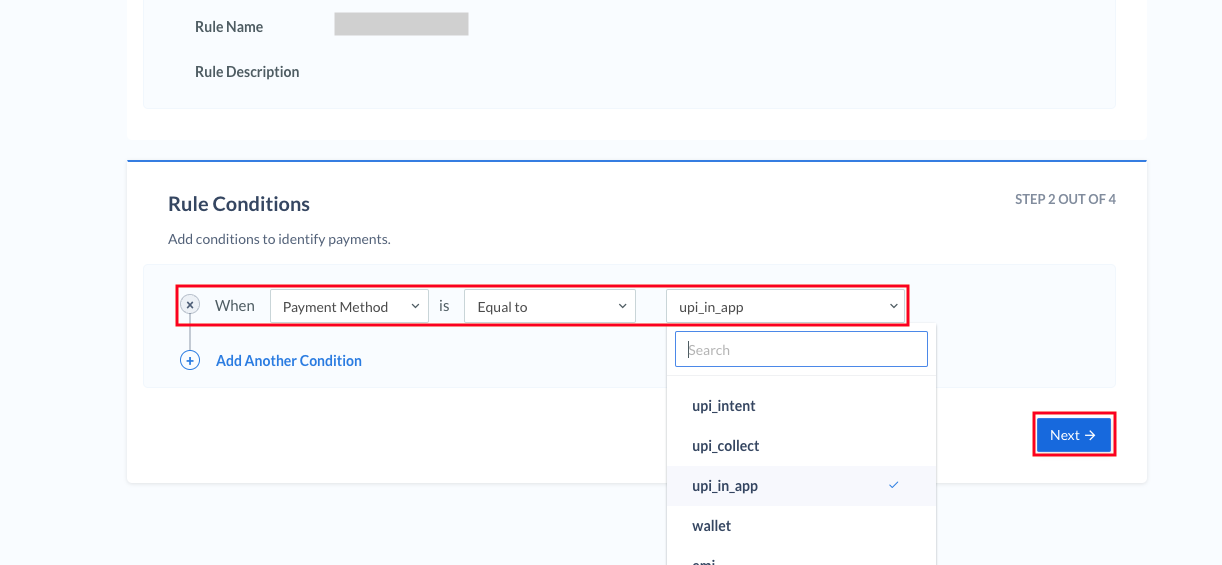
- Enter the following values:
- When - Select
Payment Method. - is - Select
Equal to. - Select Comparing Value - Select
upi_in_appand click Next.
- When - Select
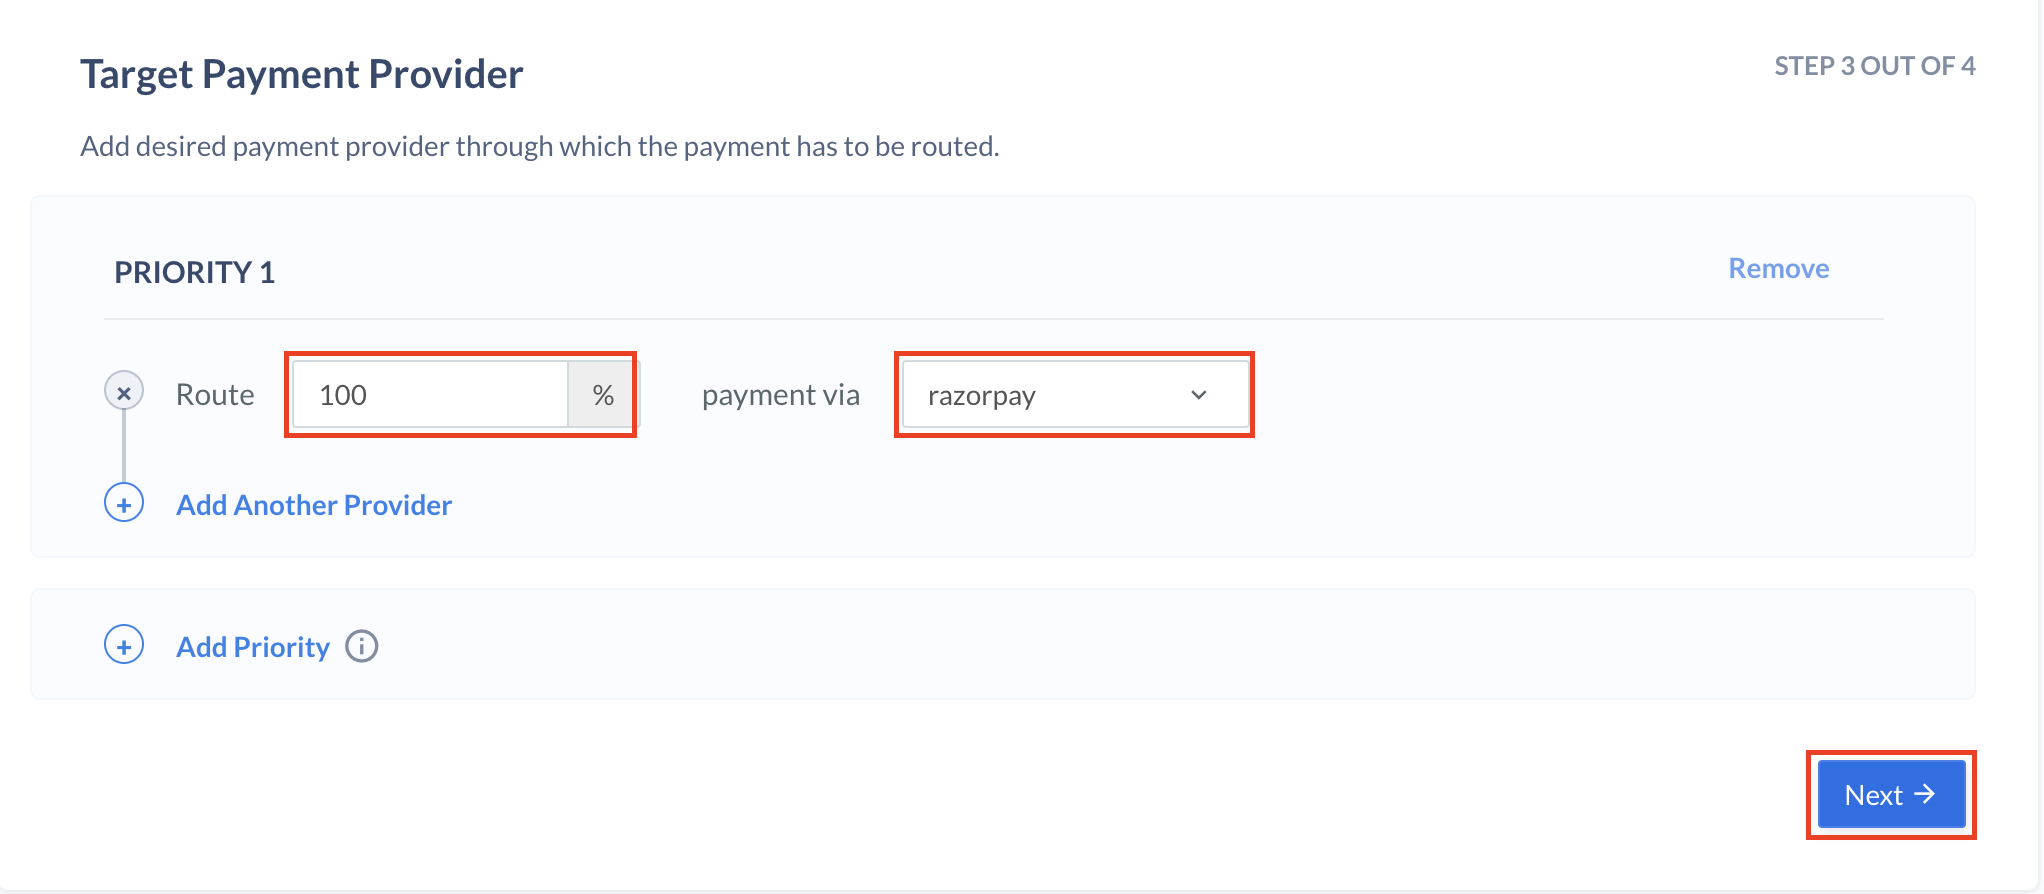
- Enter the target payment provider details and click Next.
- Click Publish Rule.
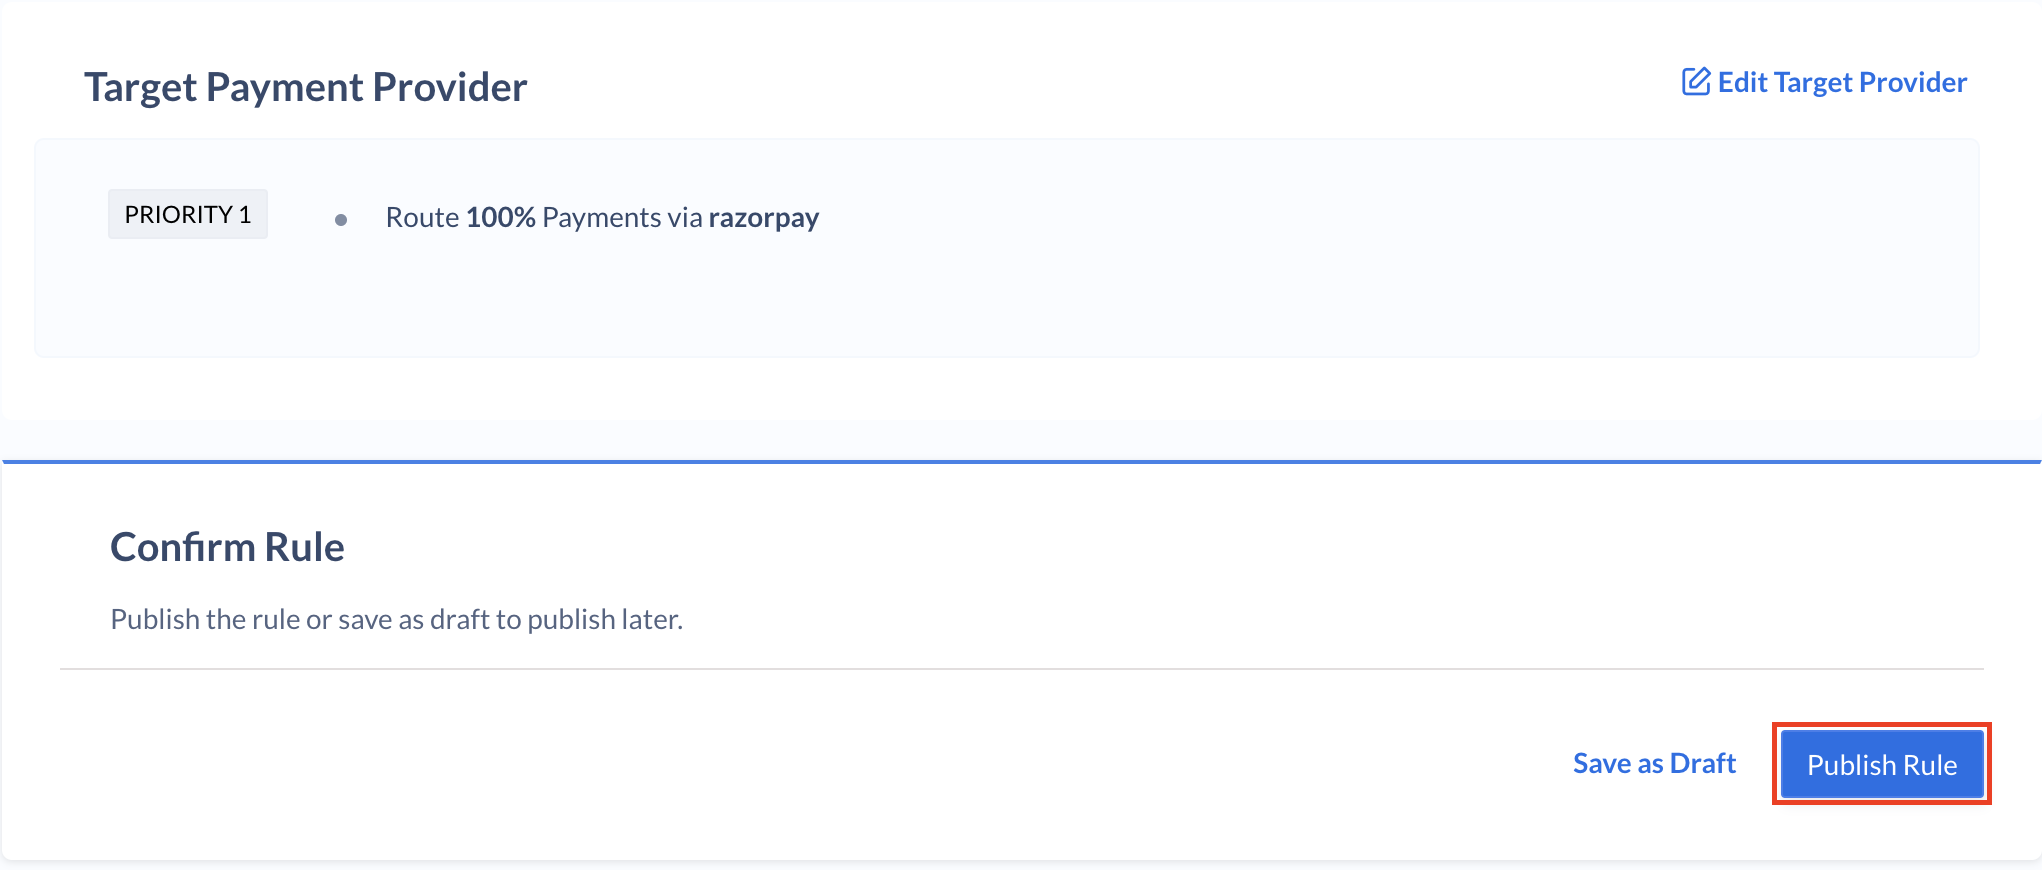
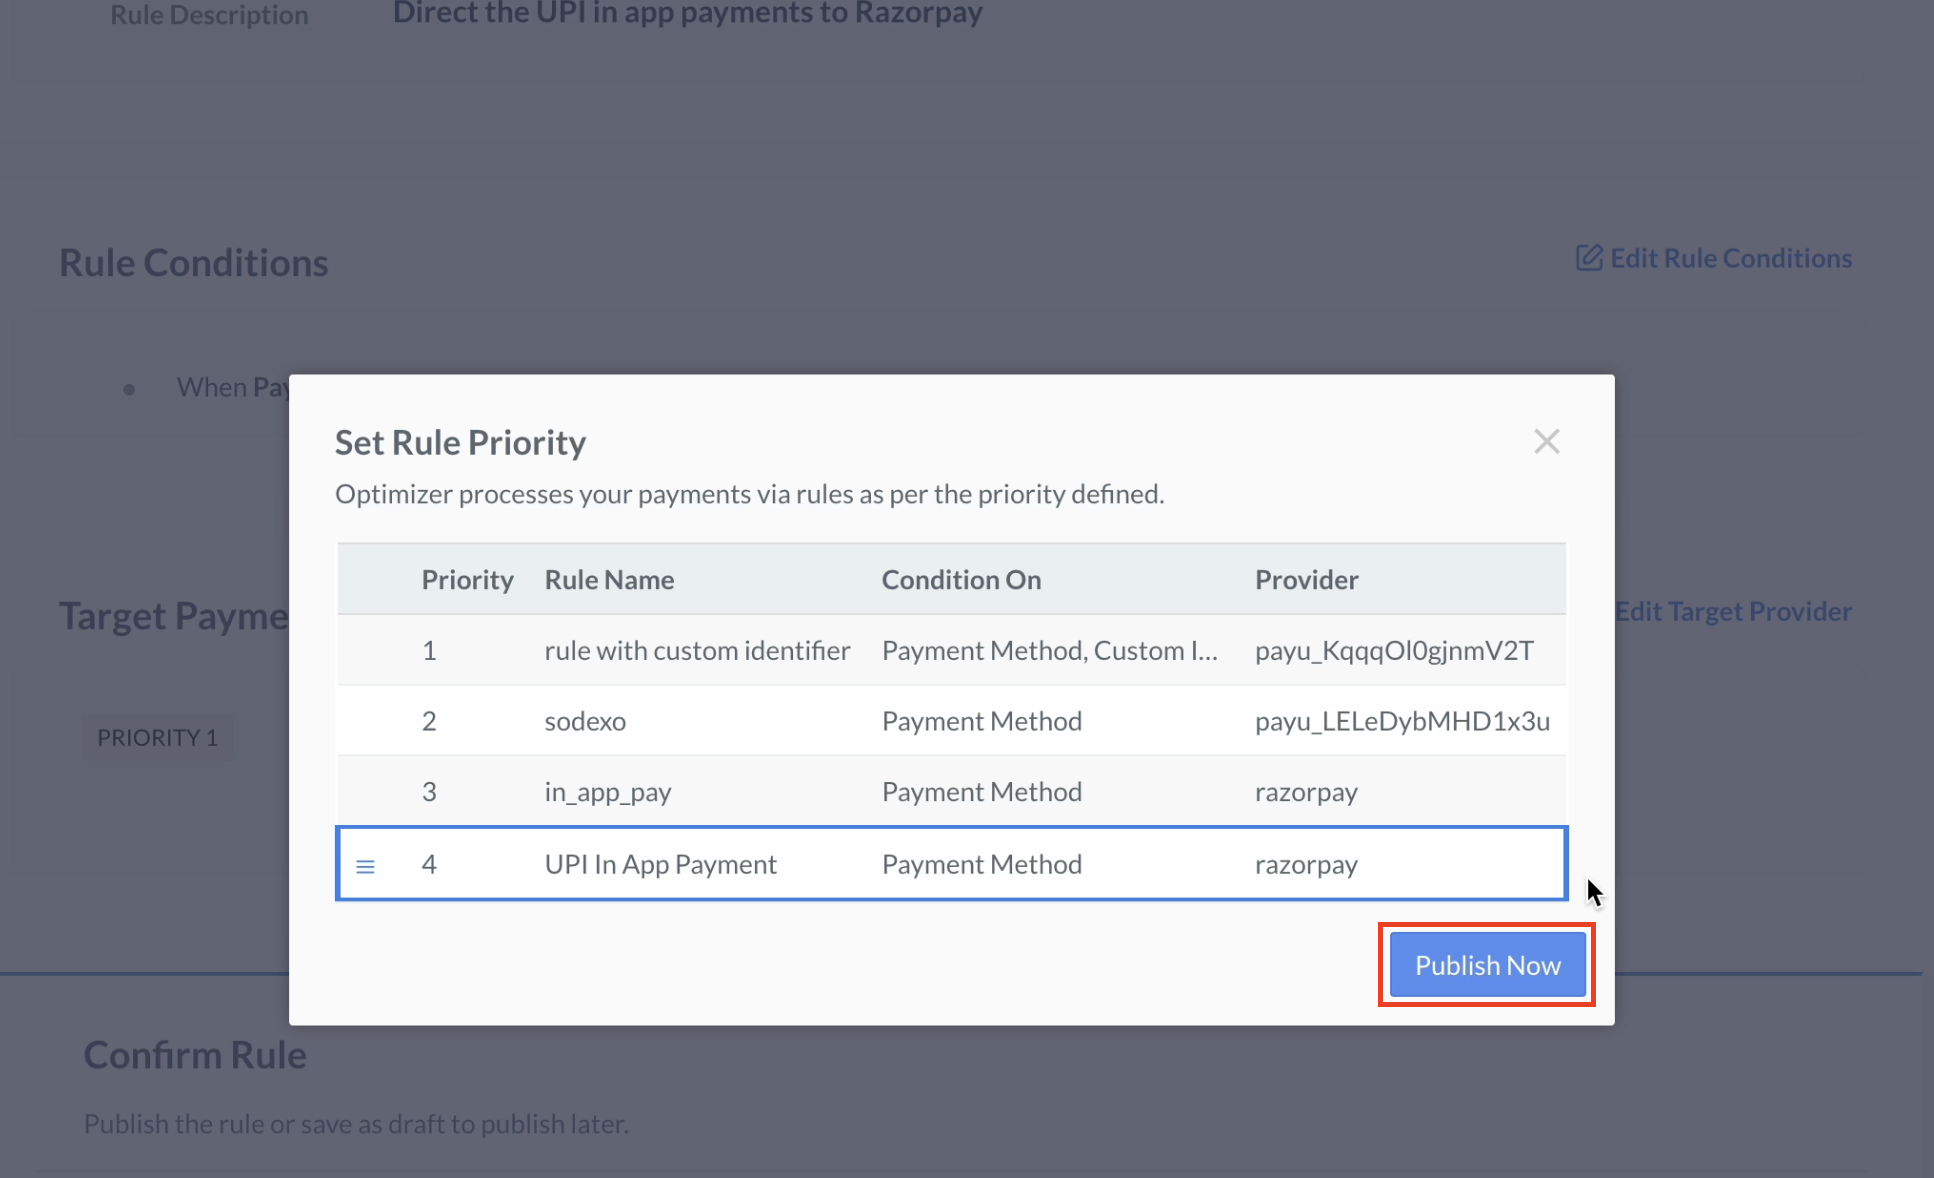
- Click Publish Now.