Available in🇮🇳 India
Follow the steps given below to integrate the All-in-one Razorpay Payment Gateway App on your Shopify store.
1. Build Integration
Install the All-in-one Razorpay Payment Gateway.
2. Test Integration
Test the integration by making a test payment.
3. Go-Live Checklist
Check the go-live checklist.
1. Build Integration
Follow the steps given below:1 Installation
1 Installation
Step 1: Sign up for a Razorpay account.Step 3: Install and Activate the App.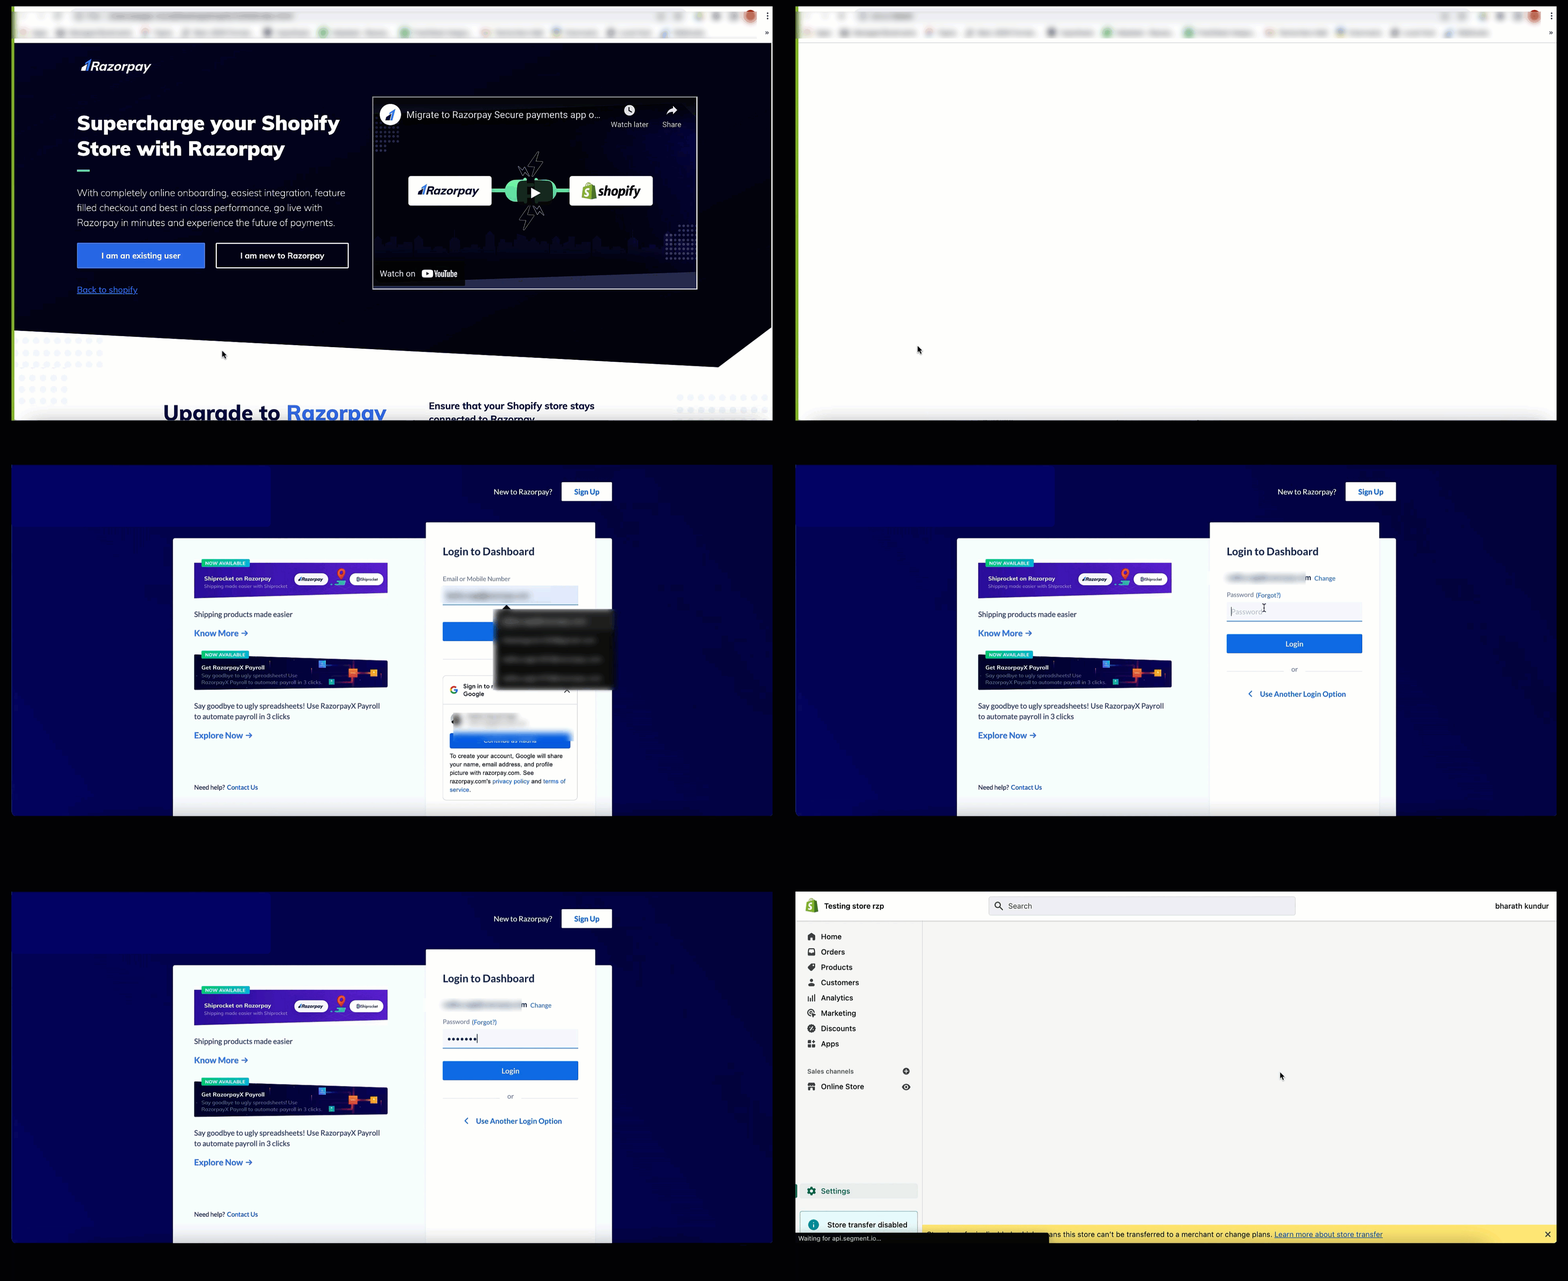
 This completes your integration. For more information, see Shopify FAQs.
- Sign up for a Razorpay account. If you already have an account, skip to Step 2.
- Submit your KYC, and if we need any further clarification, we will reach out to you on WhatsApp, SMS and email.
- Once our team completes KYC verification and you are enabled to accept payments, we will send a confirmation on WhatsApp, SMS and email.
- Method A: Direct Link Installation
- Method B: Manual Installation
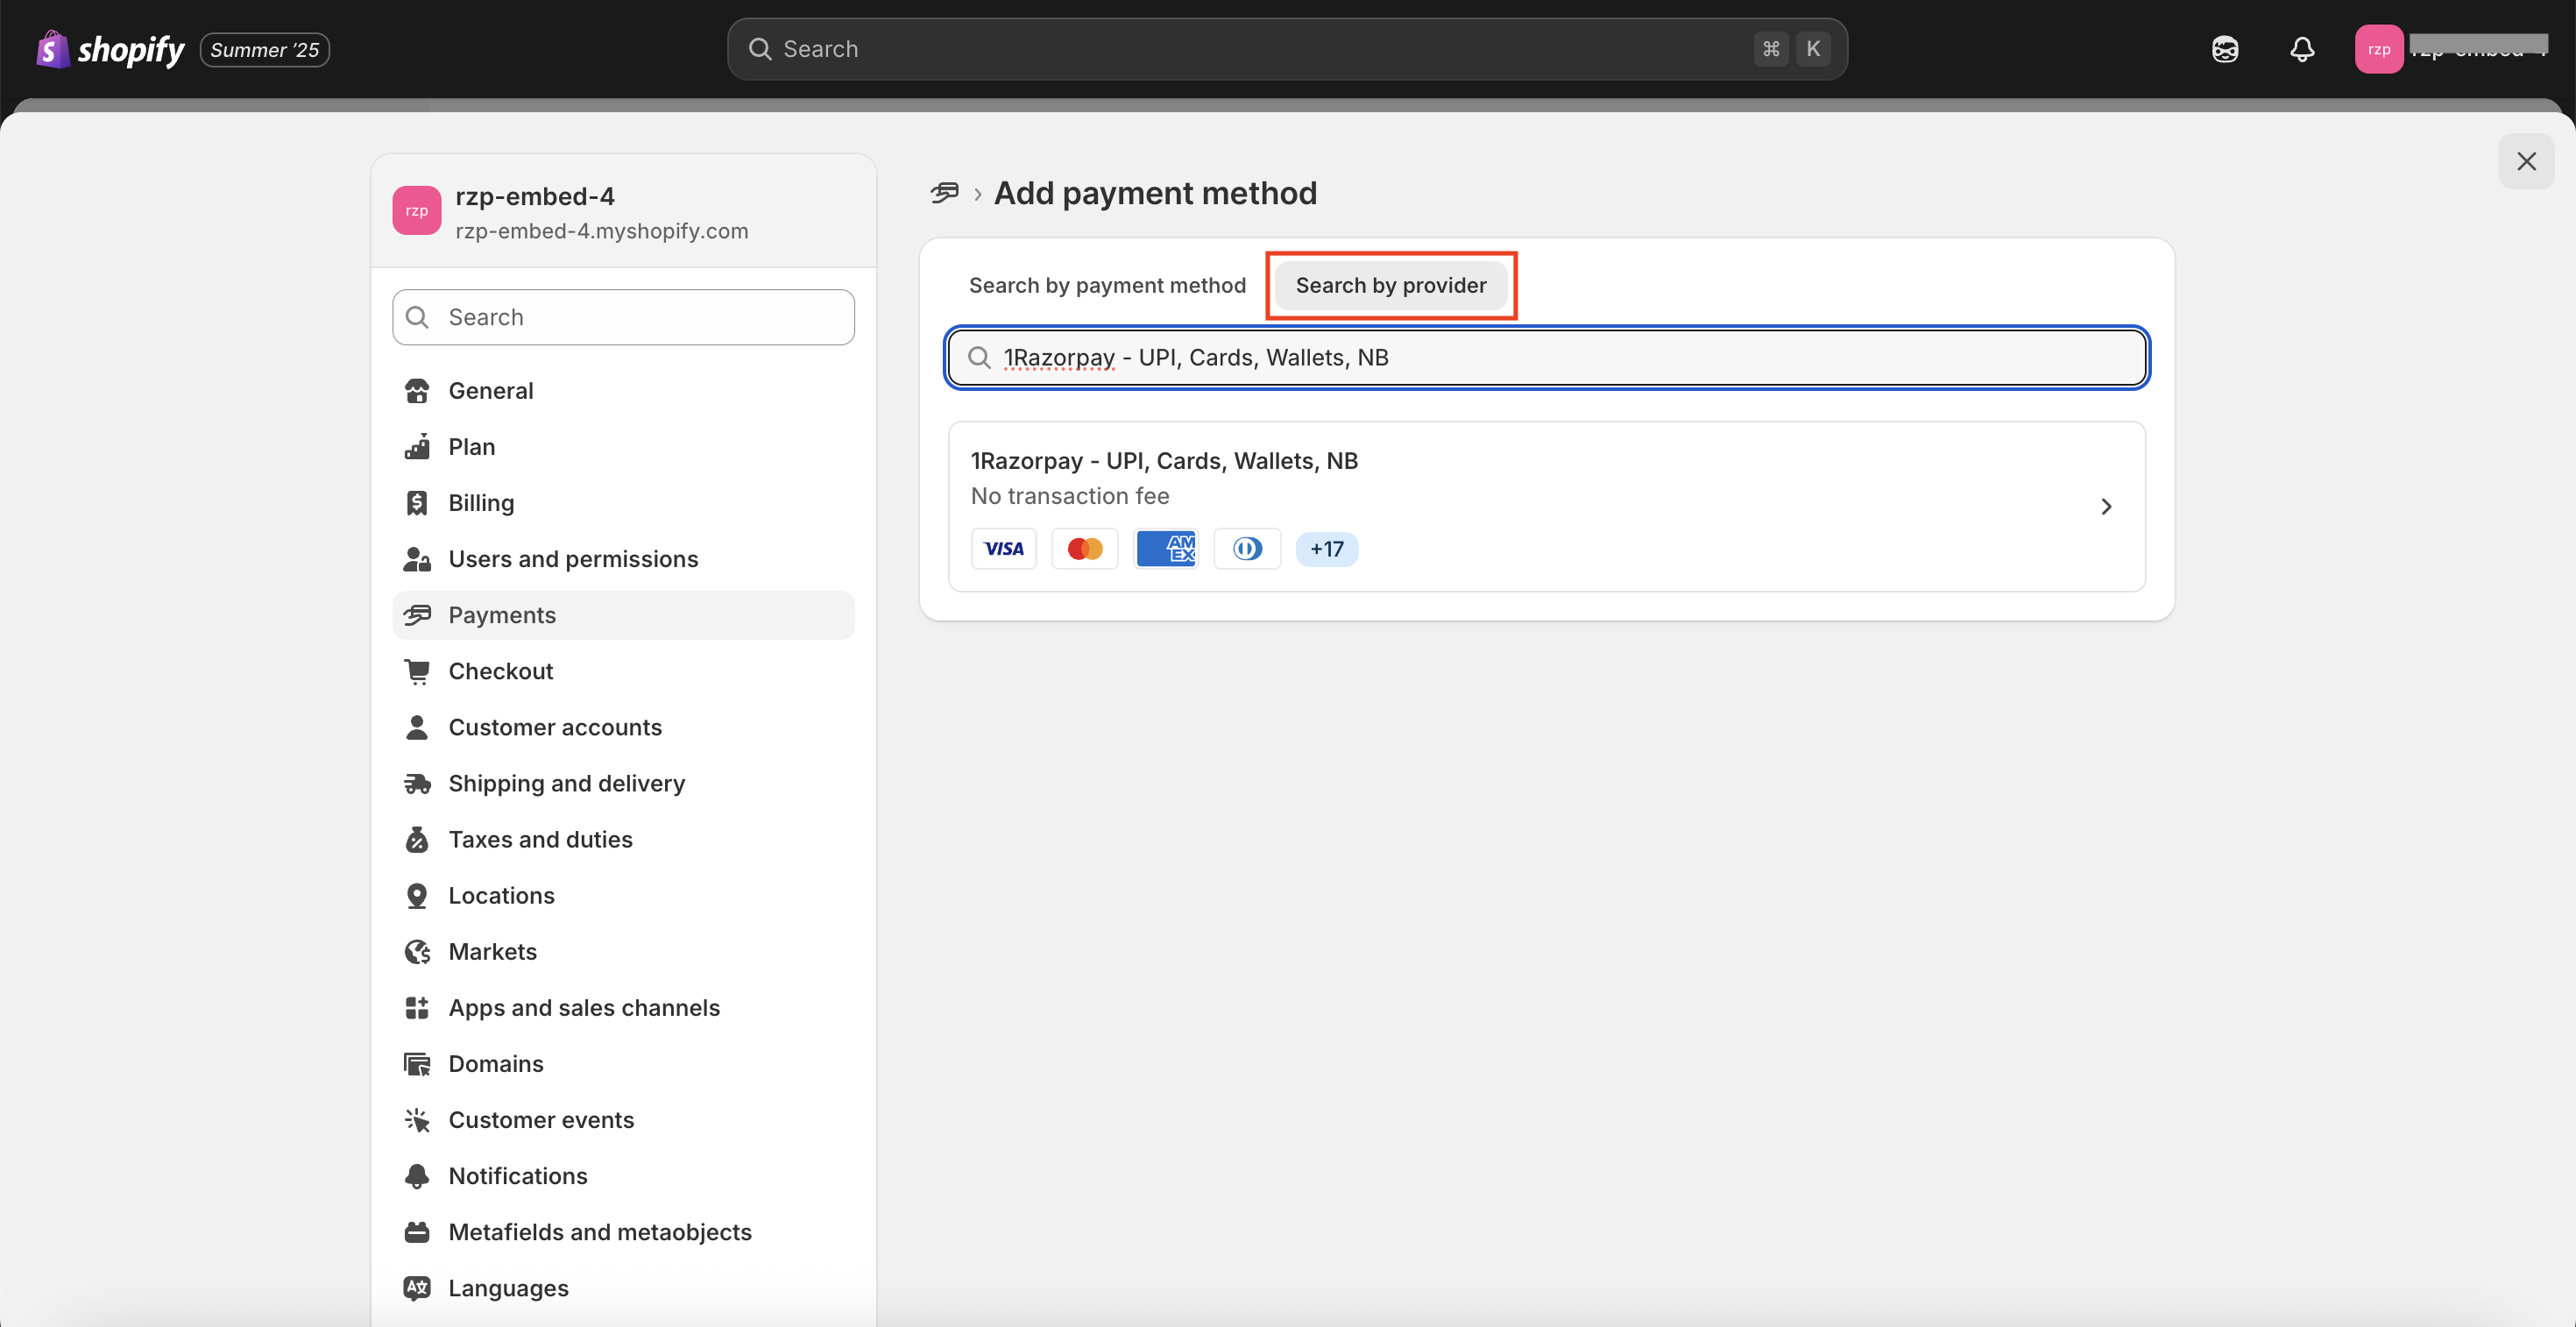
- Click on this link to access the “1Razorpay - UPI, Cards, Wallets, NB” App directly on your Shopify store.
-
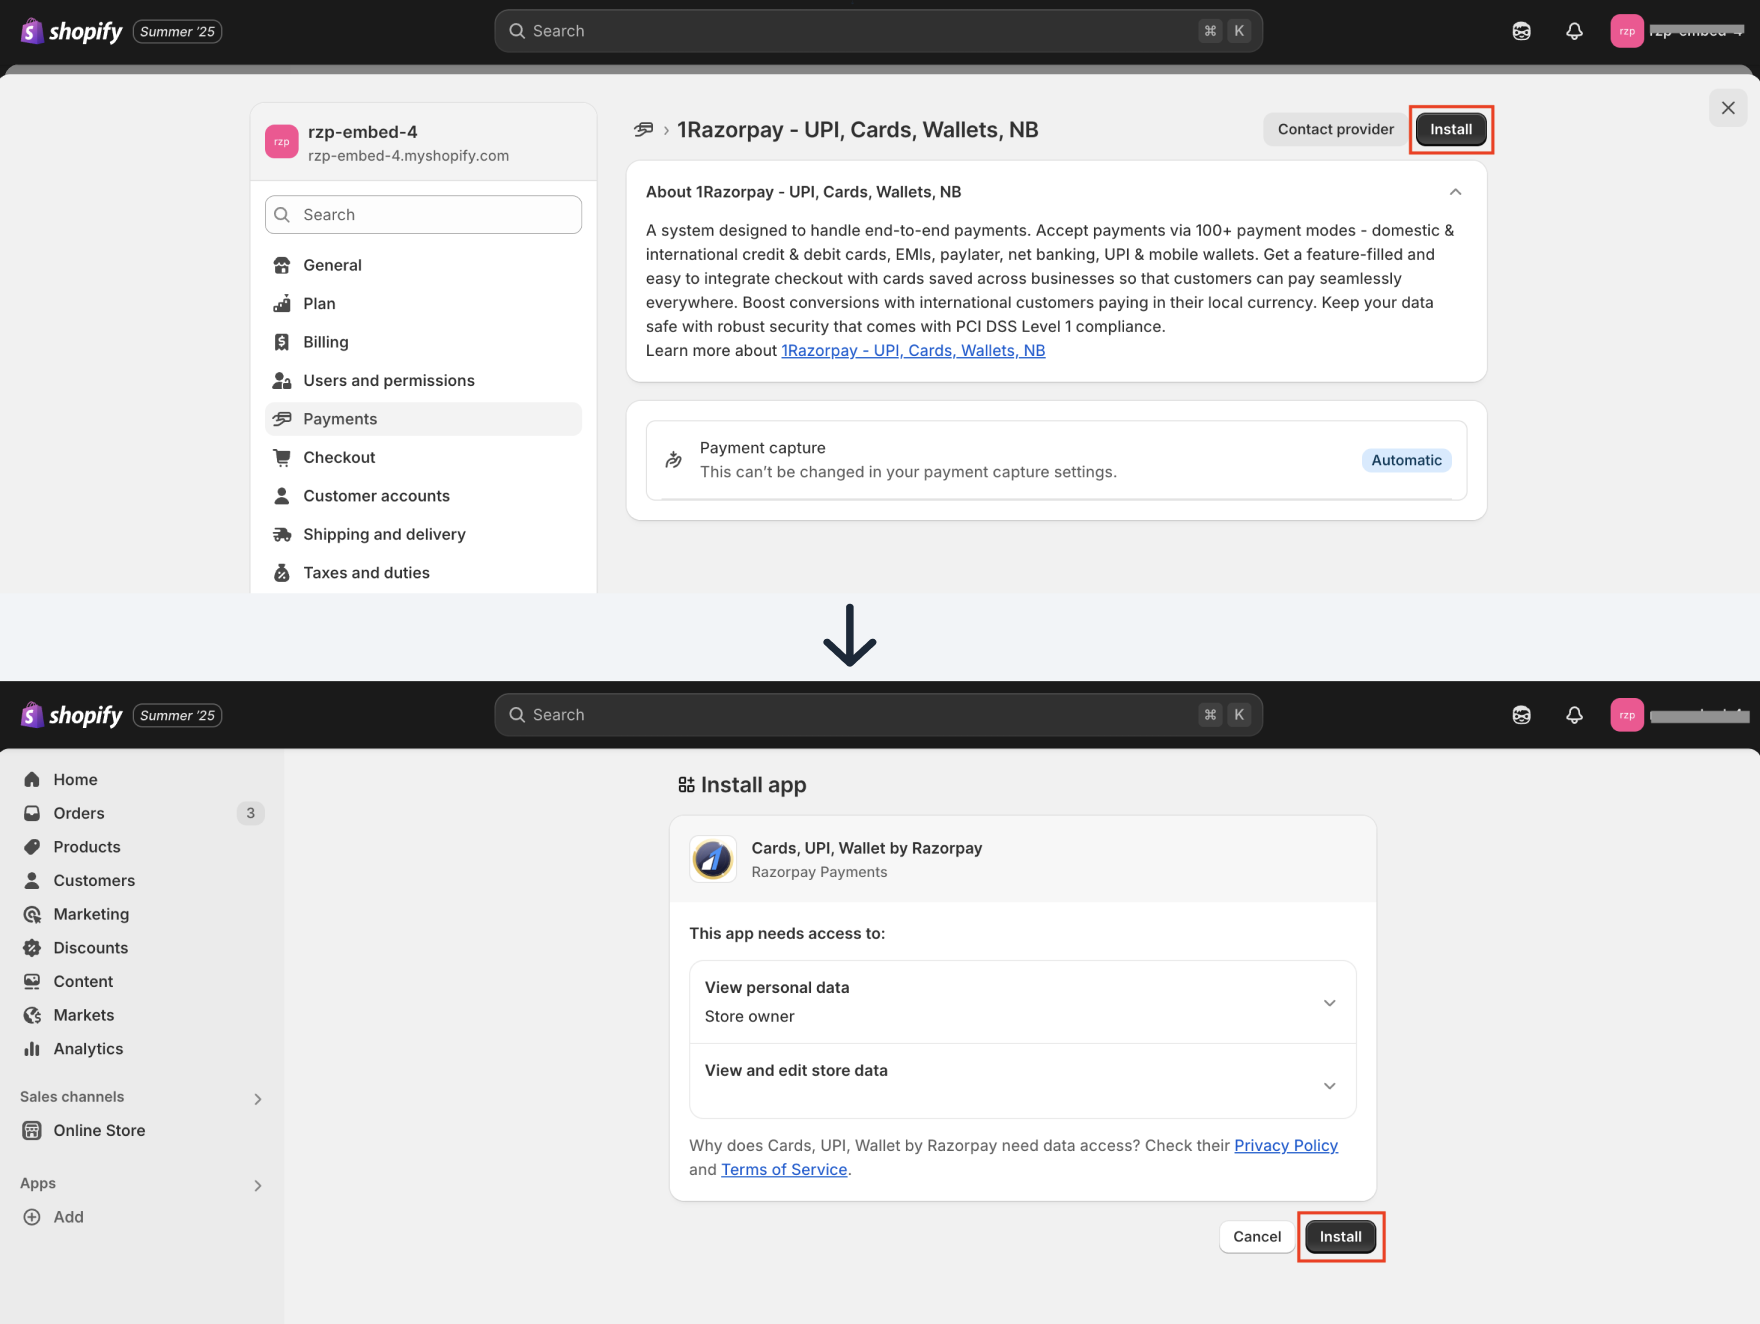
Click Install on the app installation page.
-
You will be redirected to a landing page. Click I am an existing user.

- Scroll down and click Login.
Handy TipsMake sure you log in with store owner credentials to connect Razorpay with Shopify successfully.
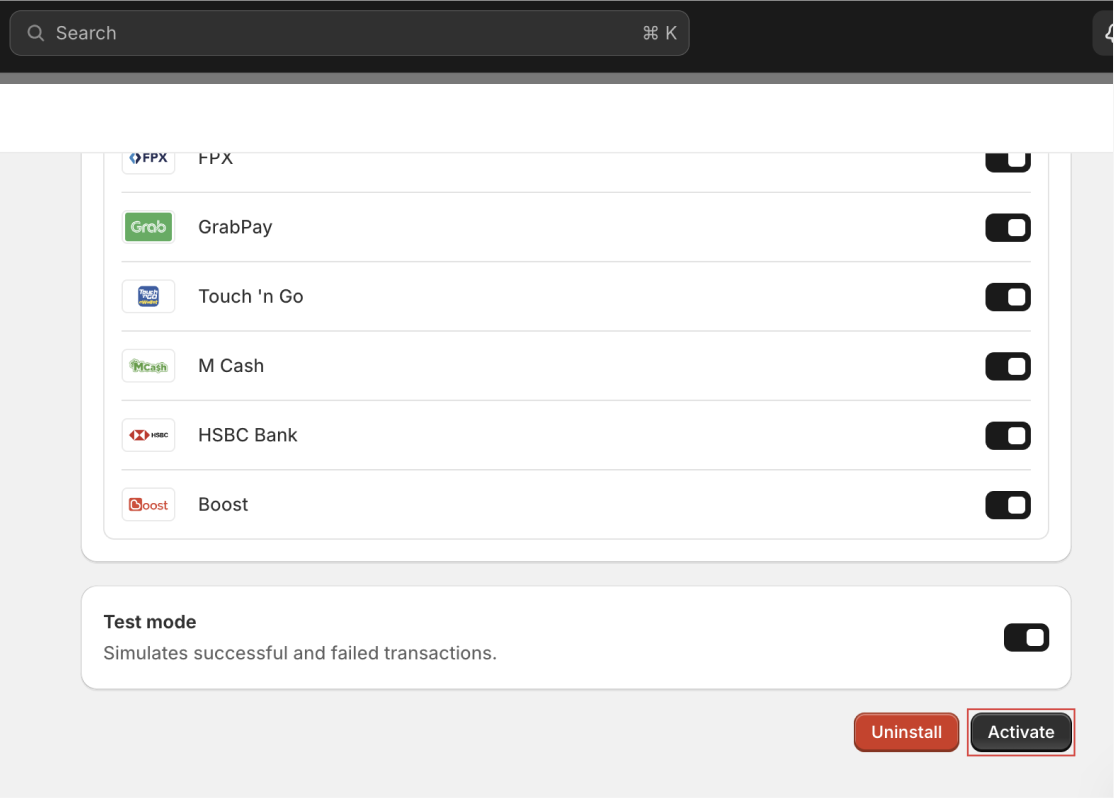
- Click Activate on the activation screen on your Shopify Dashboard.
This completes your integration. For more information, see Shopify FAQs.2. Test Integration
After the integration of Shopify - All-in-one Razorpay Payment Gateway on your Shopify store is complete, follow the steps given below:1 Make a Test Transaction in Test Mode
1 Make a Test Transaction in Test Mode
After completing the integration, you must ensure it is working as expected. You can start accepting actual payments from your customers once the test mode transaction is successful.
Follow the steps given below to test a transaction in test mode:
Follow the steps given below to test a transaction in test mode:
- Log in to your Shopify store.
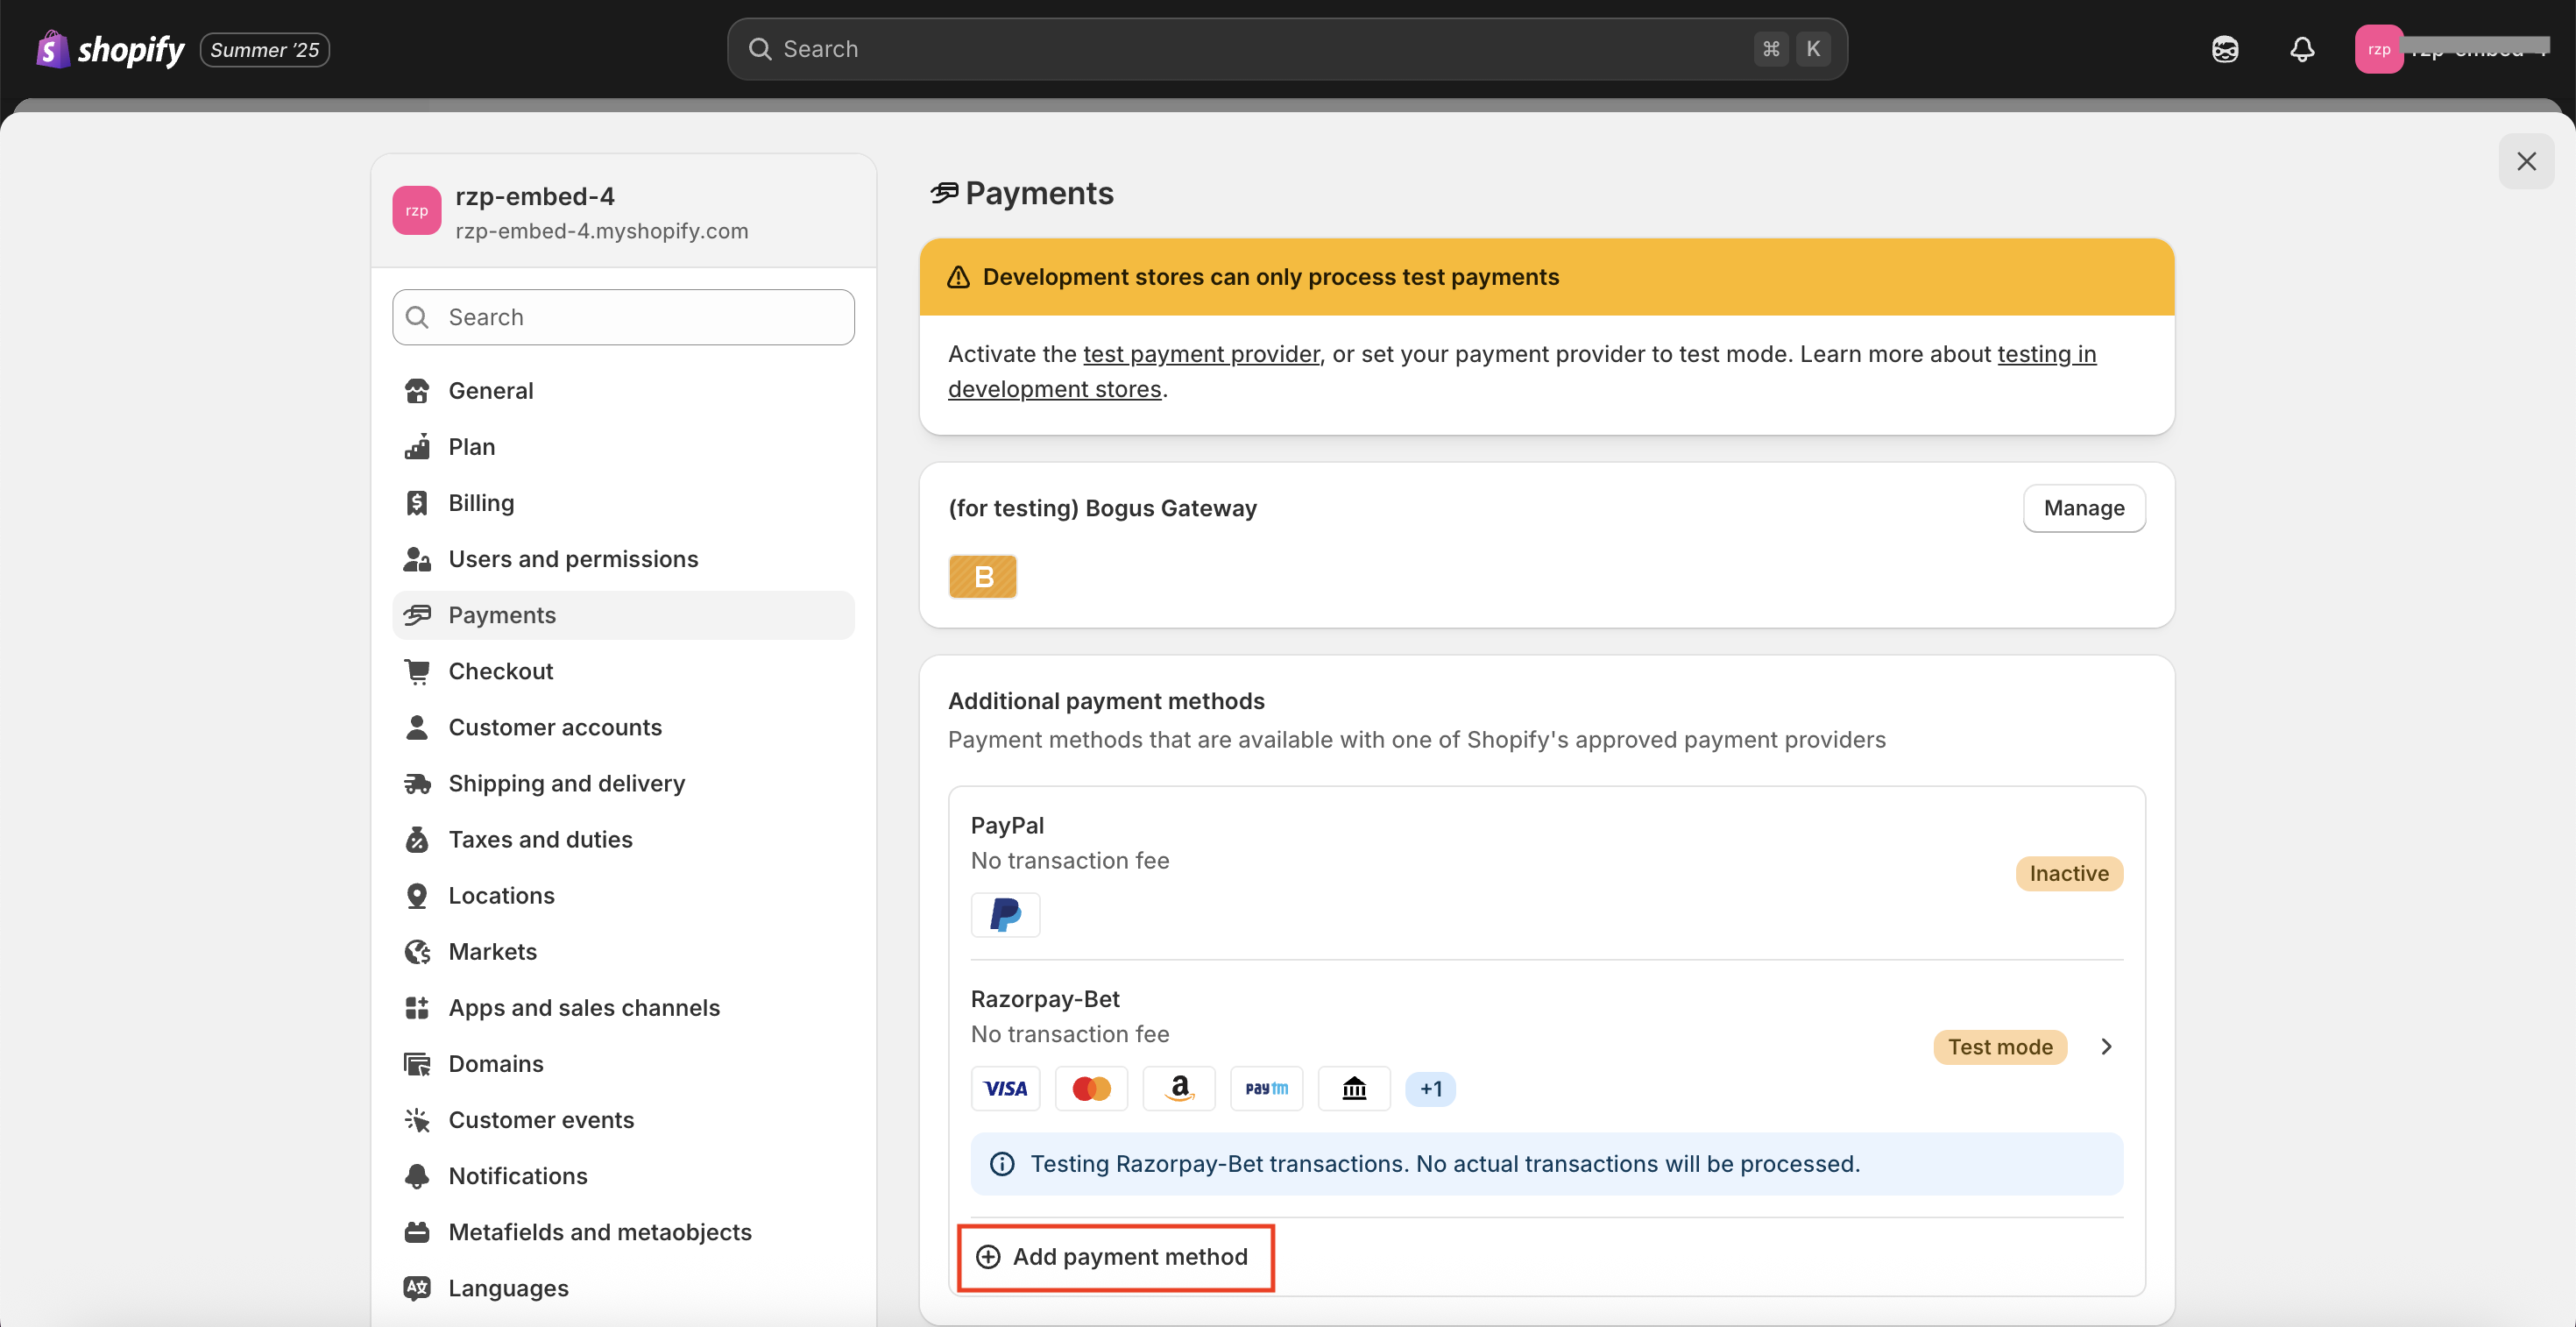
- Navigate to Settings → Payments.
- Under Additional payment methods section, click 01. Razorpay UPI, Cards, Wallets app.
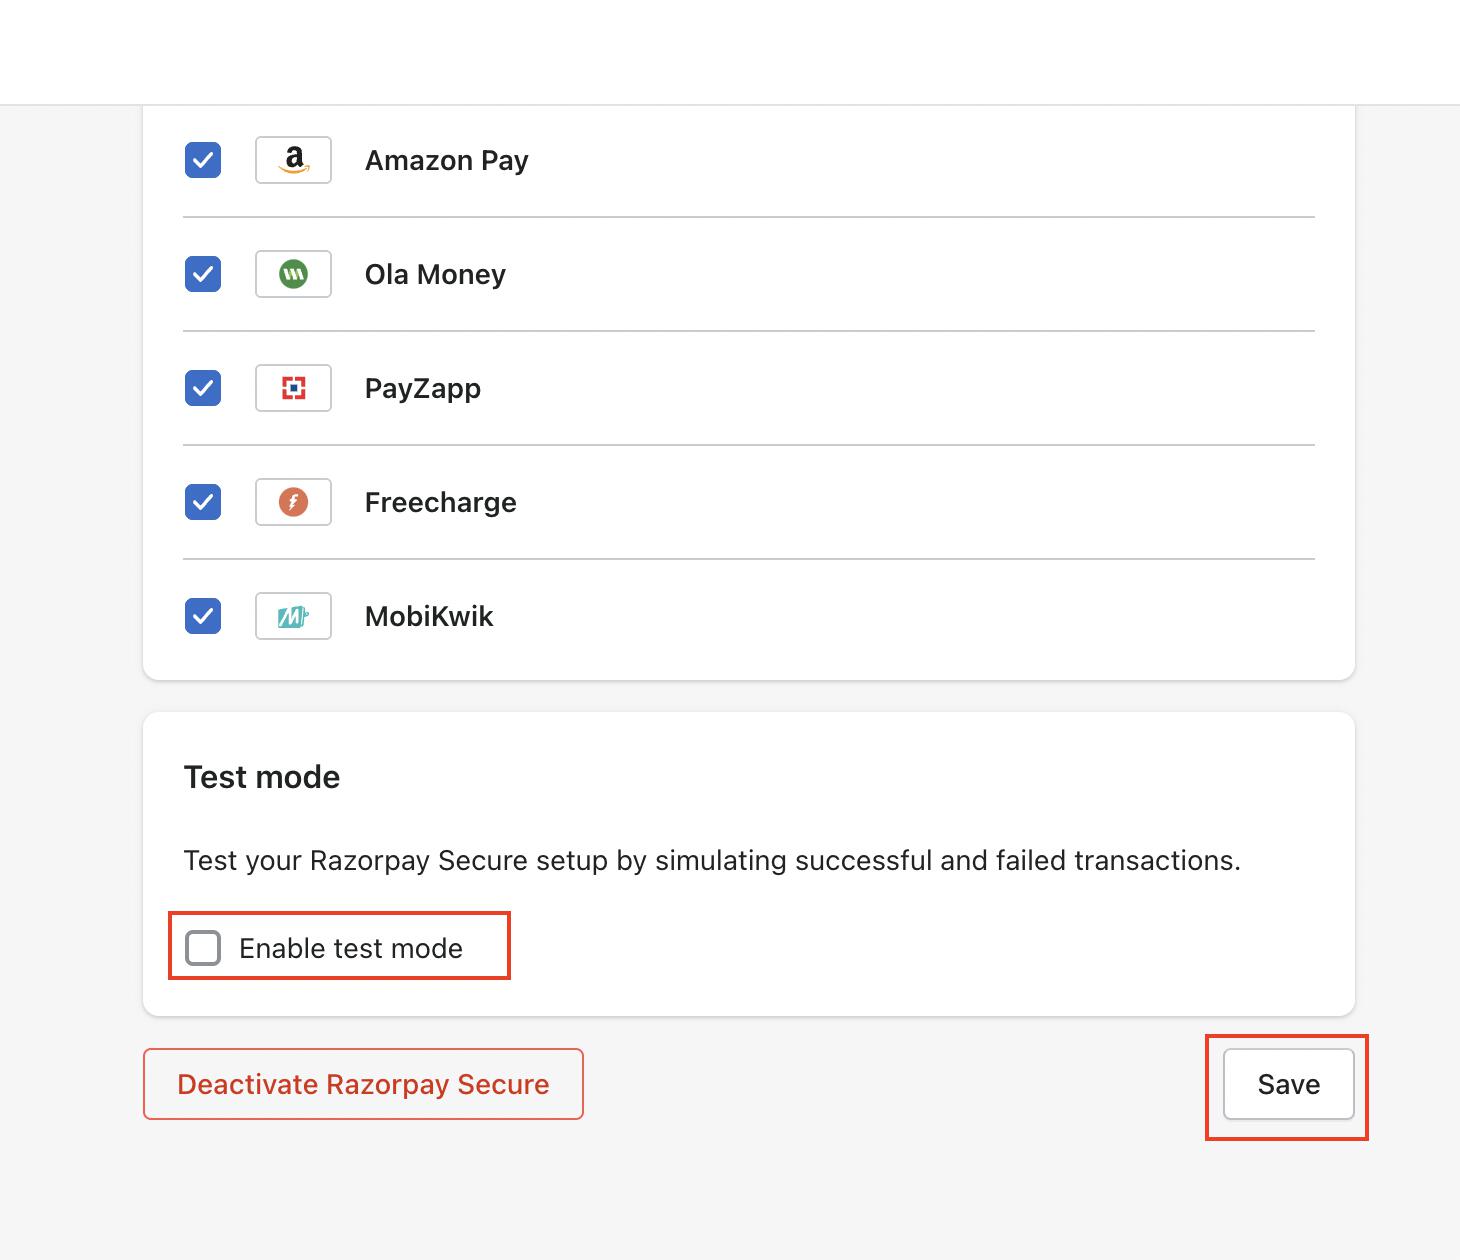
- At the bottom of the page, toggle the Test mode option and click Save.
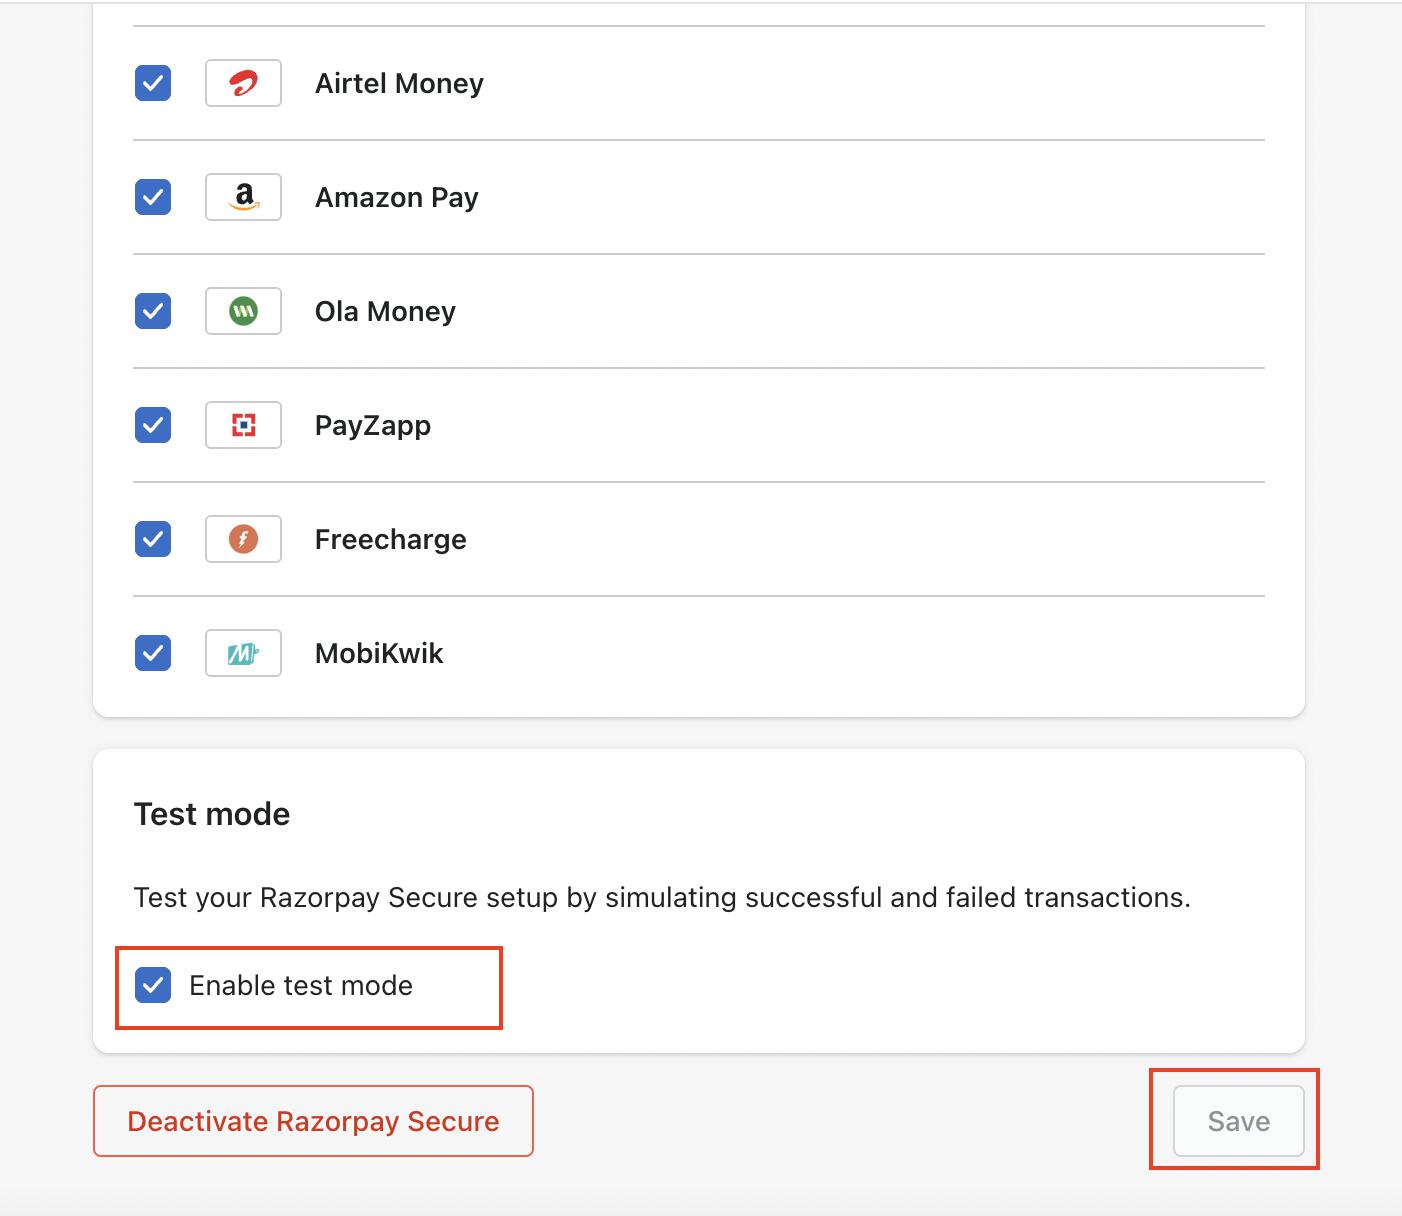
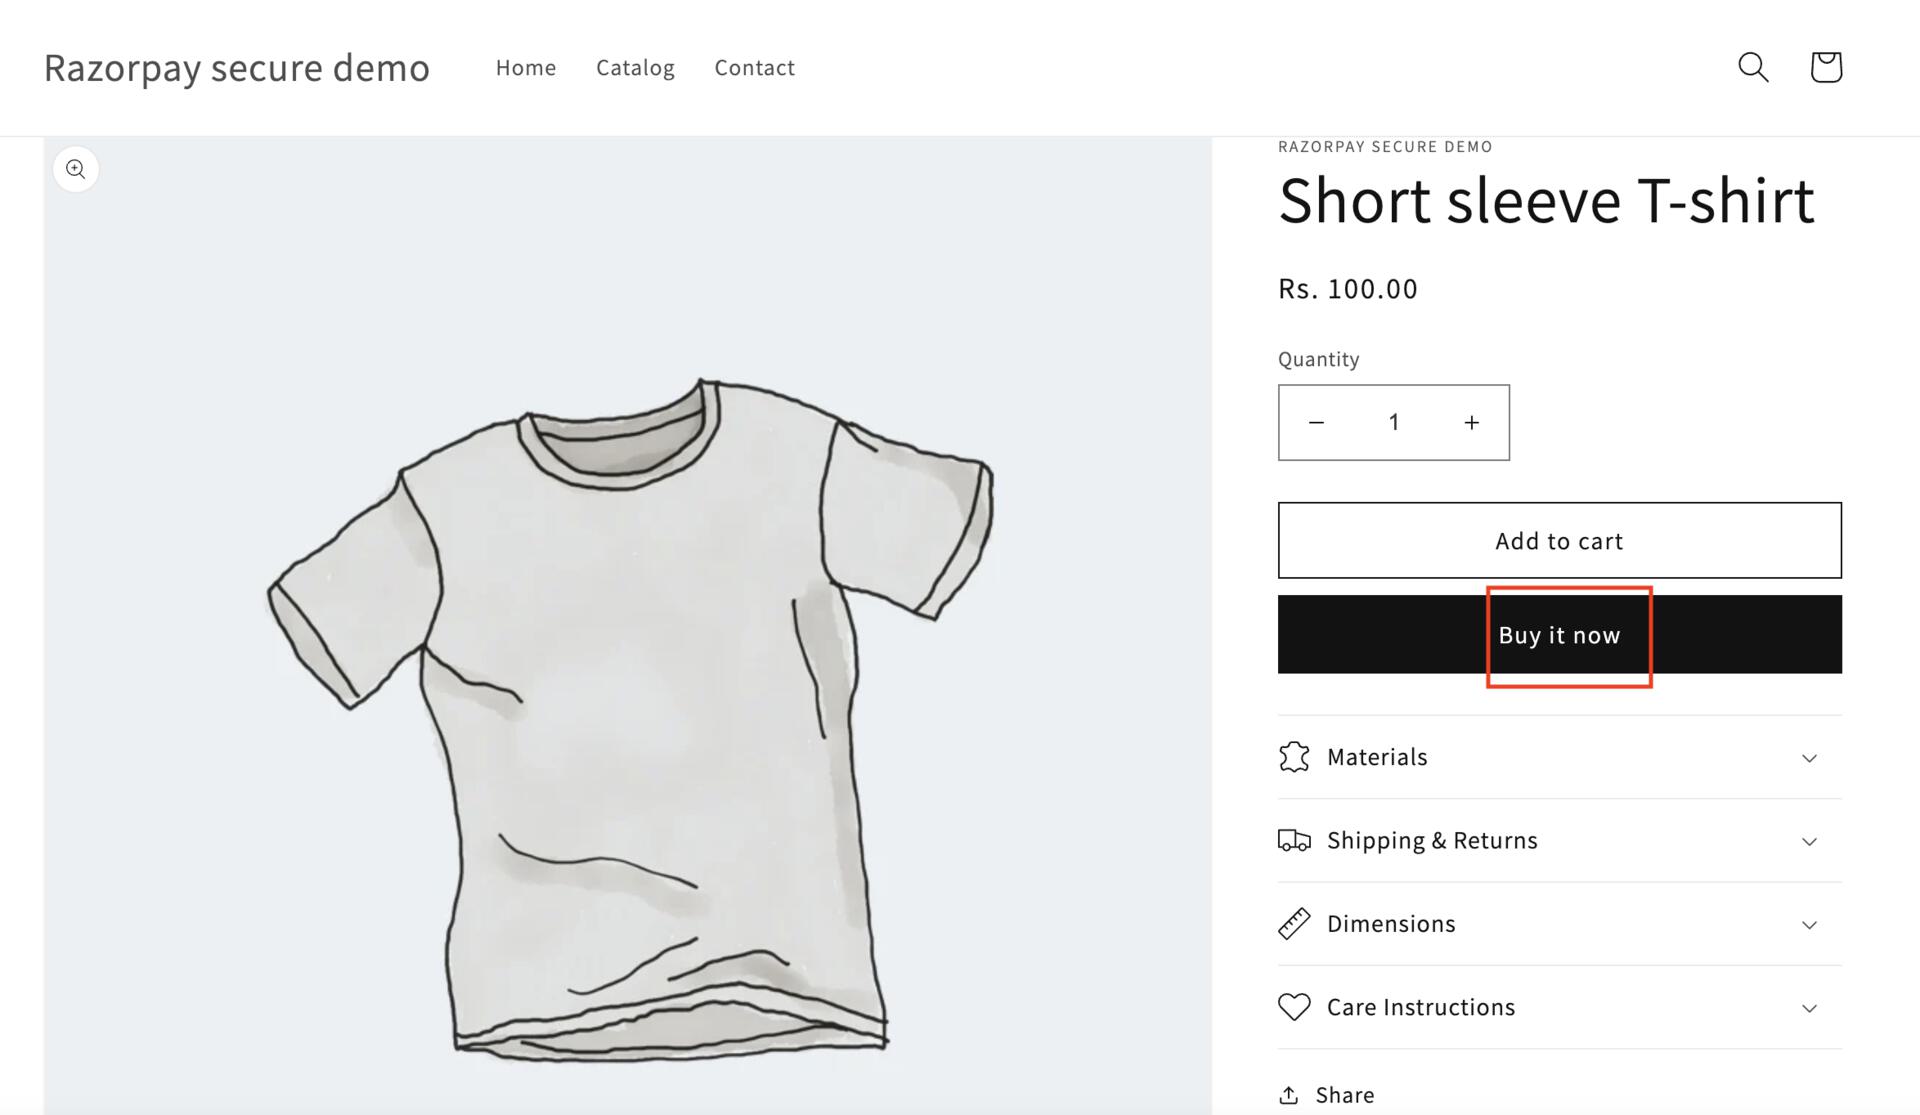
- On your Shopify store, add an item to your cart and click Buy it now.
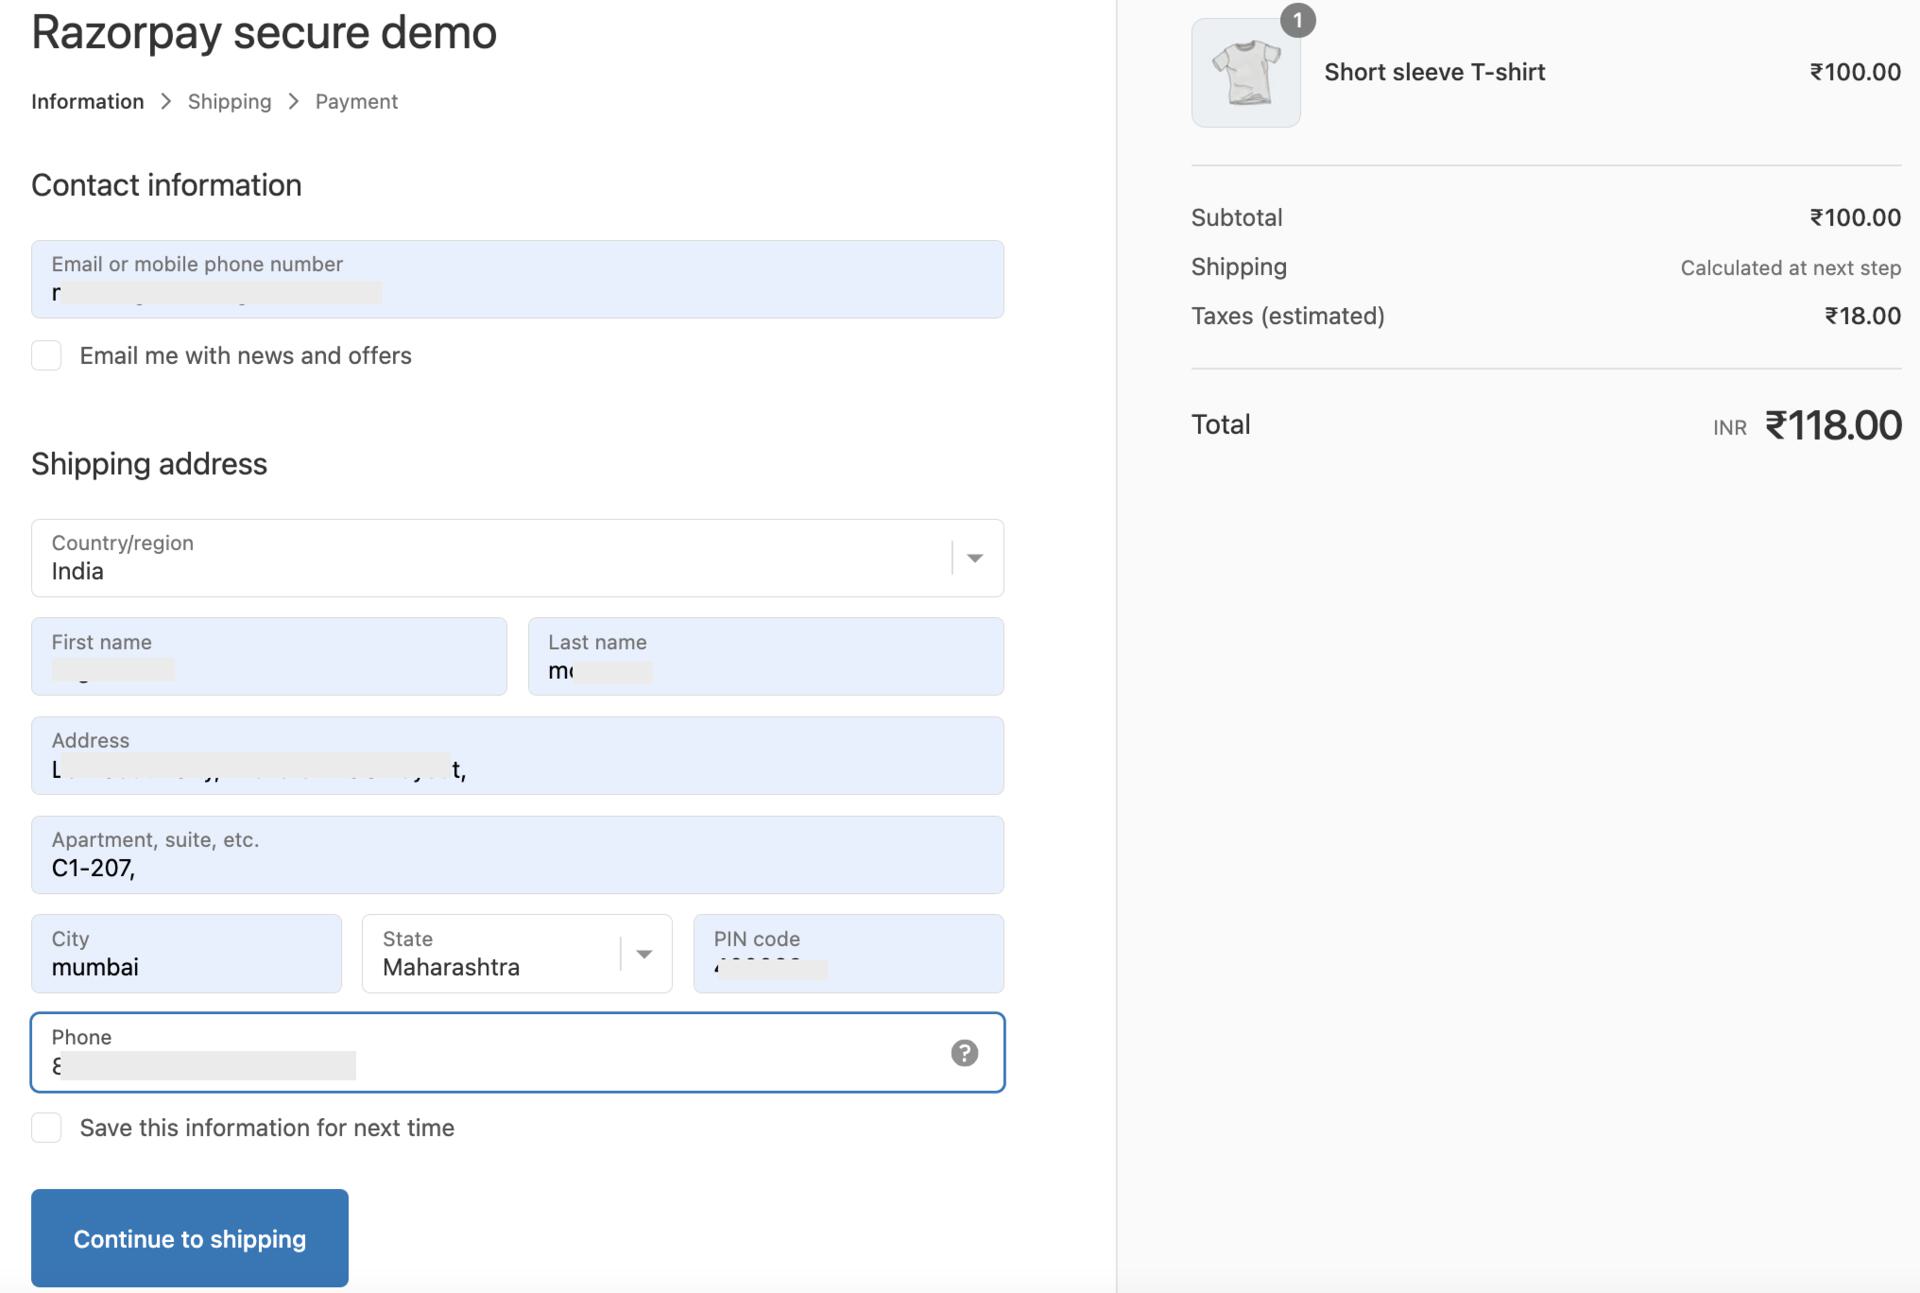
- Fill in your contact and shipping details and click Continue to shipping.
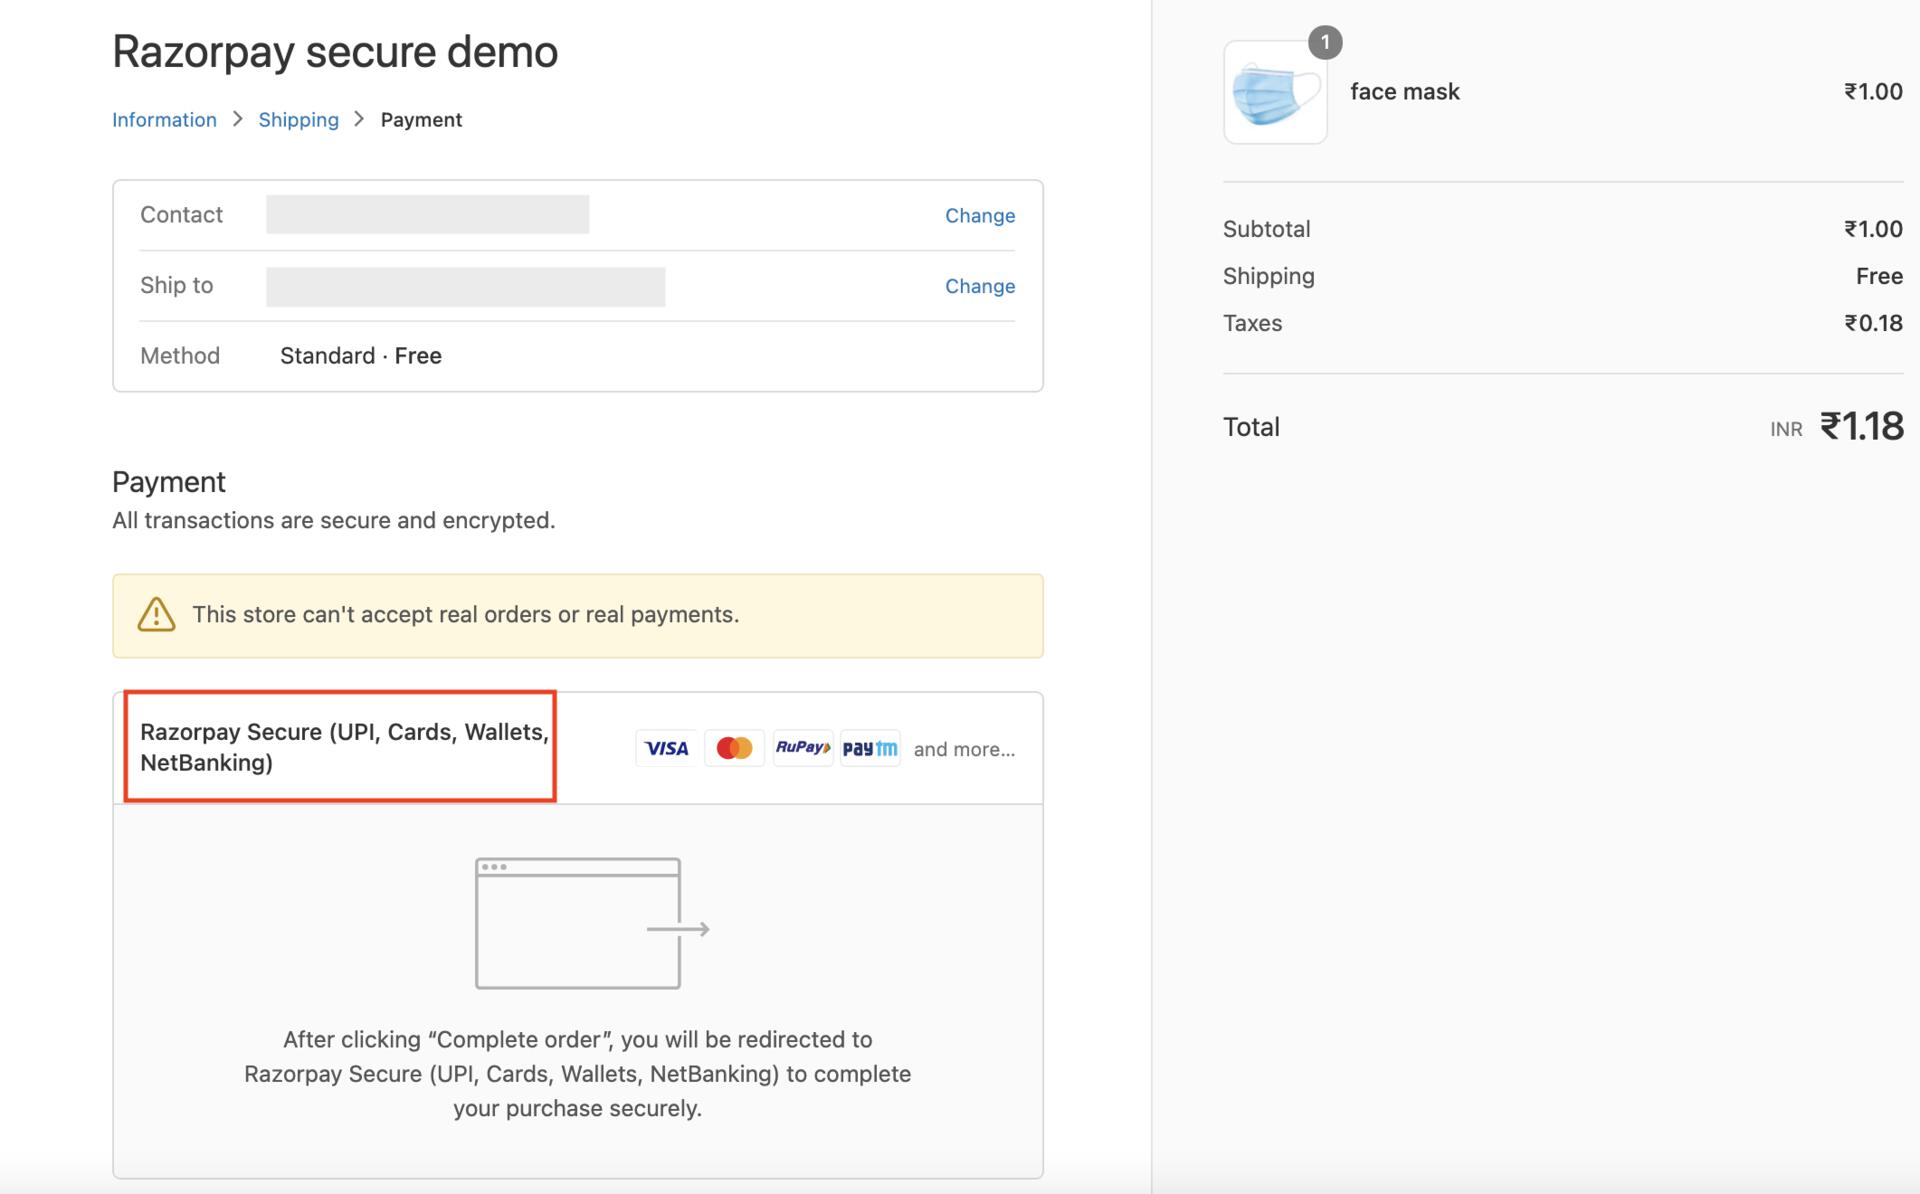
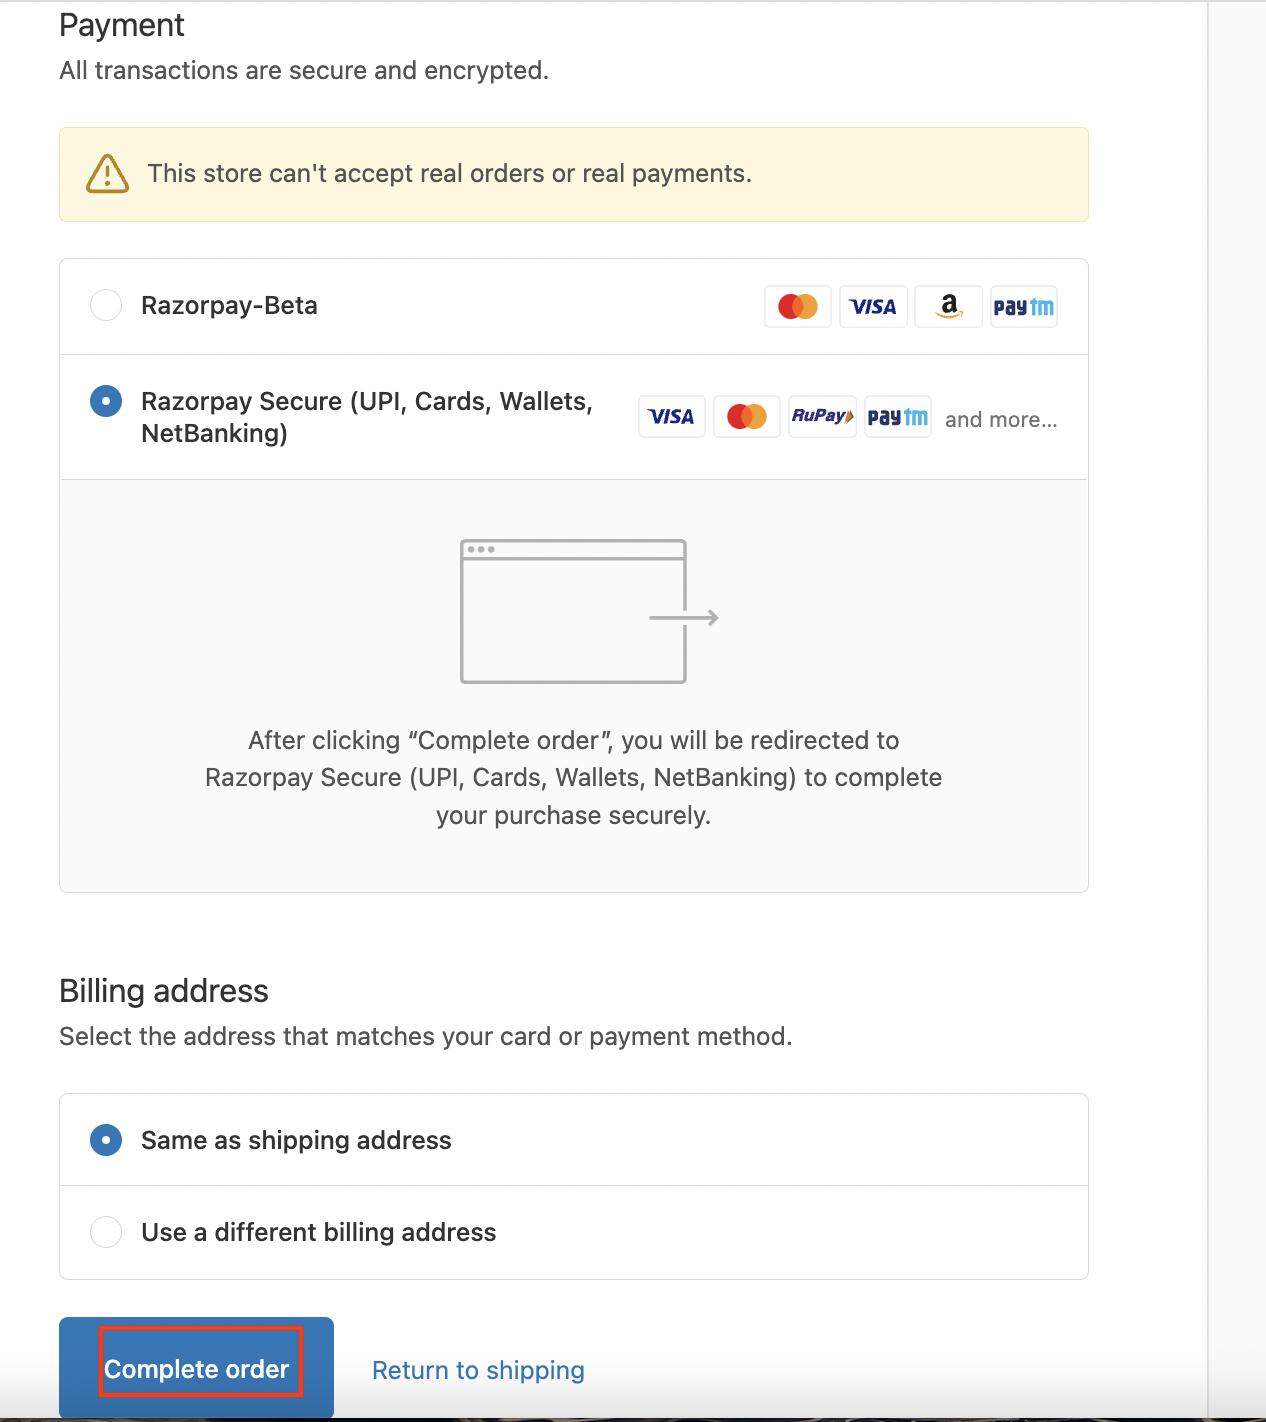
- Select All-in-one Razorpay Payment Gateway and click Complete order.
- On the checkout screen, enter your phone number, click PROCEED, and complete the payment.
- No money is deducted from the customer’s account as this is a simulated transaction.
- Ensure you have entered the API keys generated in the test mode in the Checkout code.
Supported Payment Methods
Supported Payment Methods
After the integration is complete, a Pay button appears on your webpage/app.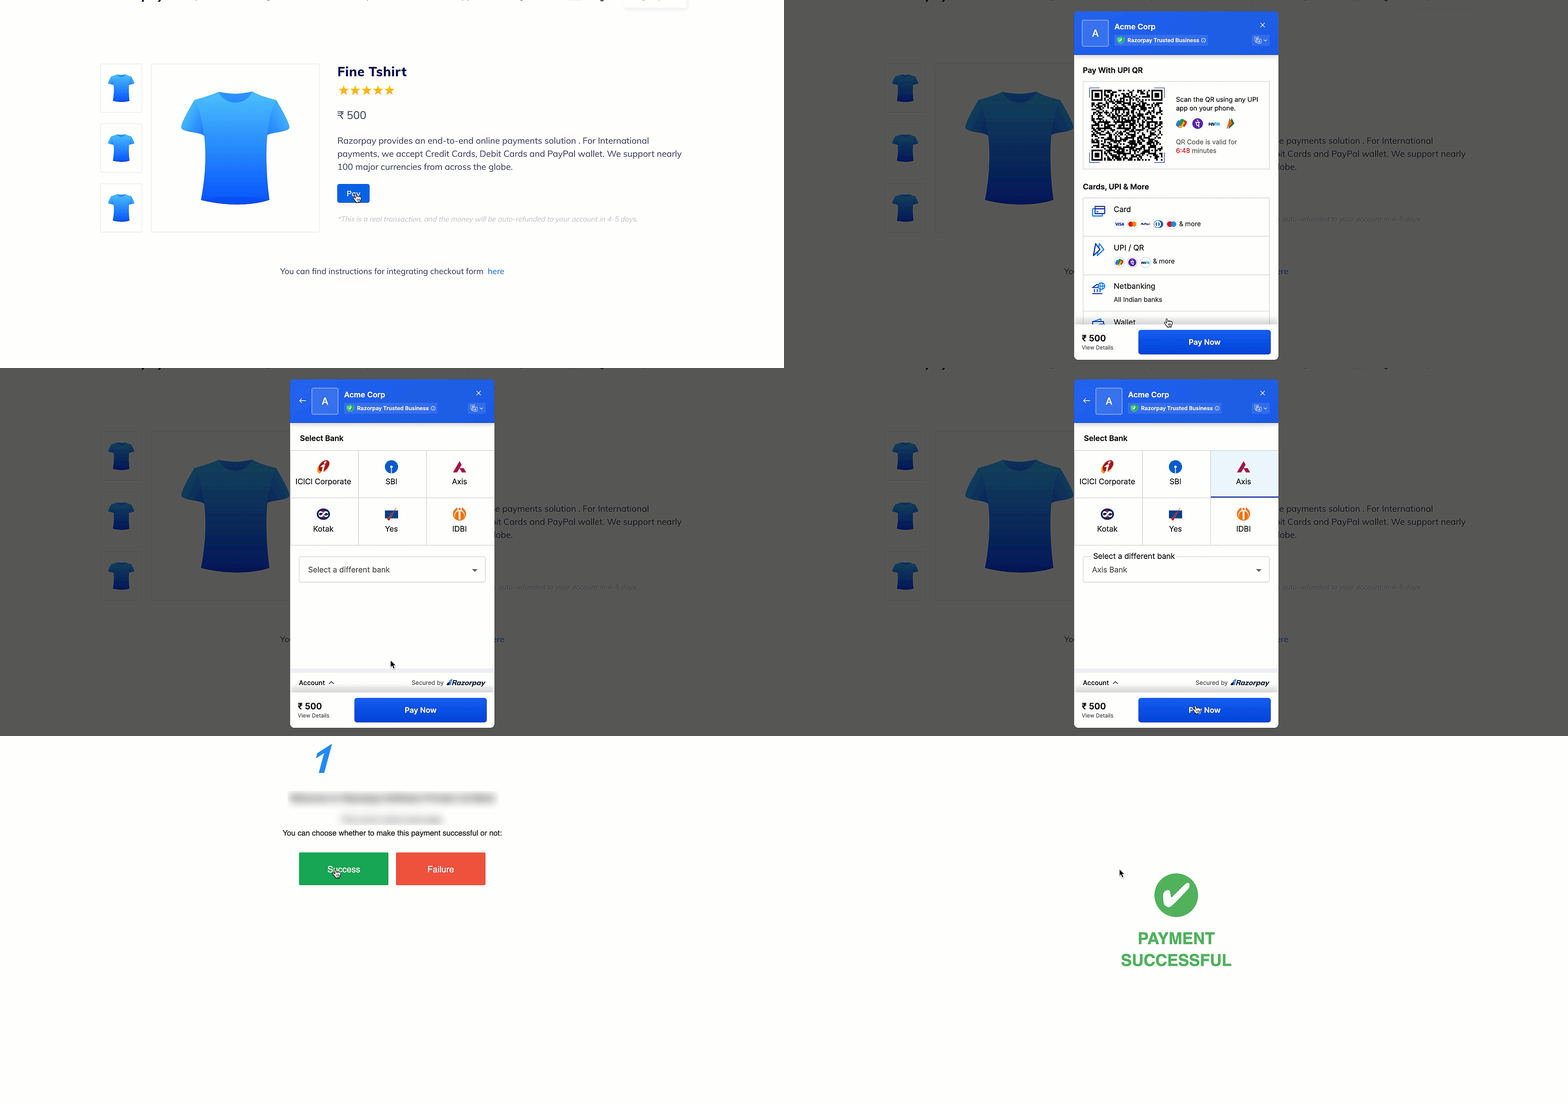 Click the button and make a test transaction to ensure the integration is working as expected. You can start accepting actual payments from your customers once the test transaction is successful.Following are all the payment modes that the customer can use to complete the payment on the Checkout. Some of them are available by default, while others may require approval from us. Raise a request from the Dashboard to enable such payment methods.
Click the button and make a test transaction to ensure the integration is working as expected. You can start accepting actual payments from your customers once the test transaction is successful.Following are all the payment modes that the customer can use to complete the payment on the Checkout. Some of them are available by default, while others may require approval from us. Raise a request from the Dashboard to enable such payment methods.You can make test payments using one of the payment methods configured at the Checkout.
Netbanking
Netbanking
You can select any of the listed banks. After choosing a bank, Razorpay will redirect to a mock page where you can make the payment
success or a failure. Since this is Test Mode, we will not redirect you to the bank login portals.Check the list of supported banks.UPI
UPI
You can enter one of the following UPI IDs:
success@razorpay: To make the payment successful.failure@razorpay: To fail the payment.
Handy TipsYou can use Test Mode to test UPI payments, and Live Mode for UPI Intent and QR payments.
Cards
Cards
You can use the following test cards to test transactions for your integration in Test Mode.
Domestic Cards
Use the following test cards for Indian payments:Error Scenarios
Use these test cards to simulate payment errors. See the complete list of error test cards with detailed scenarios. Check the following lists:International Cards
Use the following test cards to test international payments. Use any valid expiration date in the future in the MM/YY format and any random CVV to create a successful payment.Check the list of supported card networks.
Wallet
Wallet
You can select any of the listed wallets. After choosing a wallet, Razorpay will redirect to a mock page where you can make the payment
success or a failure. Since this is Test Mode, we will not redirect you to the wallet login portals.Check the list of supported wallets.2 Update Checkout Settings
2 Update Checkout Settings
Follow the steps given below for a smooth checkout experience:
- Log in to your Shopify store.
- Navigate to Settings → Checkout.
- On the Customer contact method section, click Phone number or email and click Save.
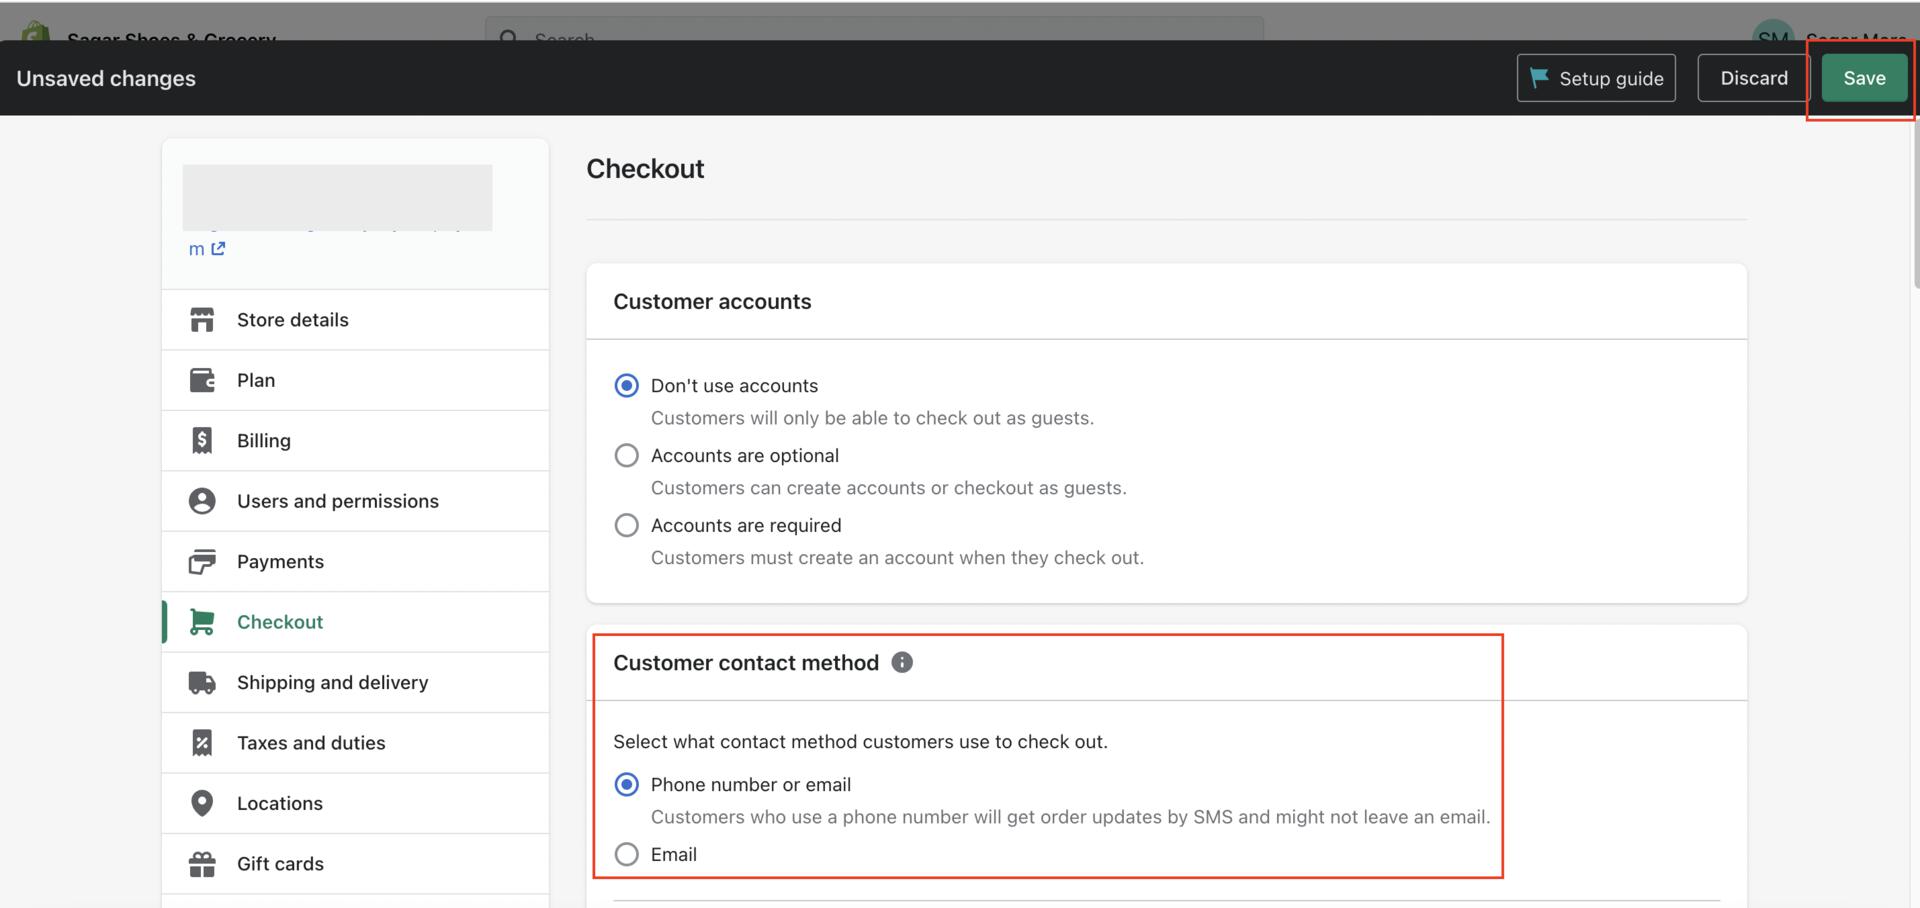
Handy TipsYour customer’s email ID is prefilled during checkout, but the
phone number must be entered manually.3 Verify Payment Status
3 Verify Payment Status
You can track the payment status from the Razorpay Dashboard or by polling APIs.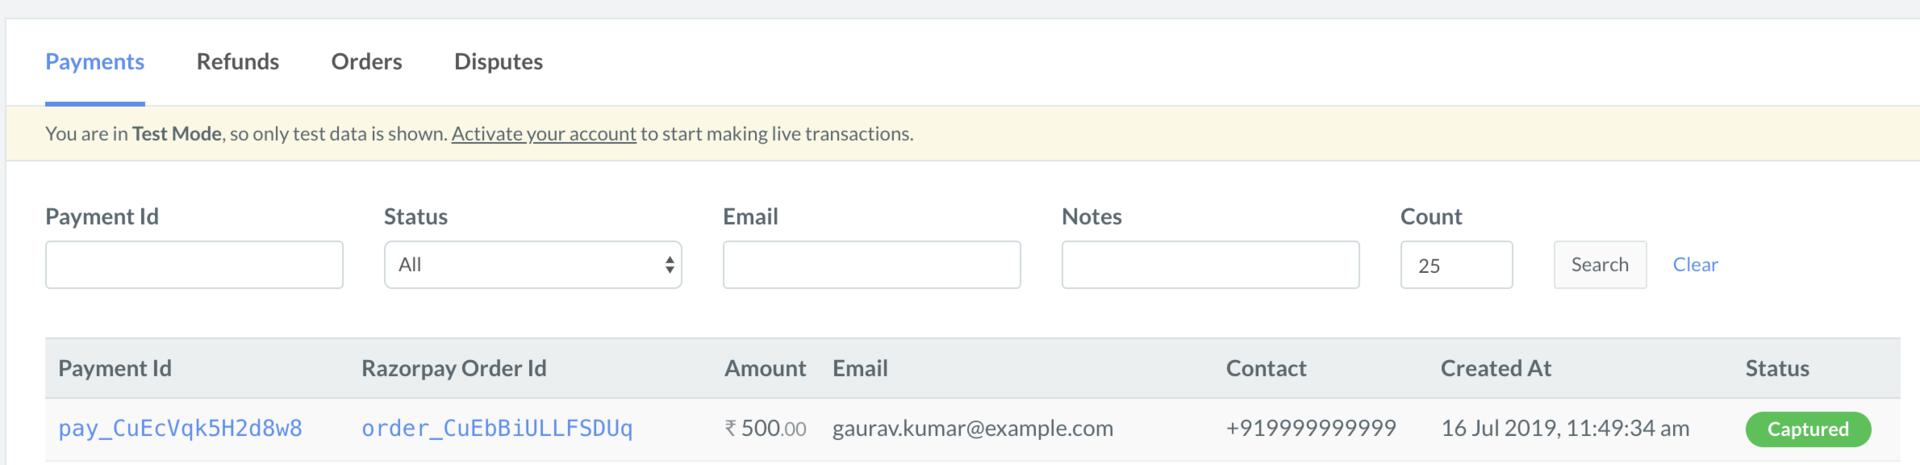
- Verify Payment Status From Dashboard
- Poll APIs
- Log in to the Razorpay Dashboard and navigate to Transactions → Payments.
- Check if a
payment_IDhas been generated and note the status. In case of a successful payment, the status is marked ascaptured.
3. Go-live Checklist
Follow these steps before taking the integration live:1 Switch from Test mode to Live mode
1 Switch from Test mode to Live mode
You can perform an end-to-end simulation of funds flow in the Test Mode. Once confident that the installation and integration is working as expected, switch to the Live Mode and start accepting payments from customers.Watch this short animation to know how to switch from Test Mode to Live Mode on your Shopify store.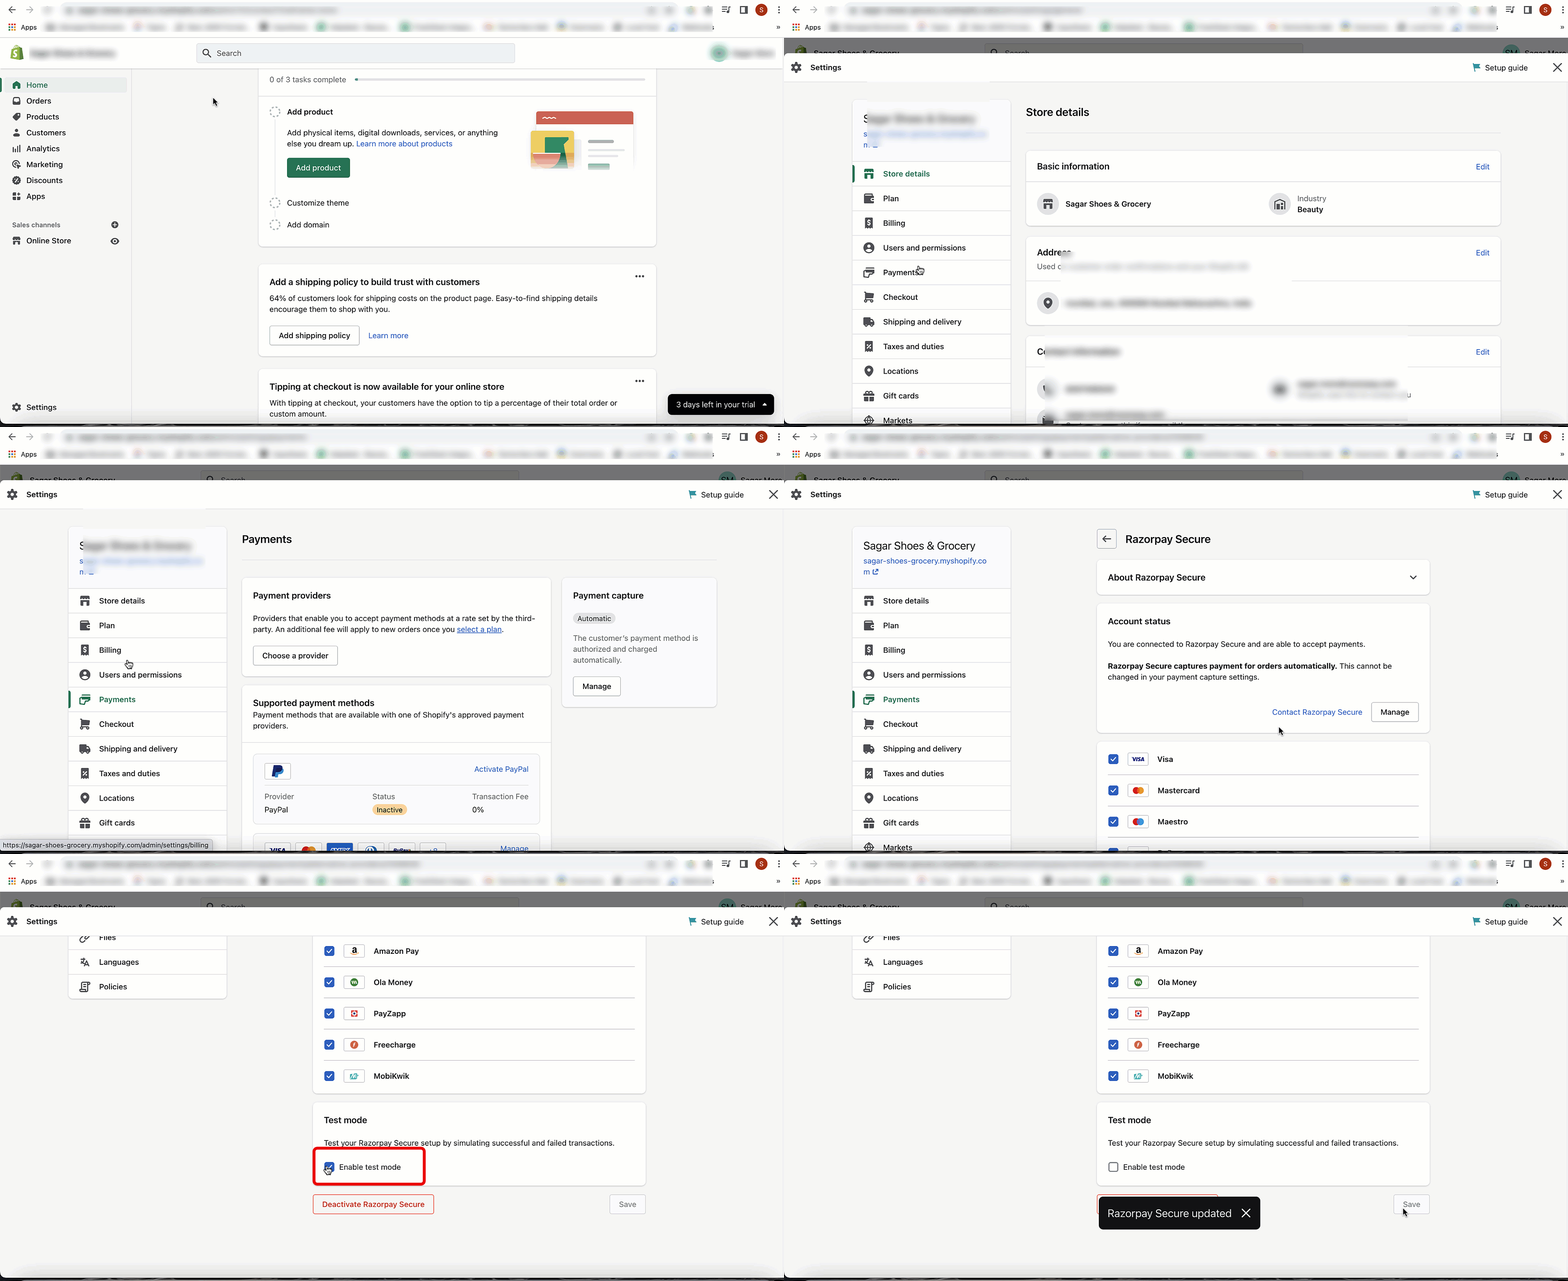 To switch from Test Mode to Live Mode:
To switch from Test Mode to Live Mode:- Log in to your Shopify store.
- Navigate to Settings → Payments.
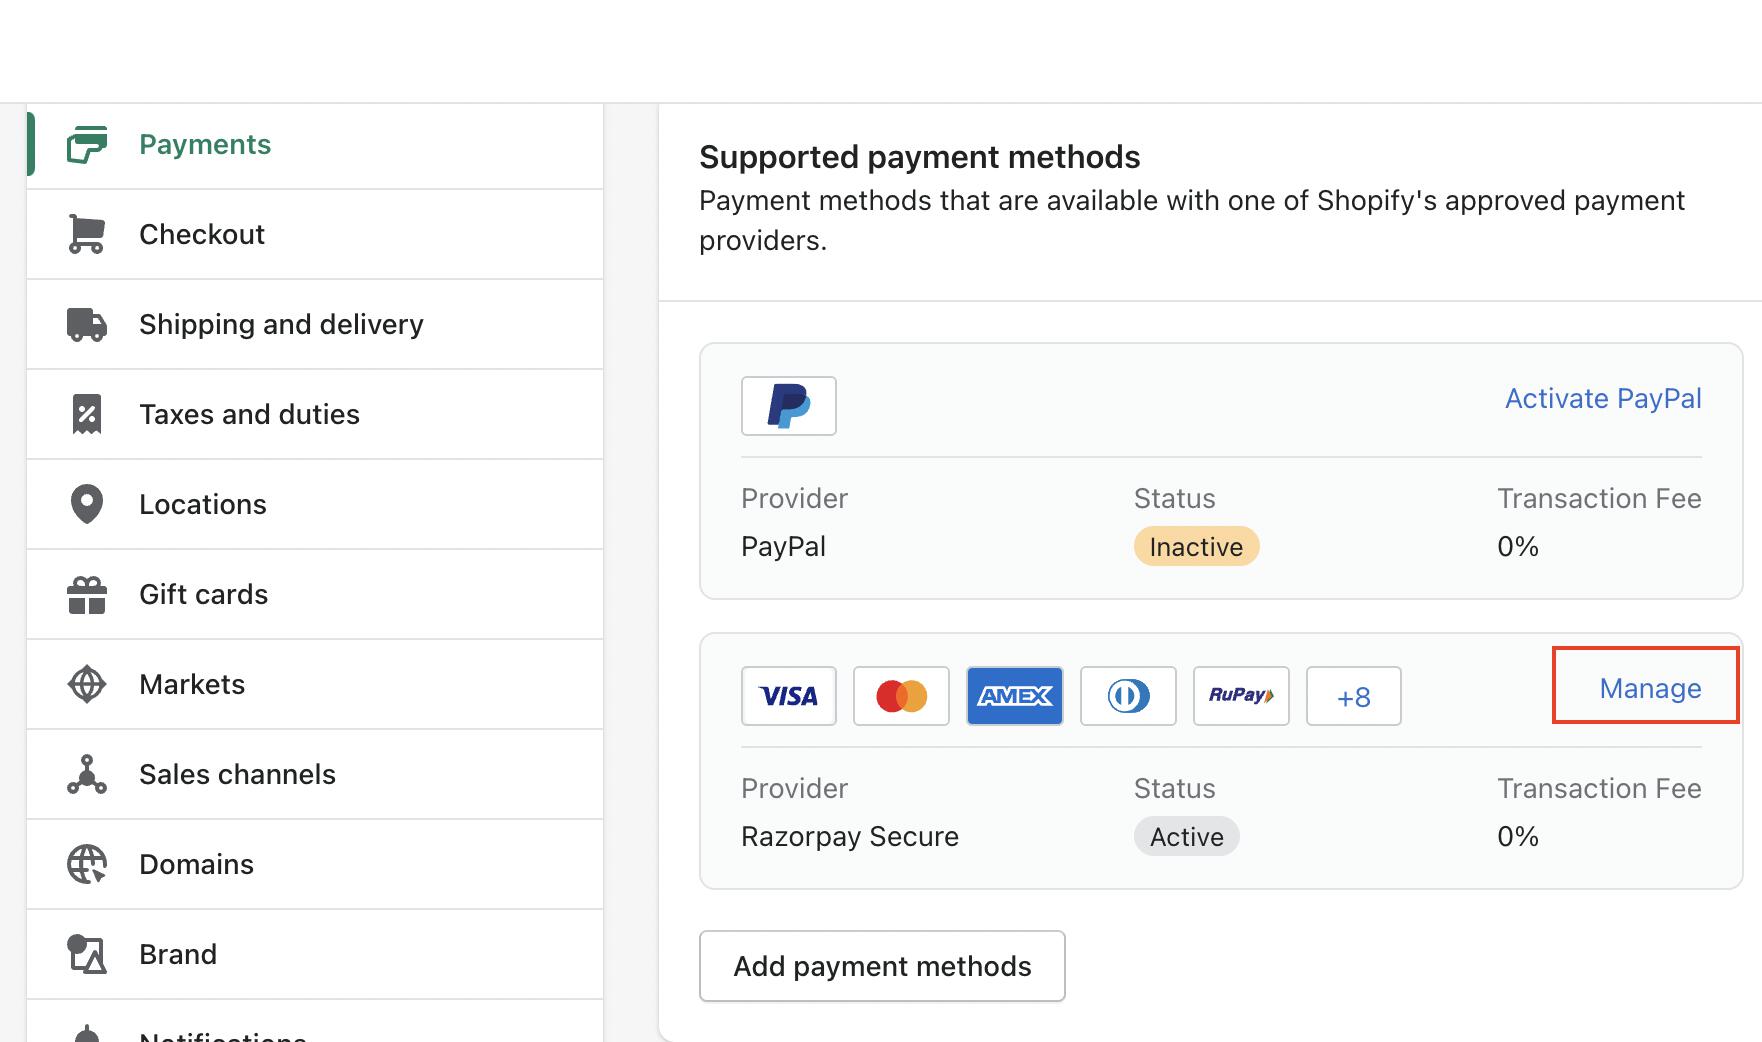
- On the Supported payment methods section, click Manage on the All-in-one Razorpay Payment Gateway app.
- At the bottom of the page, select the Enable test mode option and click Save.